Wish to integrate your CRM or any other software with Messegy? You can do that easily with Zapier.
In this doc, we've listed down a step-by-step process you need to follow to connect your preferred software with Messegy via Zapier.
Pre-requisites to connect Zapier with Messegy
Here are a few things you must have to connect your Zapier account with Messegy:
Active Messegy Account
You must have an active Messegy account. If you don't, make sure to signup now.
Signup
Live WhatsApp Business API
Your WhatsApp Business API must be live.
How to Get your WhatsApp API Live
Verified Facebook Business Manager
Your Facebook Business Manager account must be verified (to connect with Unlimited users).
How to Verify FBM Account
Steps to connect Messegy with your preferred software via Zapier
Step-by-step process to connect Zapier with WhatsApp via Messegy
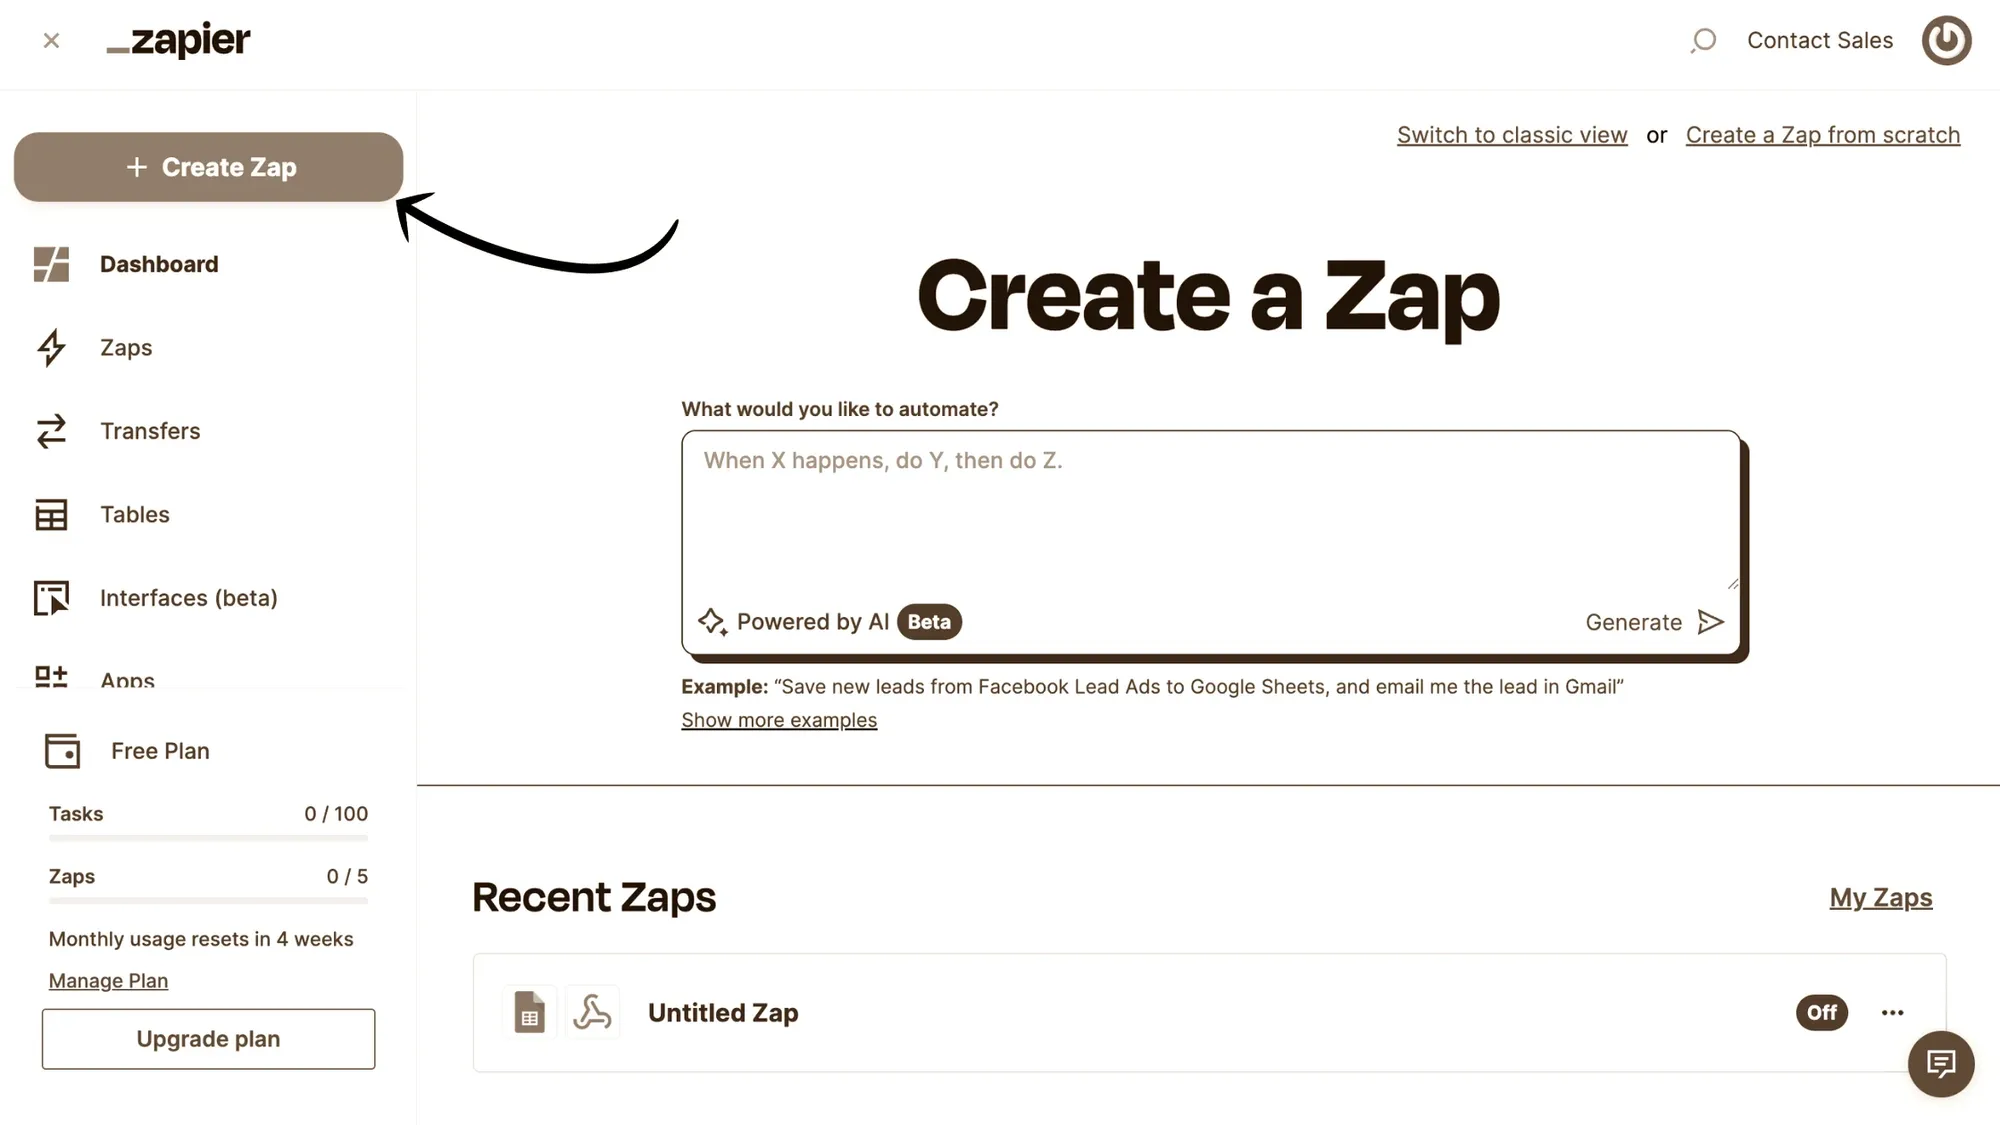
Go to Zapier & click on "Create a Zap"
Go to Zapier & click on "Create a Zap" to integrate your software with Messegy
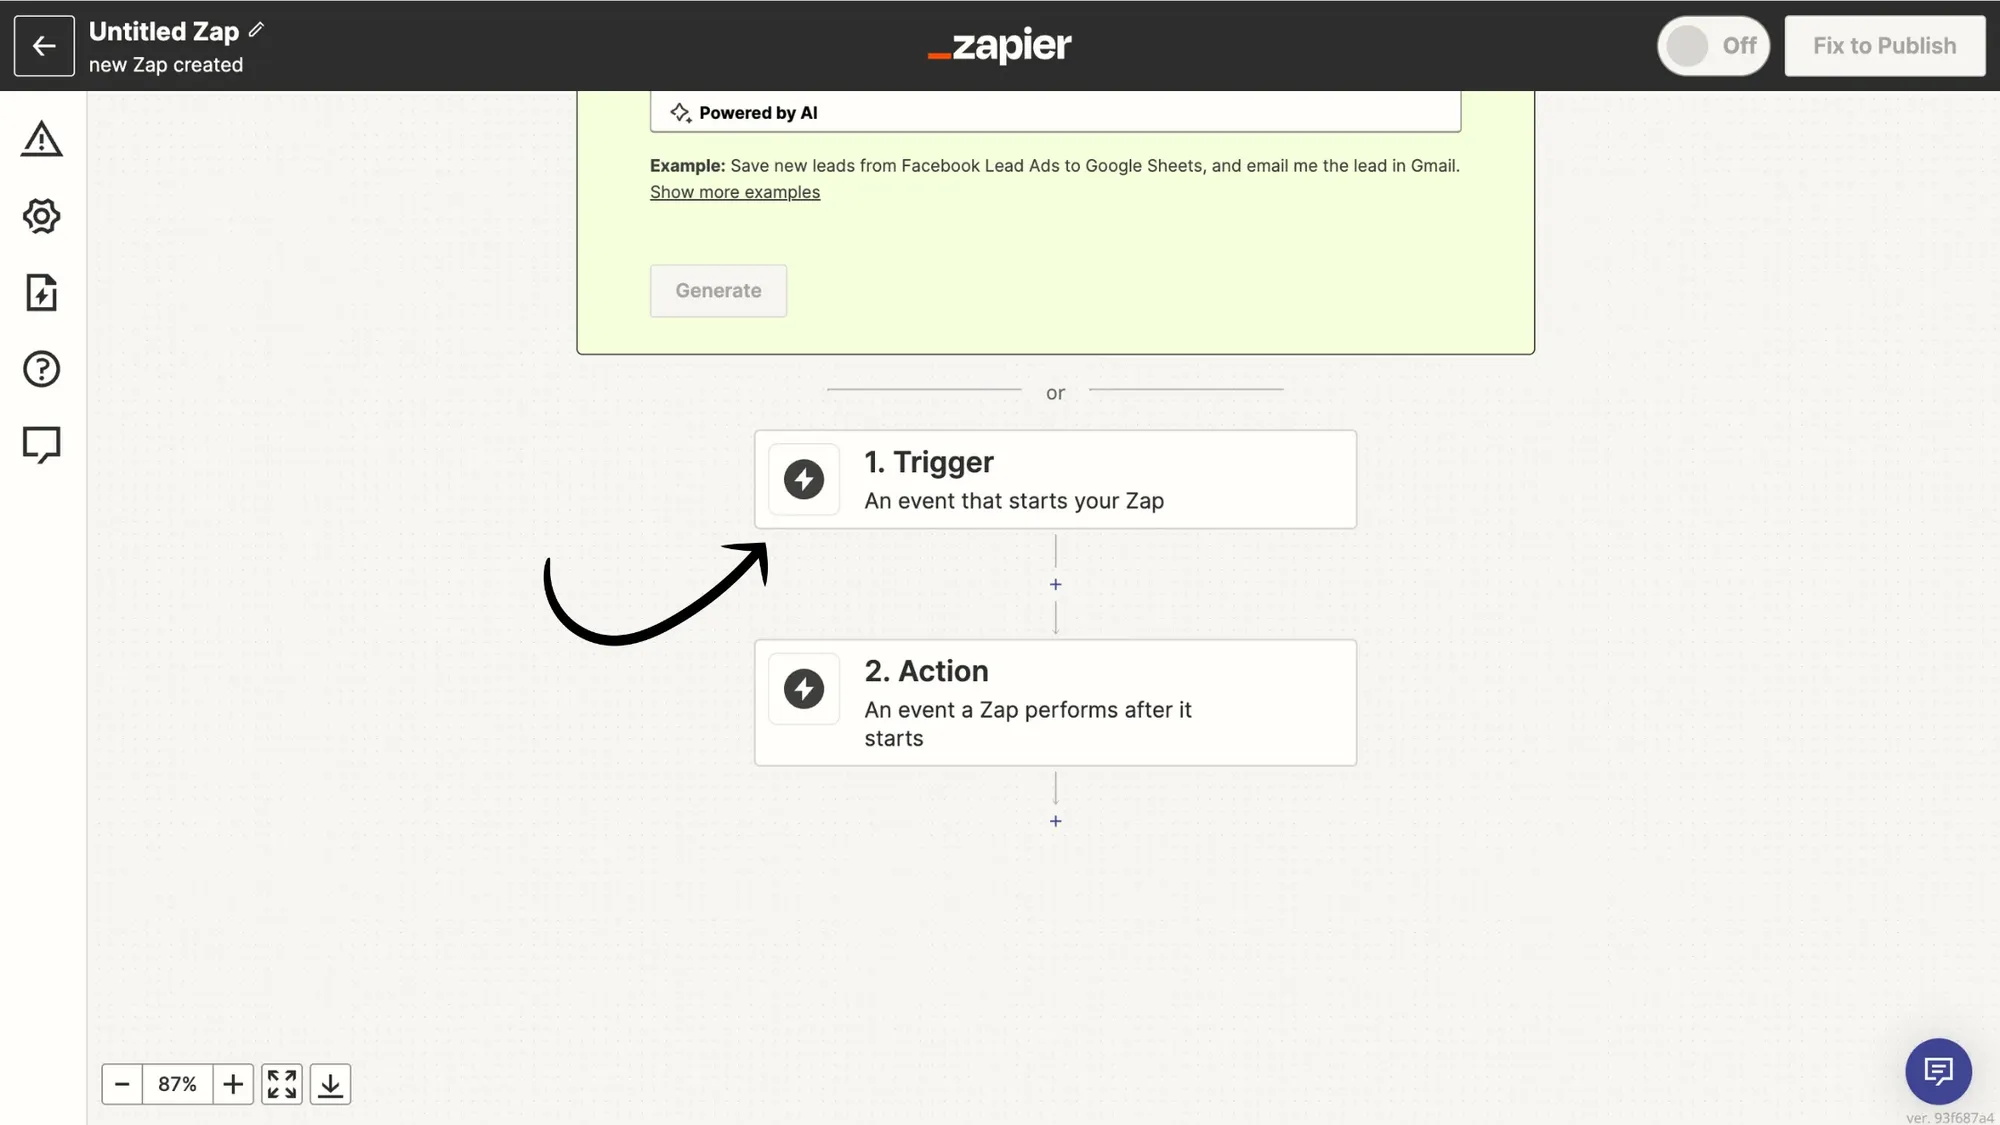
Click on the "Trigger" button
Click the Trigger button to select a triggered action as per your needs. It can be anything from your internal CRM or other software like Calendly, Zoom, Instamojo, Razorpay, Convertkit etc.
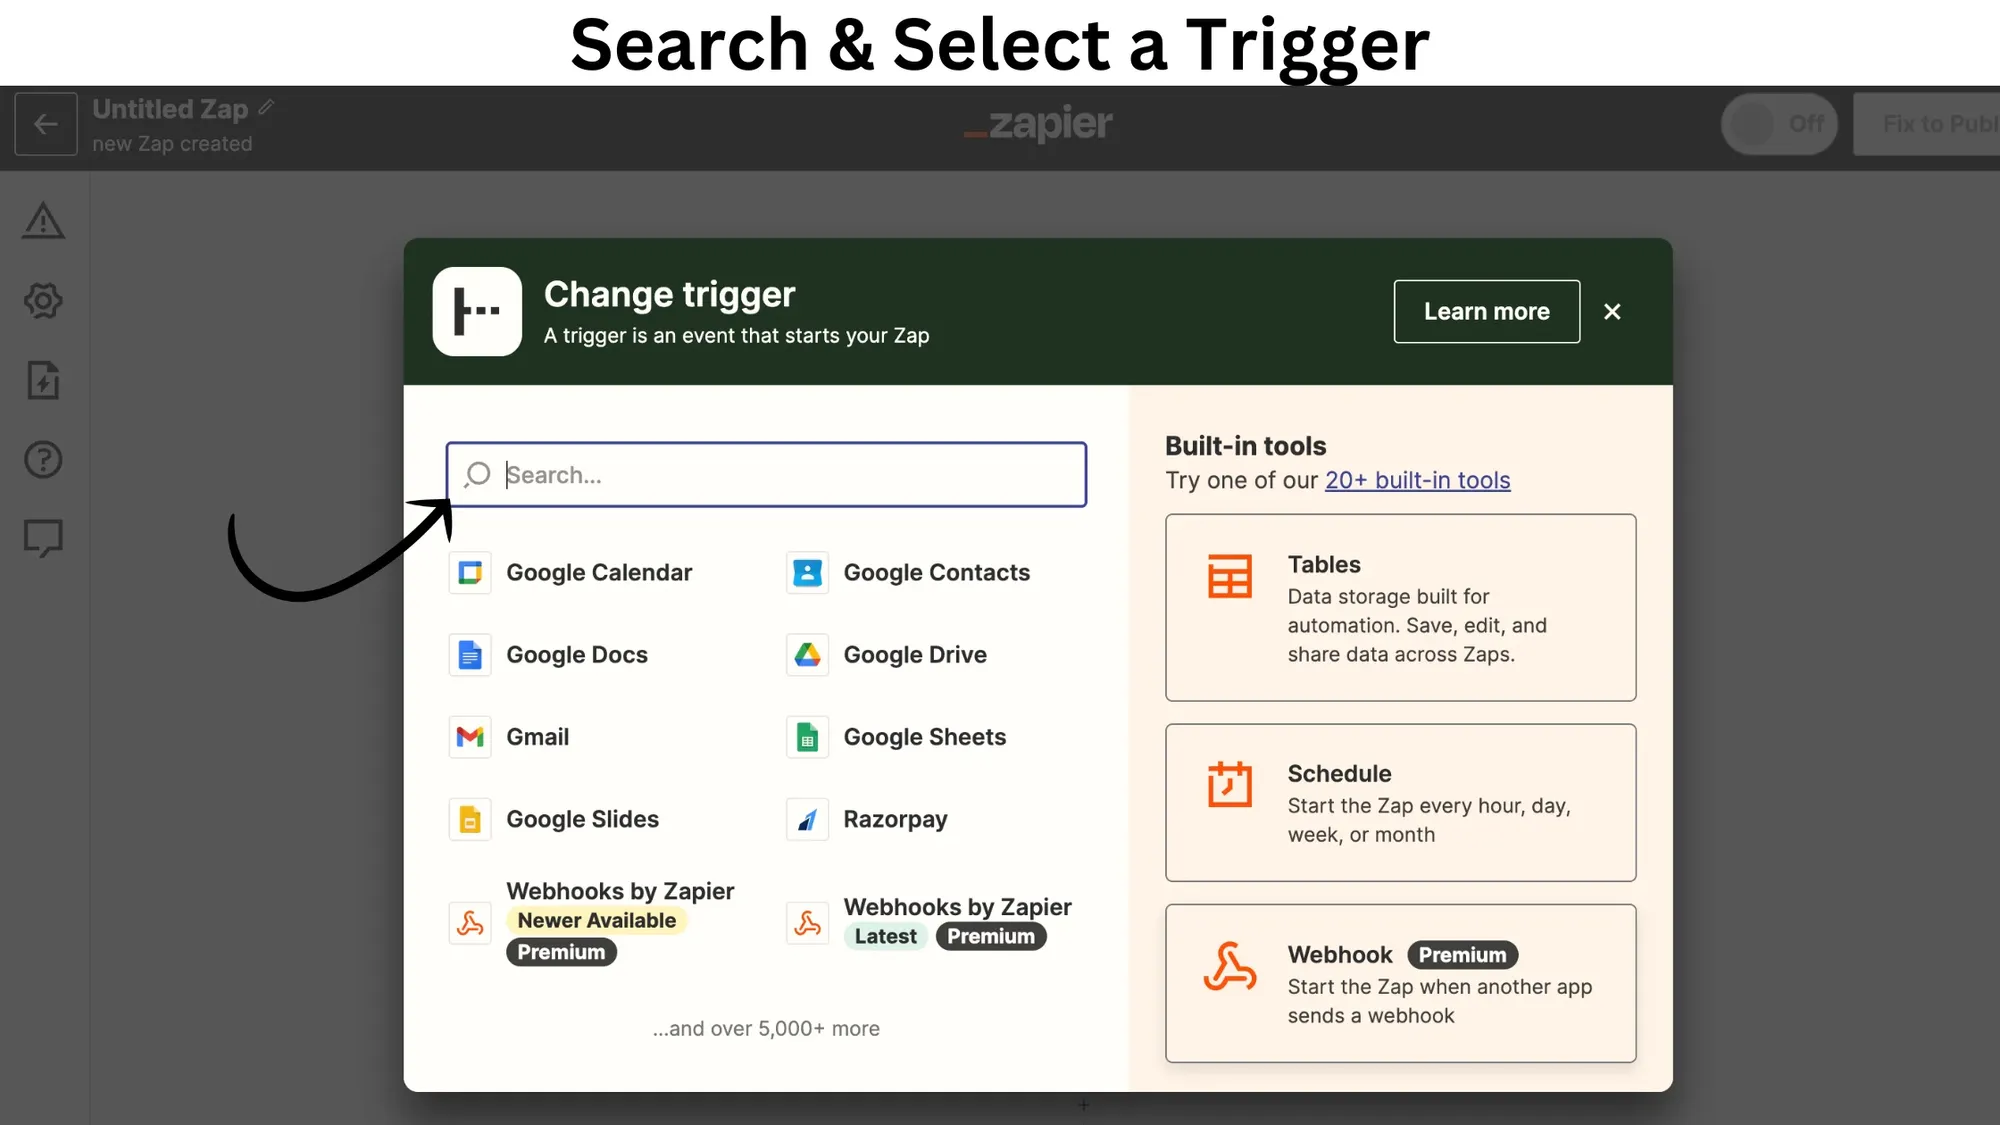
Search & select a Trigger that will help start your Zap
Here, we're going to integrate Messegy with Razorpay via Zapier. So, we'll be searching for Razorpay and selecting an event from it such as payment captured, or payment failed as a trigger.
Search for "Webhooks by Zapier"
Now to connect to Messegy to send a WhatsApp message on the selected trigger in Razorpay in the action box Search for "Webhooks by Zapier"
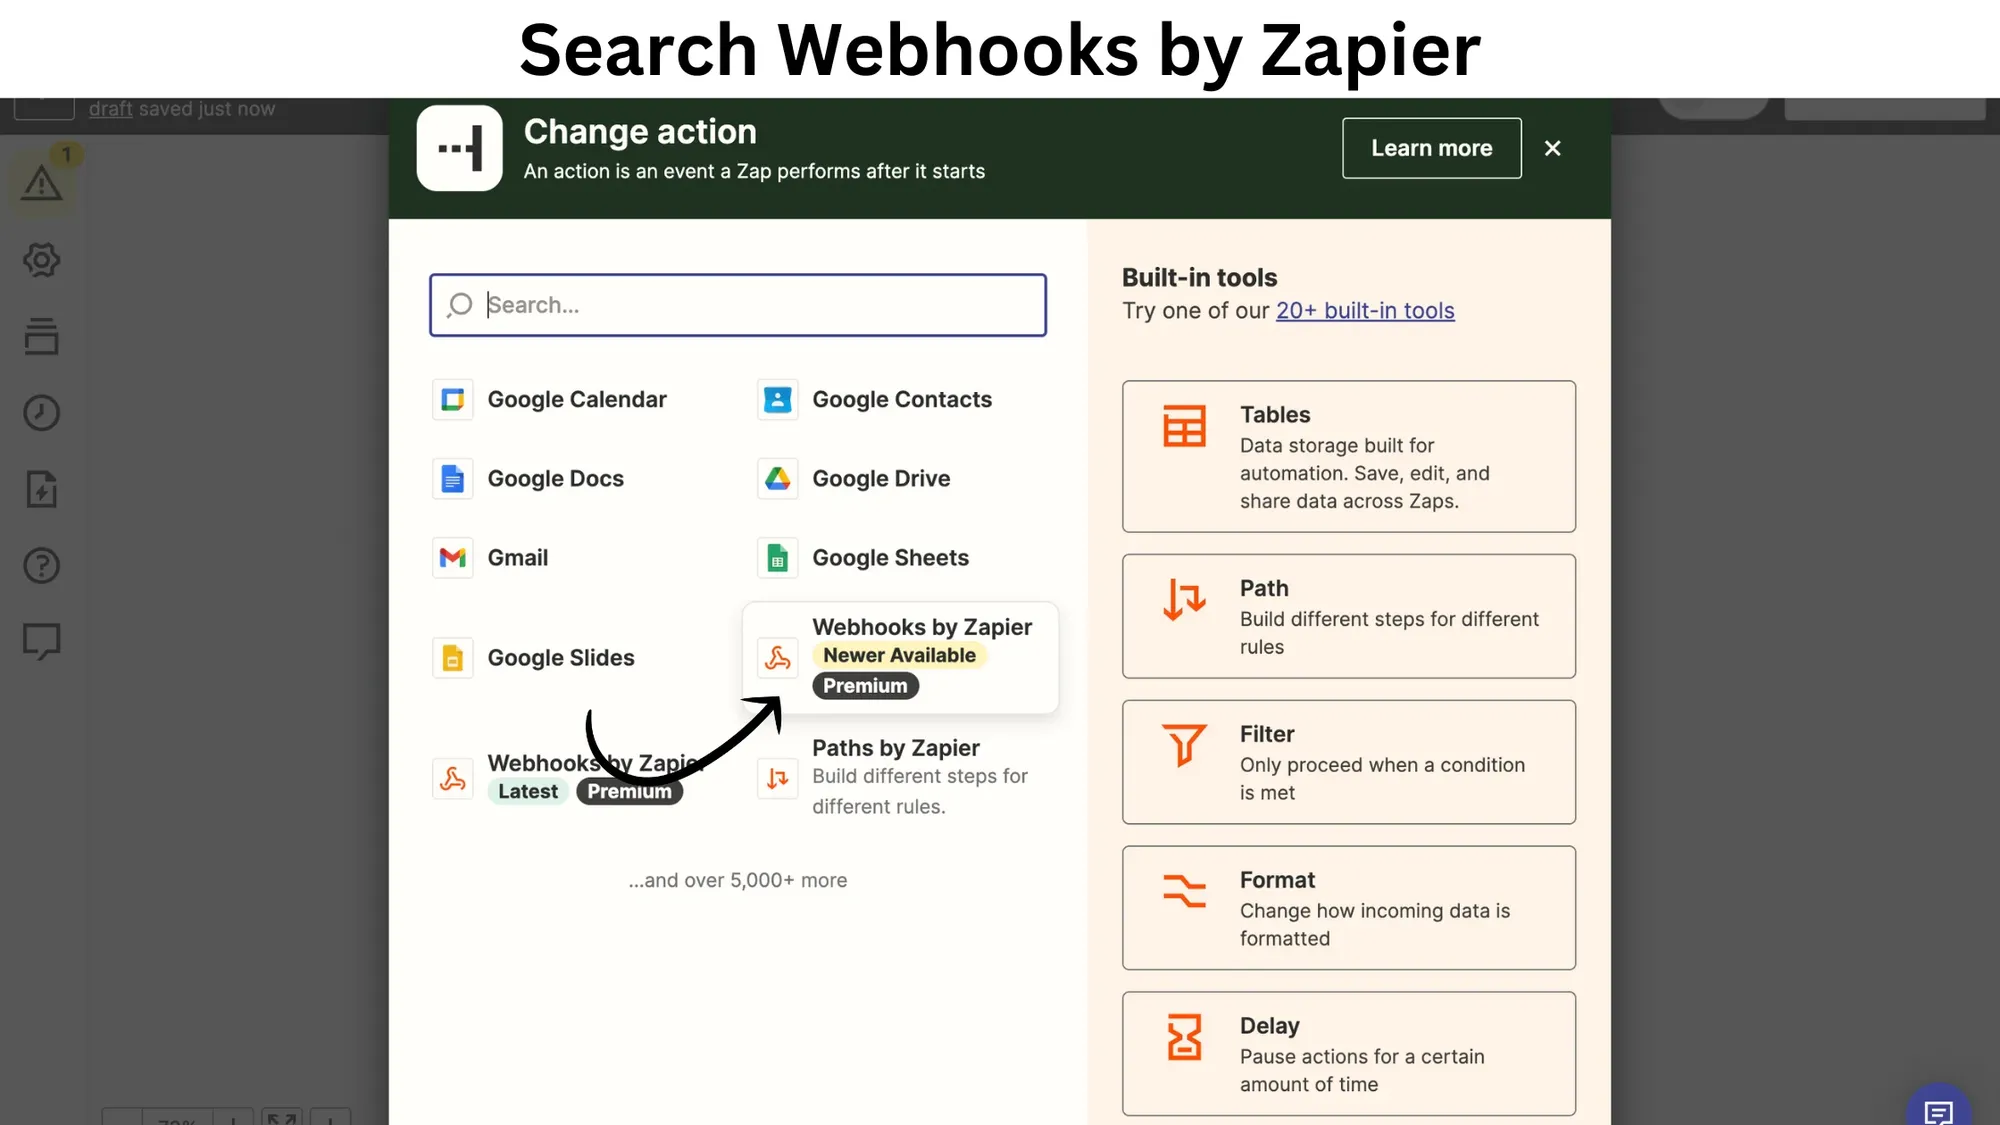
Tap on Webhooks by Zapier and under events select "Custom Request"
... lastly you can invite your team and collaborate to create something super amazing. What are you waiting for? Get started now!
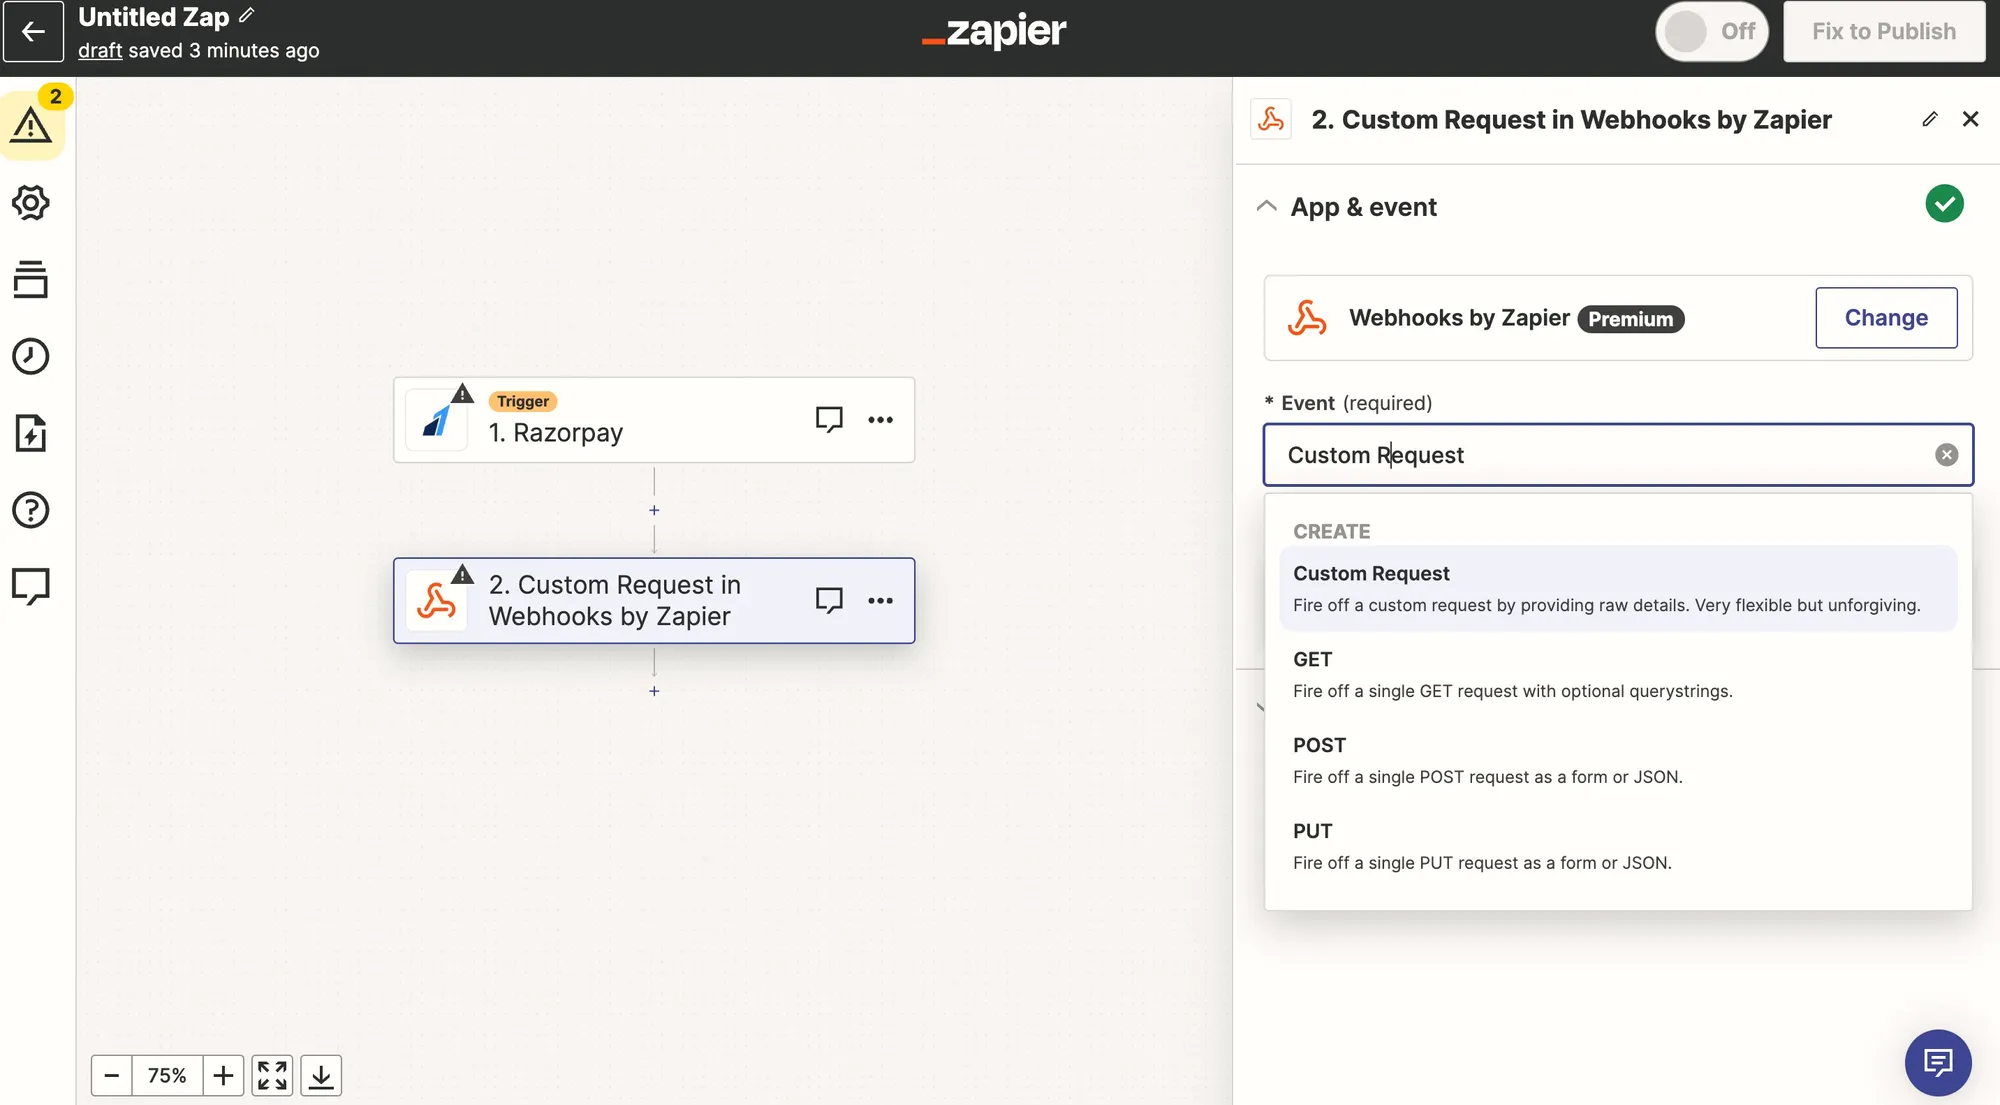
Fill in the necessary fields
-
Under Method, choose POST
-
Under URL, add this exact URL - https://backend.messegy.com/campaign/t1/api/v2
Now for the Data field, you need to create a jason curl, which can be done by following steps 7 to 9
Important Note: To go ahead with the next set of steps, make sure you have your Messegy account set. If you haven't yet setup your account, then signup on Messegy for FREE and setup your WhatsApp Business API account now.
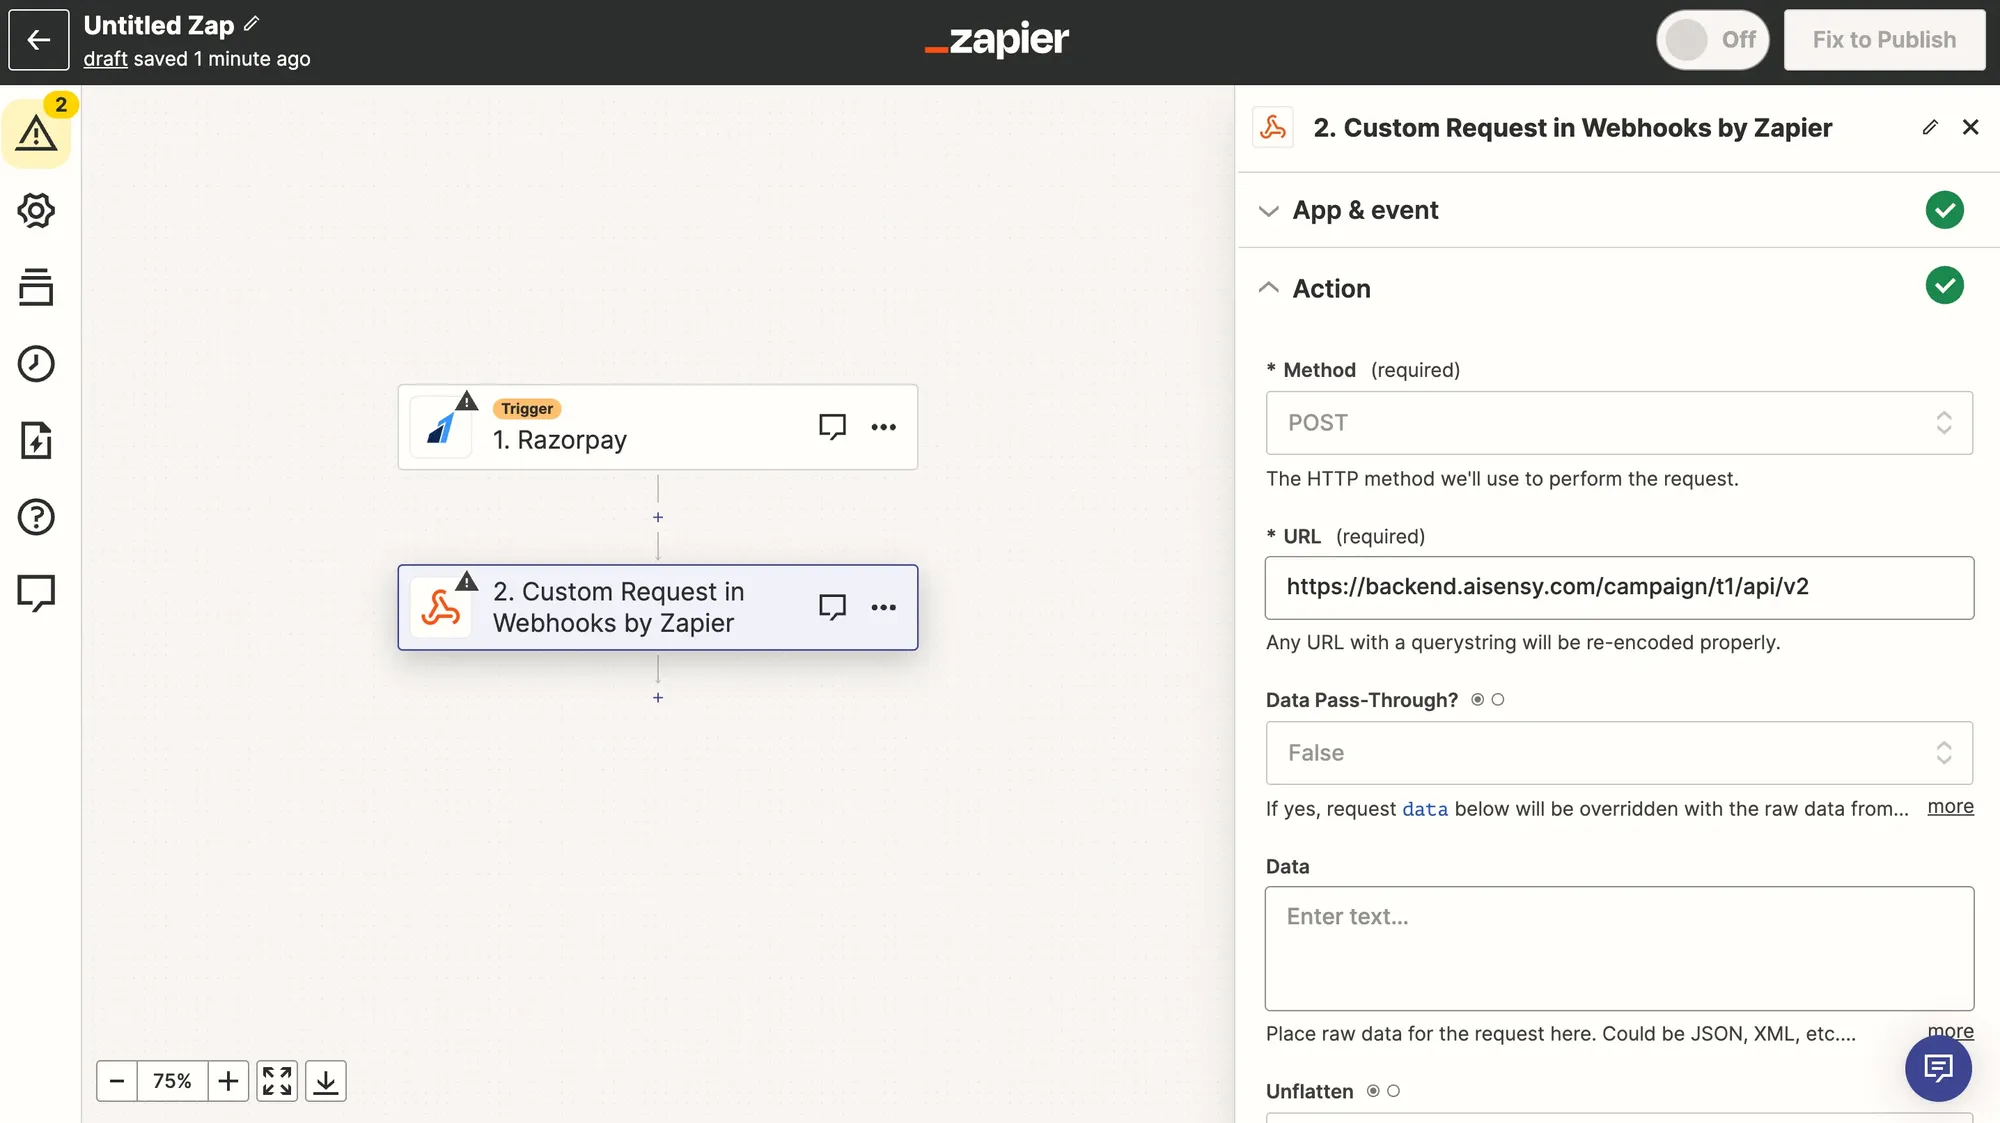
Go Back to the Messegy App
In Messegy App, go to Campaigns, click on +Launch & select API Campaign
Add a Campaign name, select a pre-approved template to which you wish to send using the campaign & set the API campaign live
Under Campaign name, add the name of your Campaign which can be anything that describes your audience and goals. E.g. "Zapier Automation".
For Template, you need to create & approve a template message beforehand to make the campaign live in Messegy.
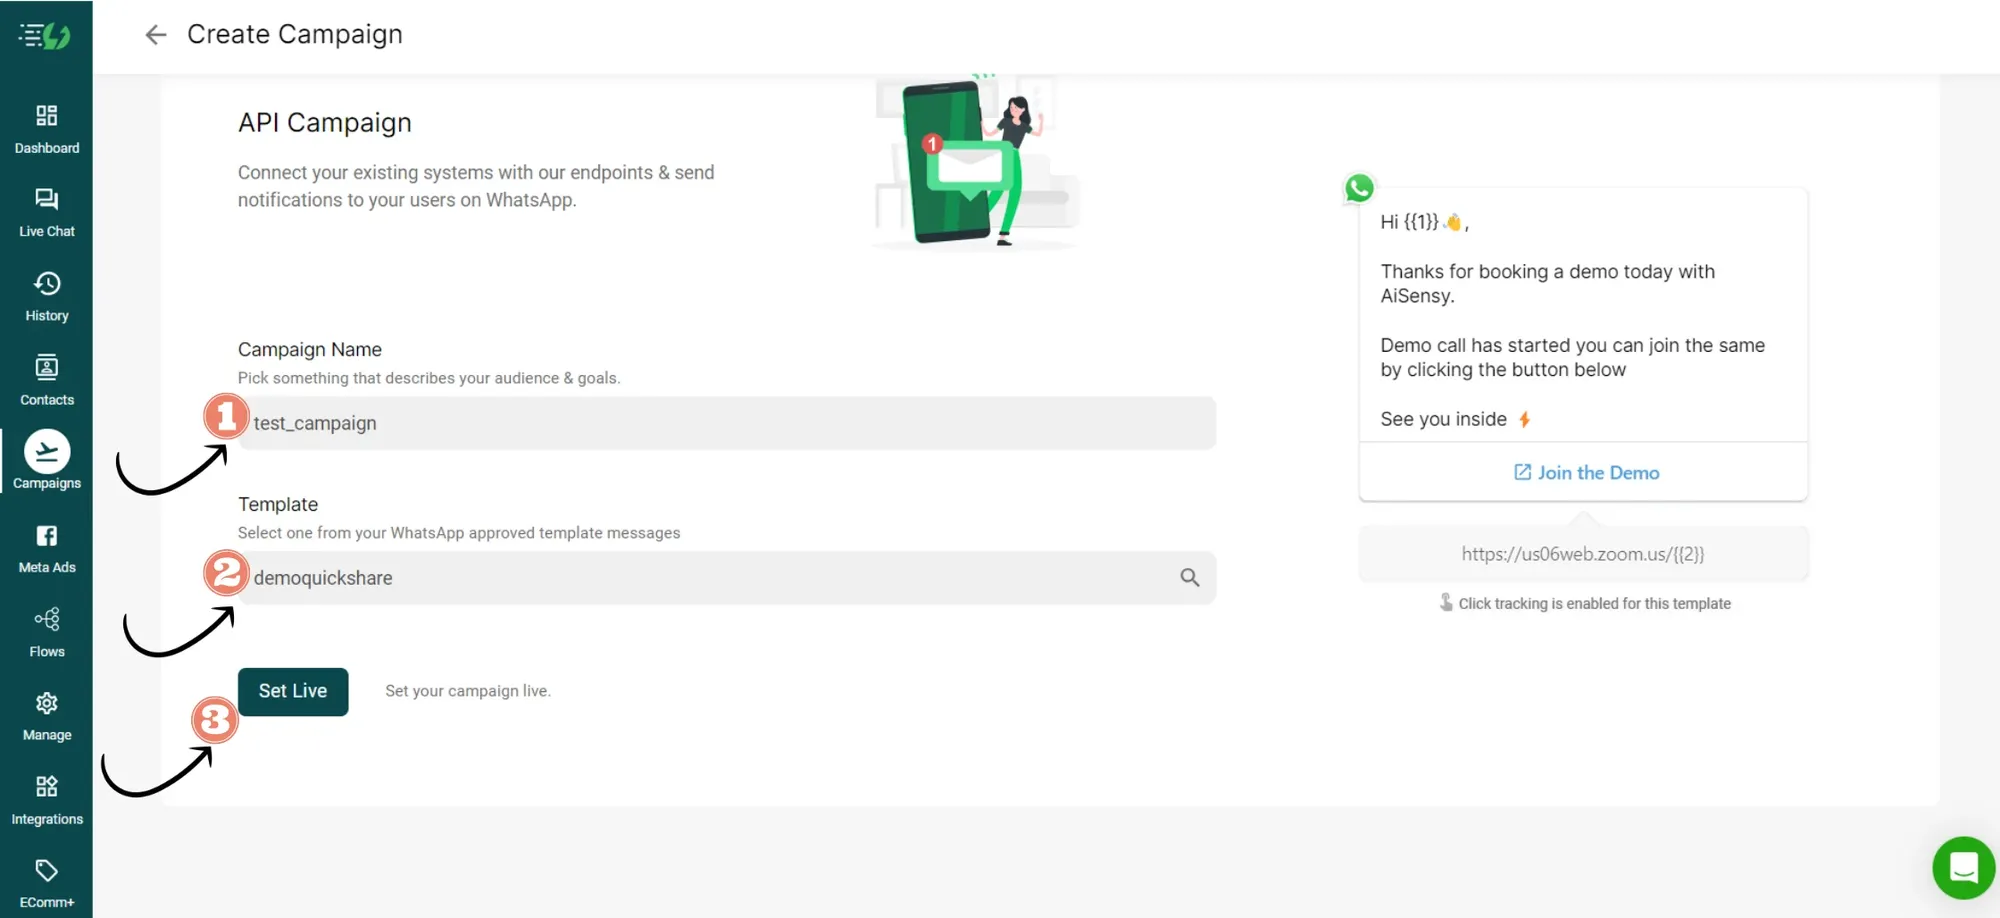
Integrating Messegy with your CRM/ Software
For this step, you would need your development team to help you out with the integration process.
Now in Zapier create the JSON key as per the details shared below
HTTP Request.
End notifications to users through the API:
NOTE: In case of a new user (i.e. the user doesn’t exist on your contact list in Messegy Platform) then a new contact will get created with the incoming details.
{"apiKey": string,"campaignName": string,"destination": string,"userName": string,"source": string,"media": {"url": string,"filename": string},"templateParams": [string],"tags": [string],"attributes": {"attribute_name": string}}
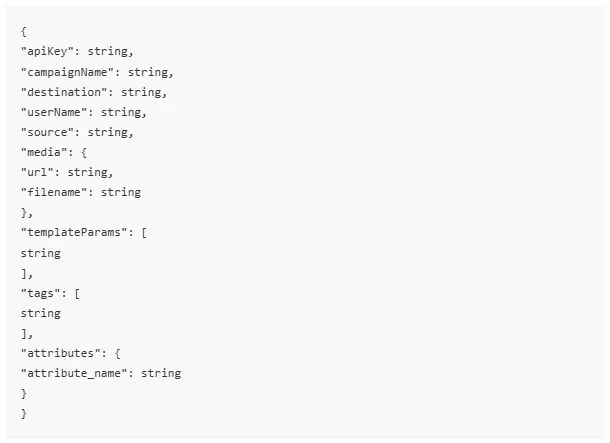
Populate the Jason key stings
Populate the Jason key stings against each attribute according to the table below
Description
Description
Everything you neeed to get started with your business
$950
per seat per year
apiKey
stringRequired. API key generated from the dashboard.
Go to manage> API Key >Copy the key
campaignName
stringRequired. Name of the campaign which has to be sent to the user. The status of the campaign should be ‘Live’.
Go to campaigns> Copy the name of the API campaign created
destination
stringRequired. Mobile number of users with country dial-code to whom the campaign has to be sent.e.g. – +917428526285 (India)It's recommended to provide it in +(country code)(phone number) format. If a phone number can't be resolved to any country then, it is by default considered to be from India(+91).
userName
stringRequired Name of the user to whom the campaign has to be sent.
source
stringOptional. Source of lead. It is to create a source-based segment to re-target.e.g.- ‘Facebook forms’, ‘Website lead’, ‘Youtube lead'
media
ObjectOptional. URL & filename of media that has to be sent with the template message.
location
string
Required. latitude, longitude, name & address of location that has to be sent with the template message.
templateParams[]
stringOptional. An array of parameter values to fill in a template message
If there is any dynamic value included in the template message enter the details of it. Multiple values are separated by comma
tags[]
StringOptional. An array of tag names to assign to the user.
attributes
object with key-value pairs. The only string is allowed as the key's value.
Optional. The object should contain keys already added as assistant attributes paired with values that you want to set as user's attributes.
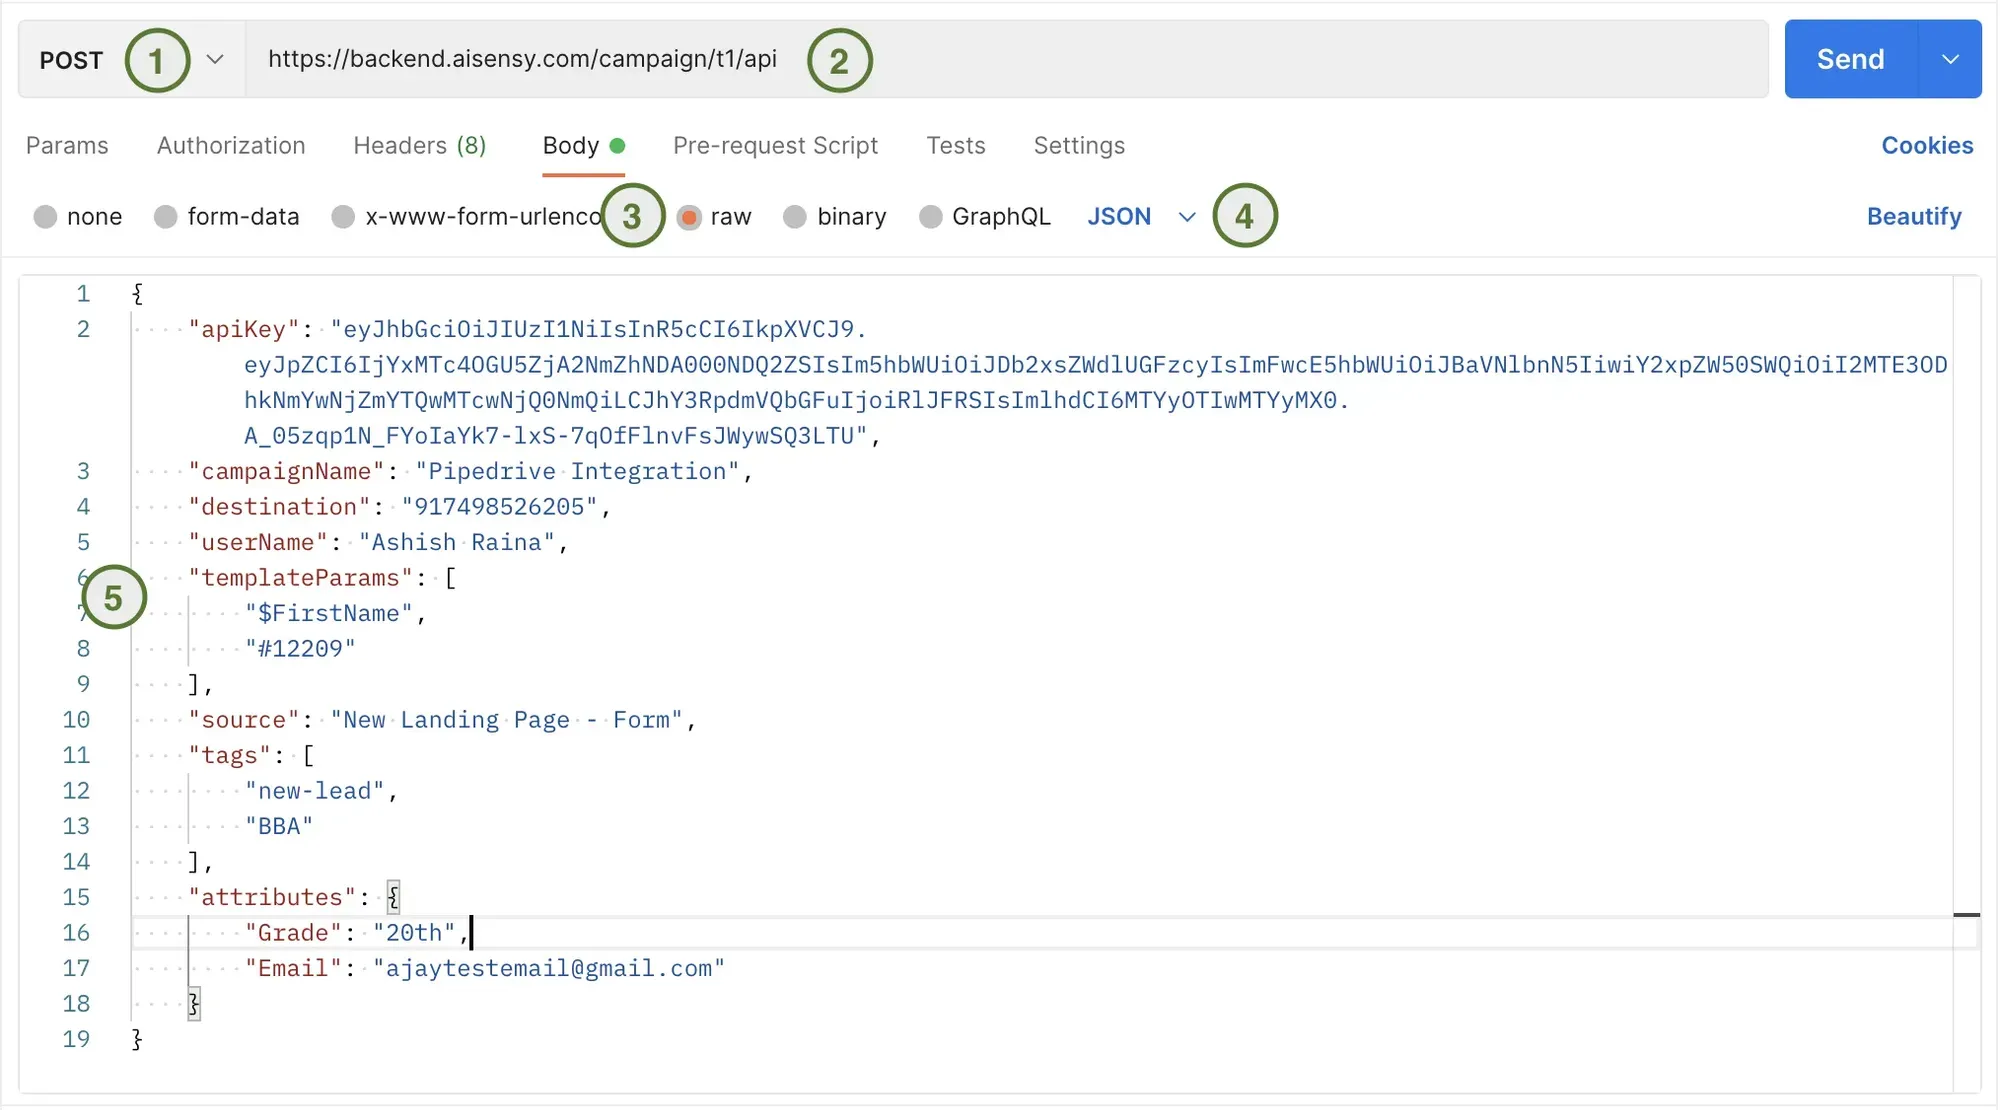
Example Postman Request
Step 1 - Setup request type to "POST"
Step 2 - Setup URL
Step 3 - Choose body type "raw"
Step 4 - Select "JSON" type
Step 5 - Set content of the request
You can find more examples here - Open in Postman
Notes:
NOTES:
-
Optional fields are not necessary for the request payload
-
The medial URL provided in the media object should be publically accessible, otherwise, the request will be rejected
-
The length of the template params array should be equal to the number of params required in the campaign whose name is provided in campaignName field. Otherwise, the request will be rejected
-
Tags should be created in your project before using them. It can be done by anyone with manager level access
-
If a tag doesn't exist in your project, it will be ignored
-
Attributes should be added to the project before using them. It can be done by anyone with manager level access
If an attribute doesn't exist in your project, it will be ignored
10. Once you have filled all the data, fill in the next fields as below
-
In Data Pass-Through choose "False"
-
For Unflatten choose "Yes"
-
In headers fill "Content-Type", in Enter Test field add "application/json"
You can do the testing part in Zapier too by clicking the Test Zap option.
You've successfully used Zapier to connect Messegy with your CRM/ preferred software which in this case is Razorpay.