Steps to connect Edmingle with Messegy to send WhatsApp messages with your learners.
The Edmingle integration enables seamless automation of WhatsApp campaigns powered by Edmingle’s event‑driven data sync into Messegy. With this setup you can:
-
Trigger WhatsApp template campaigns (e.g. event reminders, registrations, VIP alerts) in real‑time directly from Edmingle events.
-
Auto‑tag and attribute users in Messegy based on Edmingle metadata for dynamic segmentation.
-
Build chatbot flows that respond to Edmingle-triggered tags or attributes.
-
Sync user responses from Messegy back to Edmingle for two‑way automation (via API).
Requirements to connect Edmingle with Messegy
-
You must have an Messegy Pro Plan. Note: Basic plan is not supported for integration with Edmingle.
-
You must have admin access in both your edmingle account and Messegy dashboard.
-
You must have already activated your WhatsApp Business API number in Messegy.
1. Contact the Messegy support team for the Project ID & app password
To connect your Messegy account with Edmingle, you first need to connect with your Messegy spoc or directly reach out to our support team via Live chat or email us on support@messegy.com
After contacting us, request your Messegy project ID & app password for Edmingle integration.
2. Add Messegy Integration to Edmingle
-
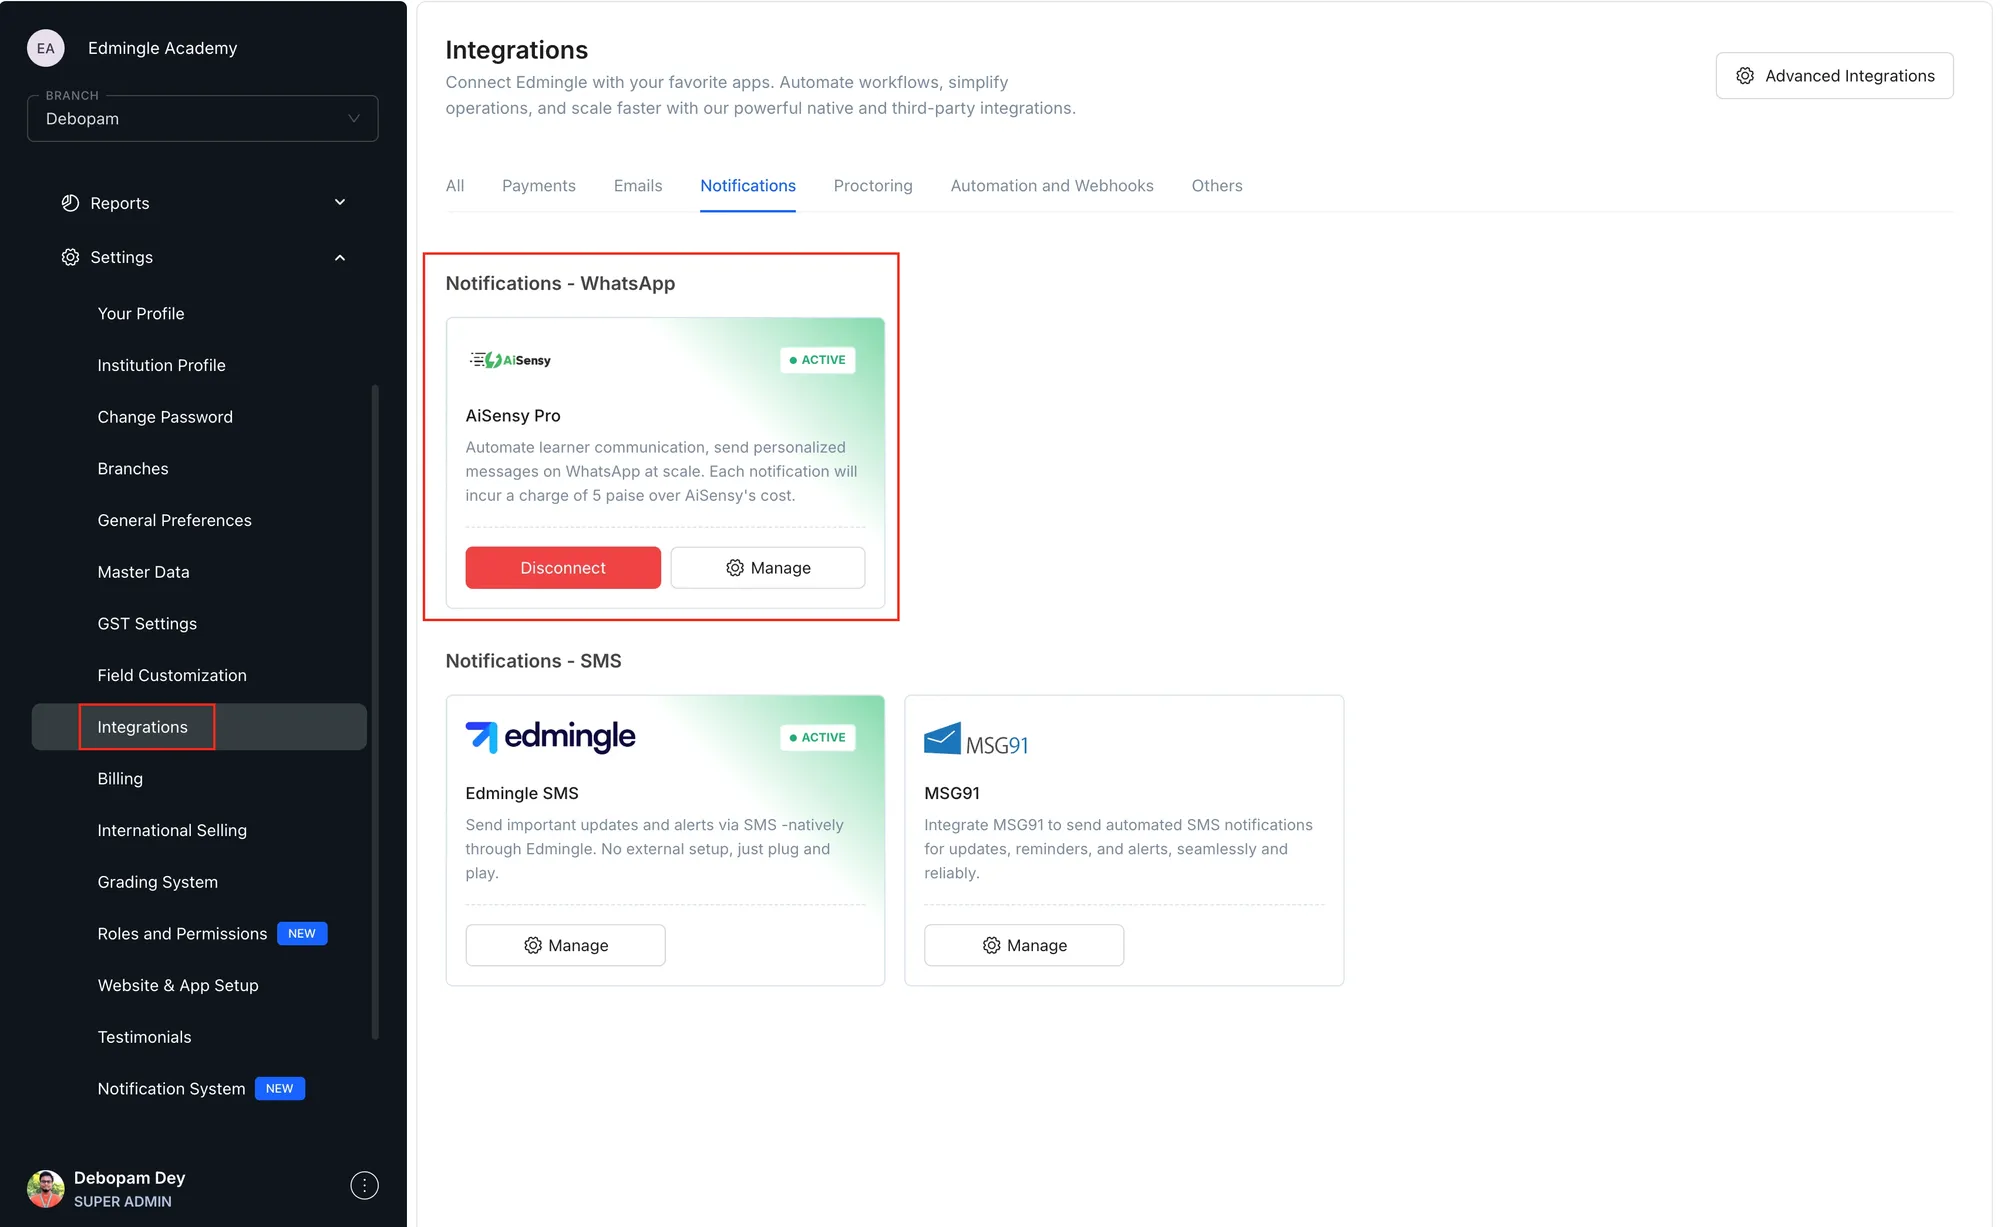
Log in to your Edmingle admin account
-
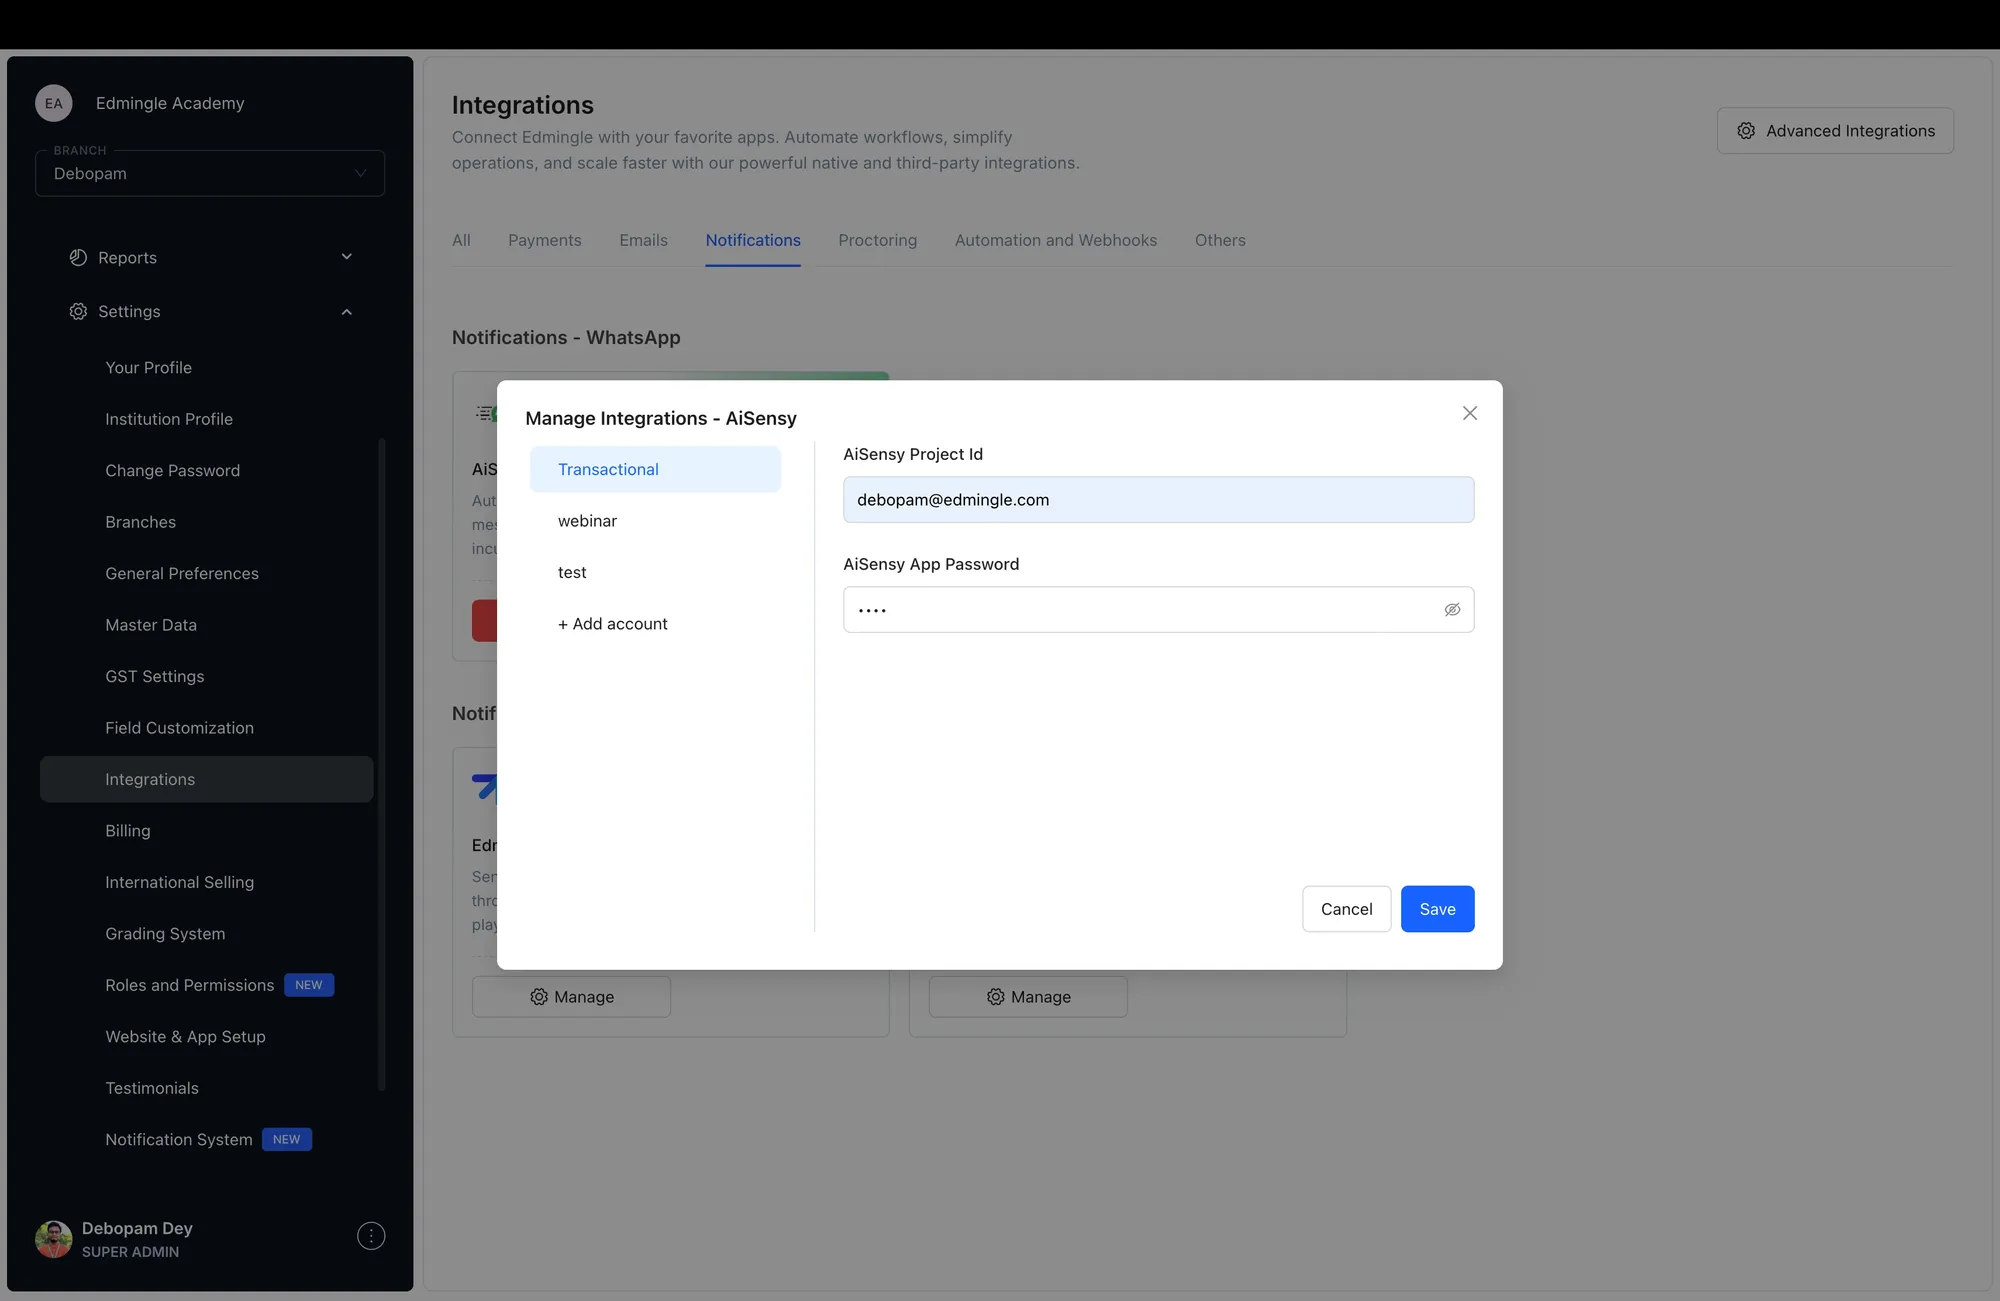
Go to Settings > Integrations
-
Locate the Messegy Integration section
-
Paste your Messegy Project ID and Password
-
Save changes
That's it! Your Messegy account is now successfully connected to Edmingle.
But, this is just the first part of the integration.
To directly send WhatsApp messages to your learners from your Edmingle dashboard, you need to set up messages in Messegy & Edmingle.
Step 1: Create a WhatsApp Template message on Messegy
In Messegy, navigate to the "Templates" section & create a new template message by clicking "+New"
Messegy Login
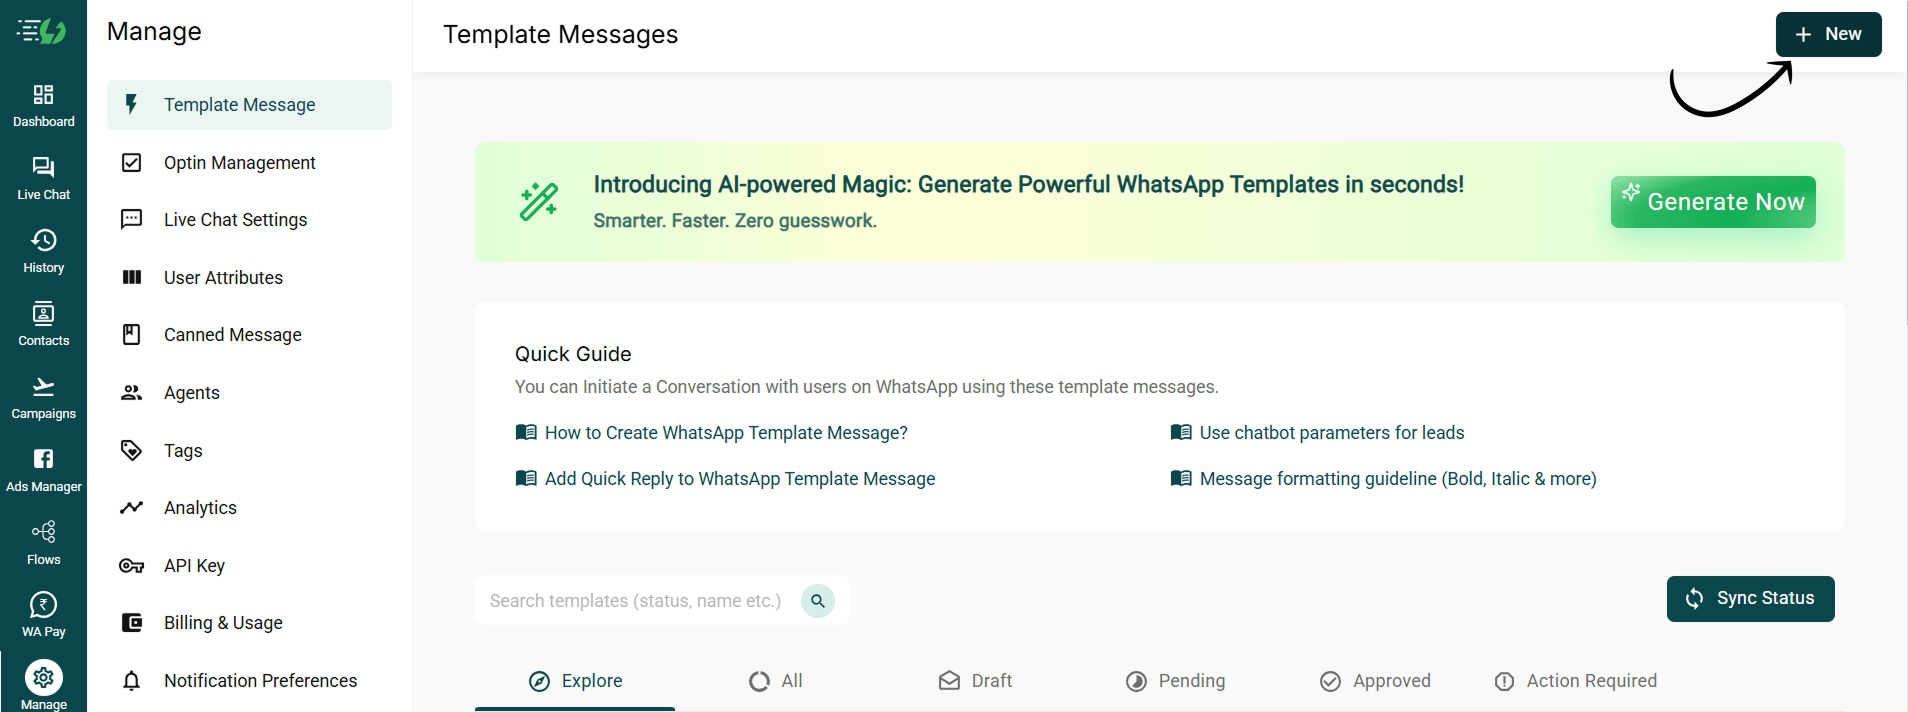
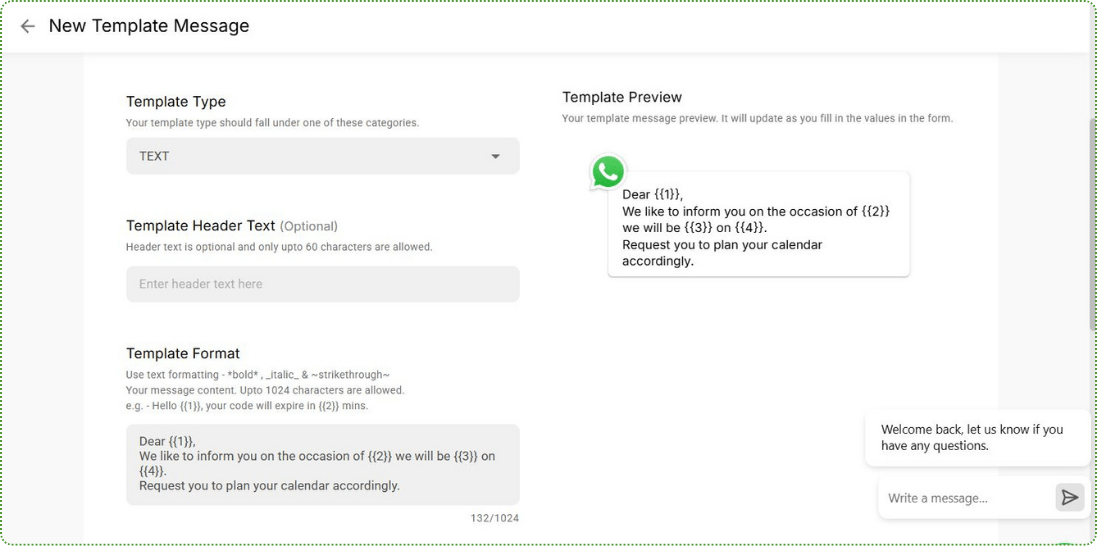
Provide necessary details such as template name, category, and message content
For more info on how to create template messages in Messegy, check out this template message guide.
Here is a list of suggested templates you can use for each of the system notifications. You’re free to customize or add your own as well: Suggested Templates.
3. Submit the template for approval
Once approved, the template will be available for use in campaigns.
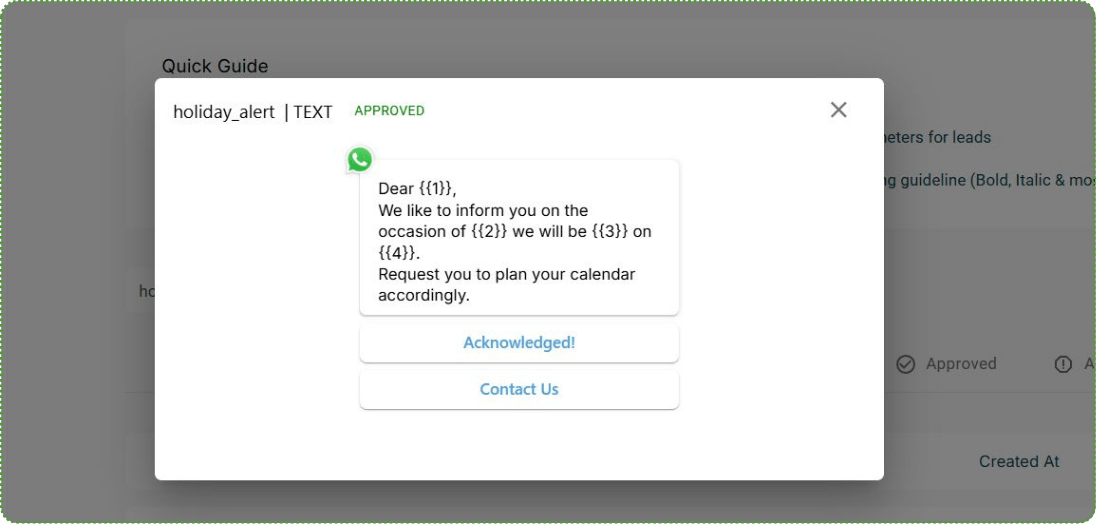
Configure System Notifications
System notifications are sent automatically based on user actions (e.g., payment success, course enrollment, certificate issue). To configure system notifications to be sent on WhatsApp:
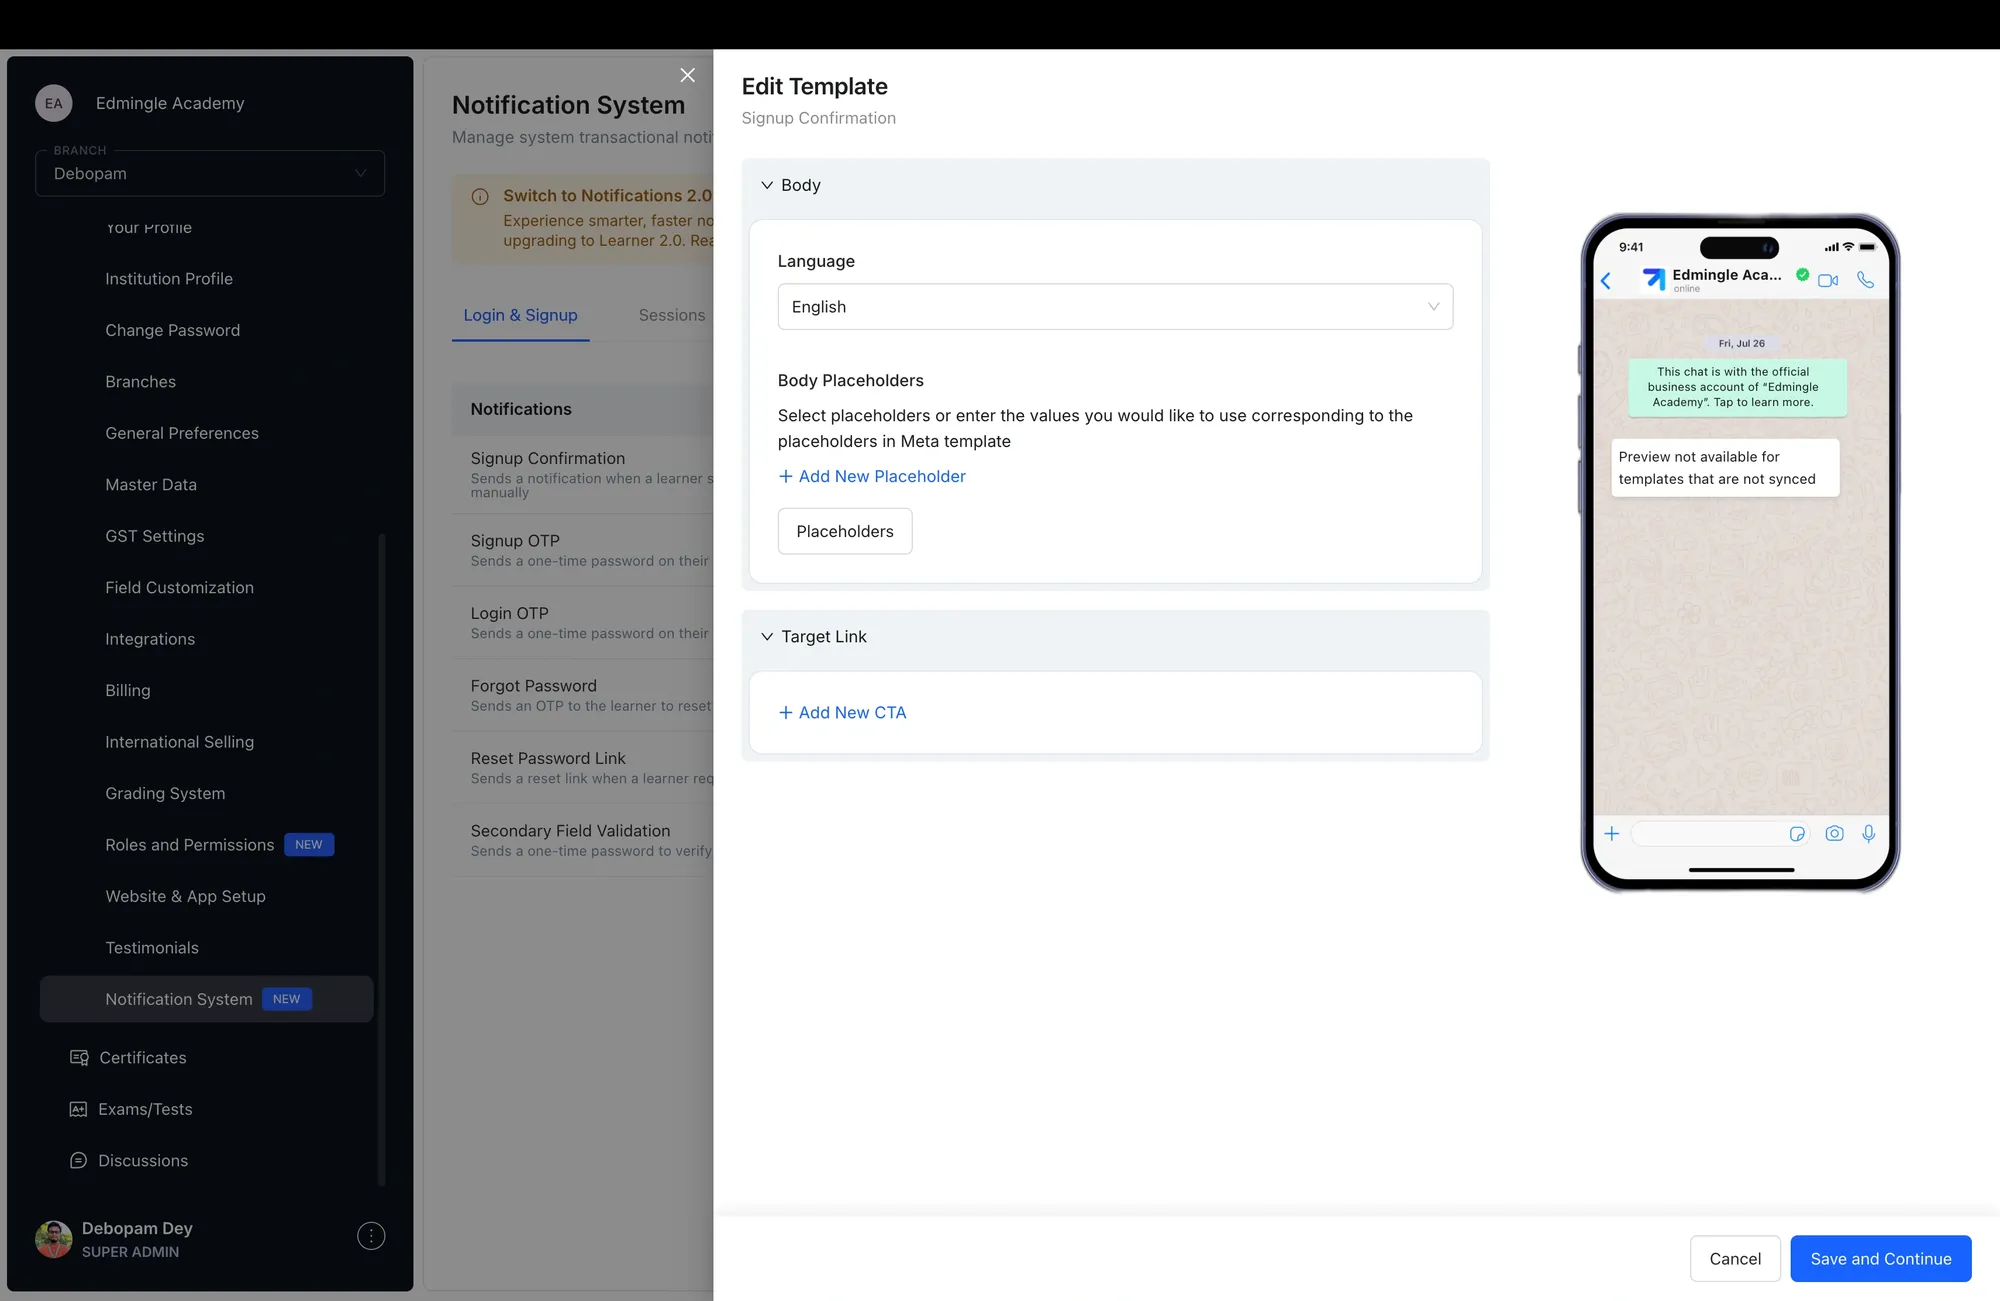
Go to Settings > System Notifications
Select Manage Notifications from the top
Select Manage Notifications from the top and enable the WhatsApp Notification option.
Click on "Edit Template"
-
Add the External Template Name (same as Messegy)
-
Set language (match Messegy)
-
Body Placeholders (add the relevant placeholders against each value on Messegy)
-
Add CTA (Call to Action) if applicable, with the WhatsApp URL option available on the placeholders dropdown.
-
Save Template
That's it! Do the same for all the templates you wish to automate for your learners, and you're good to go.
Your Messegy X Edmingle integration is successful.