Looking to send WhatsApp reminders, confirmations or promotional messages the moment someone books an appointment with you?
With the DaySchedule x Messegy integration, you can automate this entire process -no manual effort needed! Check this guide for the step-by-step process.
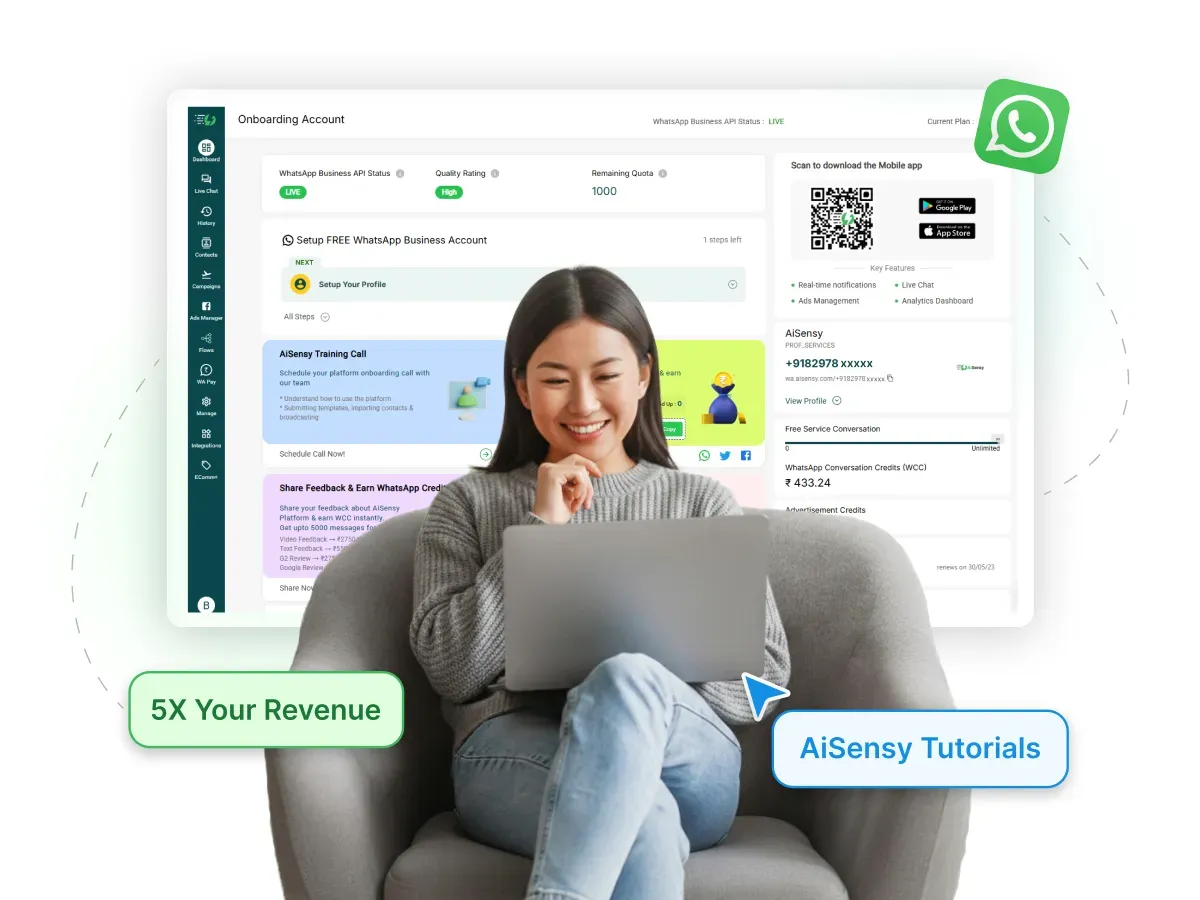
Requirements to enable this integration
Before getting started, make sure you have the following:
-
An active Messegy account subscription
-
An active DaySchedule account subscription
If you have both these ready, let's help you integrate DaySchedule with Messegy and set up important reminders & confirmations on WhatsApp.
Steps to connect DaySchedule with Messegy
-
Log in to your DaySchedule account
-
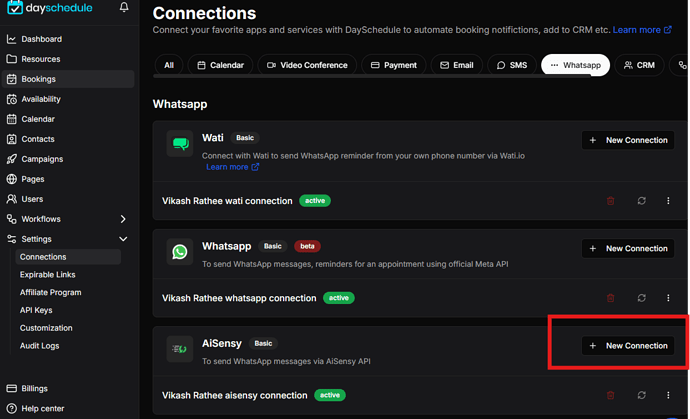
Head over to the Connections tab from the sidebar
-
Scroll to the WhatsApp section and click on Messegy
-
Click on the ‘New Connection’ button
-
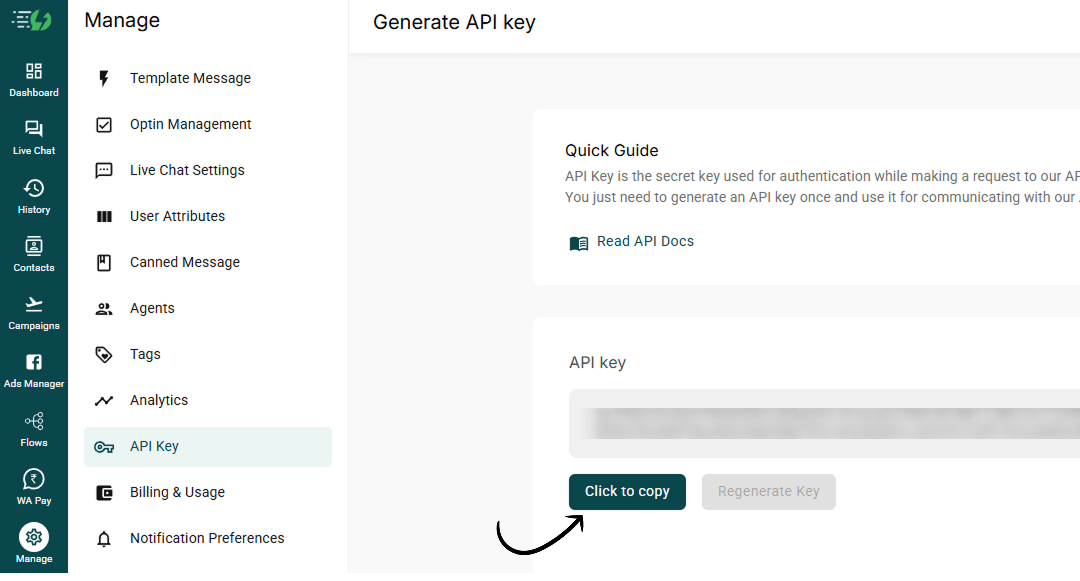
Copy your API Key from the Messegy dashboard
In Messegy, go to Manage👉API key👉Copy API key
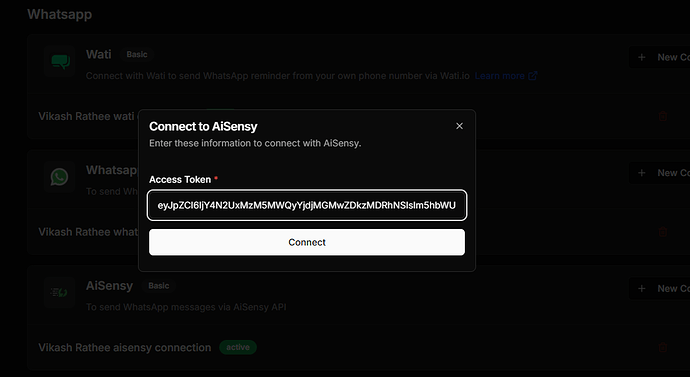
- Paste the key into DaySchedule and hit ‘Connect’
Once done, you’ll see Messegy successfully connected. That's it! You've successfully connected Messegy with DaySchedule.
Now, let's go ahead and help you set up messaging workflows in DaySchedule so your customers automatically receive meeting confirmations and reminders on WhatsApp.
Creating WhatsApp Template message and API Campaign in Messegy
Now that Messegy is connected, let’s create a workflow that enables you to send WhatsApp reminders, confirmations, or promotions instantly.
First, you need to create a pre-approved template message in Messegy and create an API campaign.
Follow these steps below to create a template message in Messegy and create an API campaign.
- Go to Messegy App & create a new template message
In Messegy, navigate to the "Templates" section & create a new template message by clicking "+New"
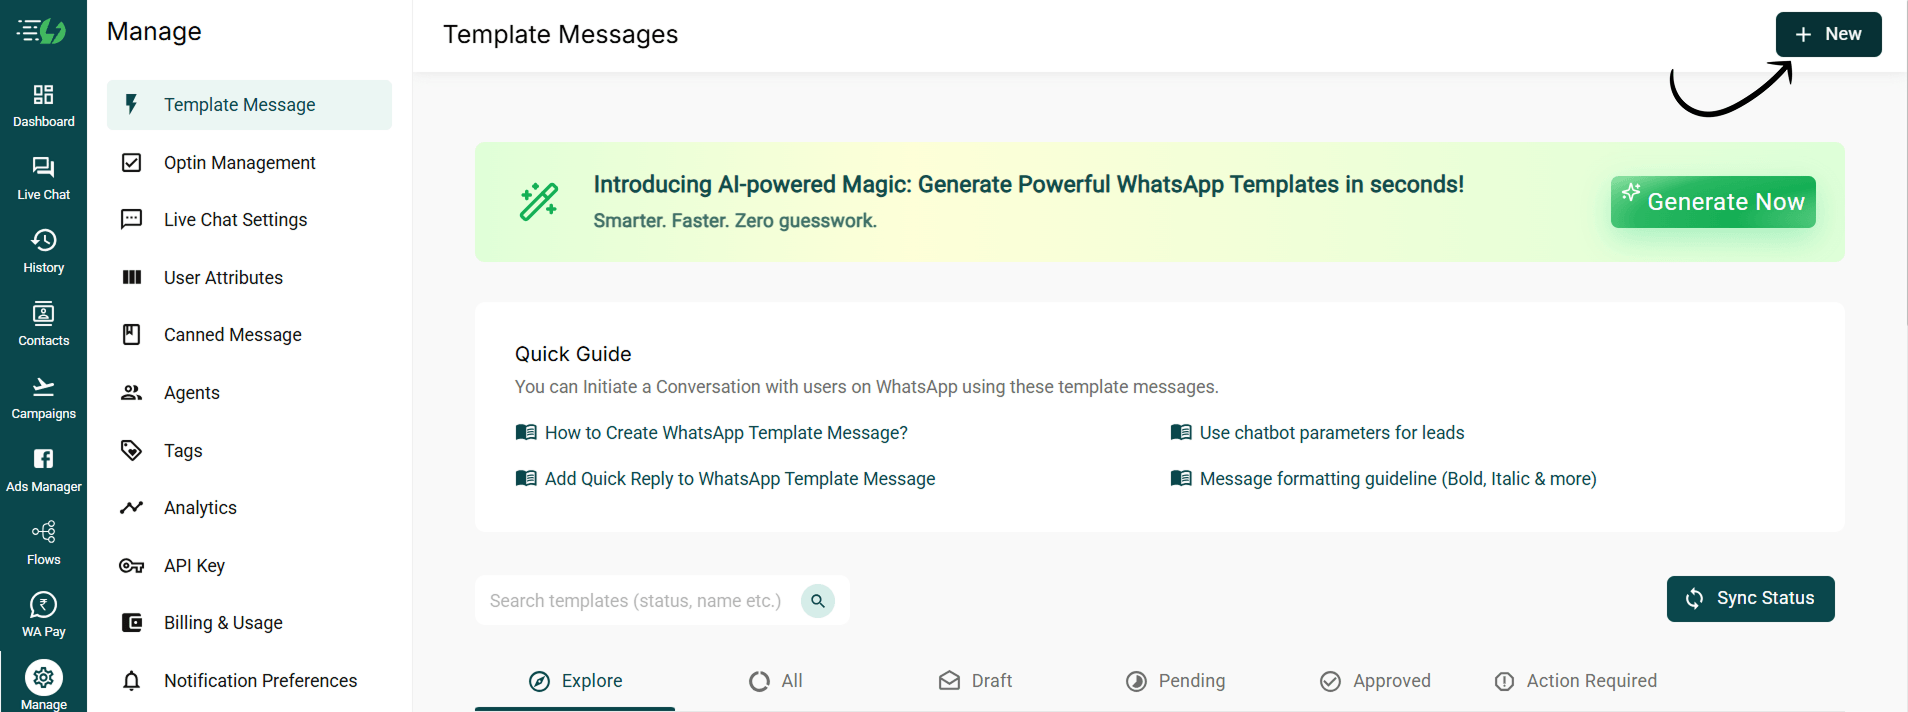
- Provide necessary details such as template name, category, and message content
For more info on how to create template messages in Messegy, check out this template message guide
Note: This is just a sample template. You can create and automate any WhatsApp template message for meeting reminders, confirmations and more. The scope is infinite.

-
Submit the template for approval
-
Once approved, the template will be available for use in campaigns
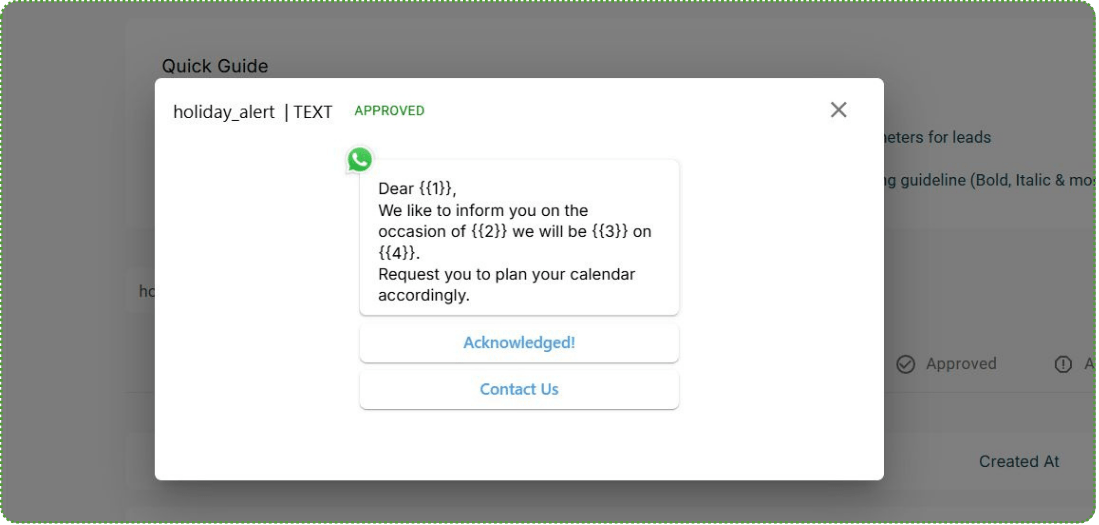
Step 2: Create a Campaign on the Messegy Platform
- Go to the "Campaigns" section in Messegy.
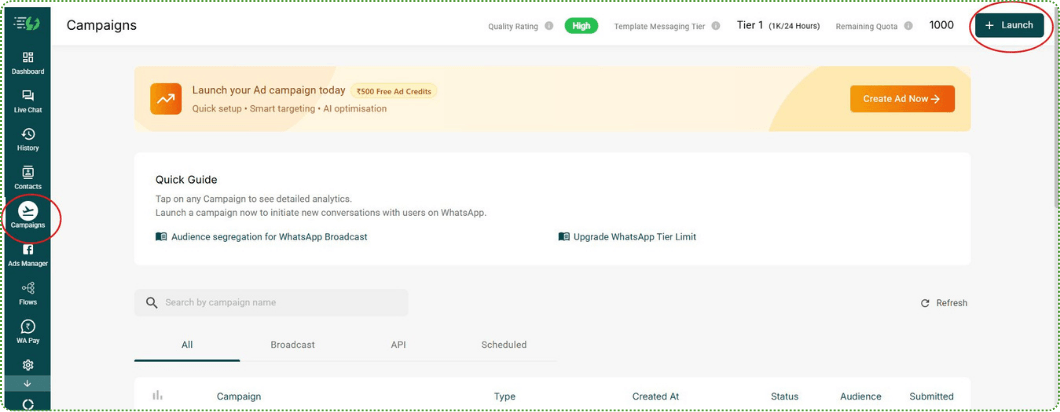
- Click on "Launch" and select API Campaign
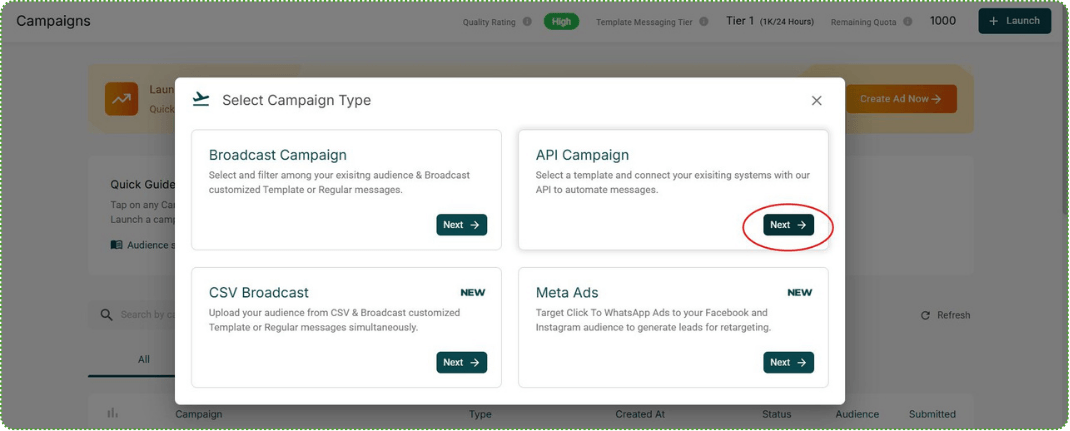
-
Enter a campaign name and select the approved template.
-
Save and activate the campaign.

Setting up WhatsApp Automation Workflow in DaySchedule
Now, you need to setup this workflow in DaySchedule. Here’s how:
-
In DaySchedule, go to Workflows from the main menu
-
Click on ‘Create Workflow’
-
Choose the specific event, webinar, or service this workflow should apply to(You can also select ‘All’ to apply it universally)
-
For Trigger, select event_scheduled

-
Under Action, choose Messegy from the provider list
-
Pick the Messegy account you just connected
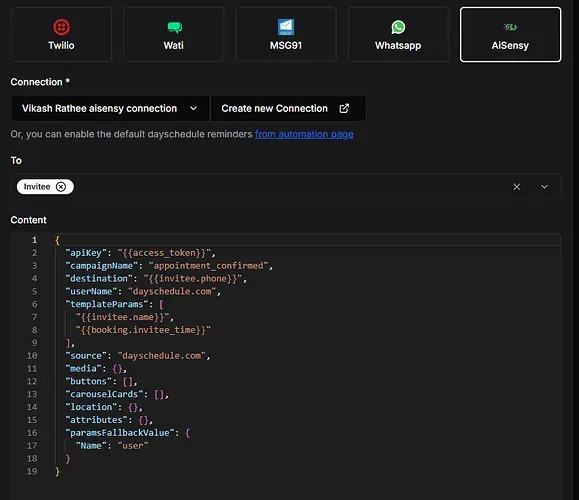
- Now Customize Campaign Details
-
Enter the campaignName exactly as it appears in your Messegy dashboard.
-
Add templateParams if your WhatsApp message template requires any personalization fields such as name, time, or service.
-
Click on Test run to test the WhatsApp campaign and save to publish.
You can personalize messages using variables like {{invitee.name}}, {{invitee.phone}} etc. See the complete list of variables here.
Now, every time someone books an appointment, DaySchedule will automatically send the details to Messegy and trigger a WhatsApp message using the selected API campaign.