Facebook Business Manager Verification allows Meta to determine whether the account belongs to a legitimate business or an organization. This step is crucial in order to unlock all of Messegy's special features.Follow our step-by-step guide to verify Facebook Business Manager Account for WhatsApp Business API.

Requirements for Facebook Business Manager Verification
Here are the requirements to verify for Facebook Business Manager account:
LEGAL DETAILS OF YOUR BUSINESS
Provide Accurate Business Name, Address, and Contact Information.
BUSINESS DOCUMENTATION
A legal document containing the Legal Name of the Business and Legal Address, preferably a GST or Bank Account Statement. All images must be clear, in colour and show the whole document.
BUSINESS WEBSITE
The website must mention at its footer the exact Legal Business Name (as cited in the documents).
PROOF OF BUSINESS ACCESS
Proof of access to the business such as an official Business email (email with the same domain of your website).
Video Tutorial: FBM Verification
The next step to successfully getting started with Messegy is to apply for Facebook Business Manager Verification.This step is important as without a verified Facebook Business Manager, you can't have complete access to WhatsApp Business API.Note: you can apply for Facebook Business Manager Account verification simultaneously while applying for WhatsApp Business API.

How to verify Facebook Business Manager Account?
Step-by-step guide
Go to Facebook Business Manager
Log in to Facebook Business Manager Page.This will open a new tab on your Facebook Business Account.
Log in
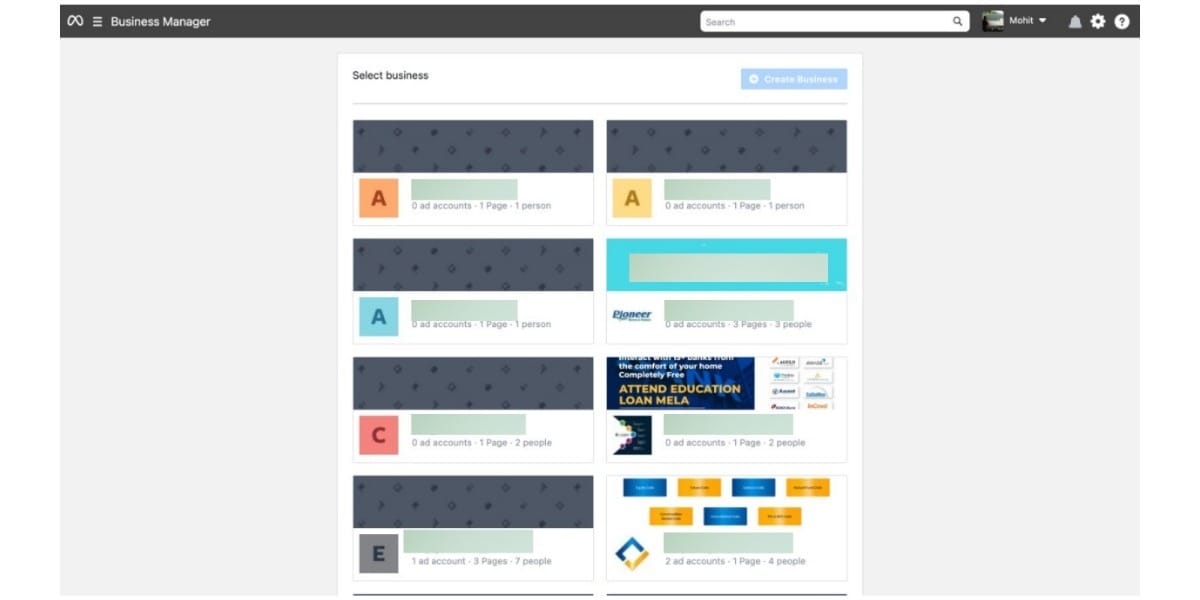
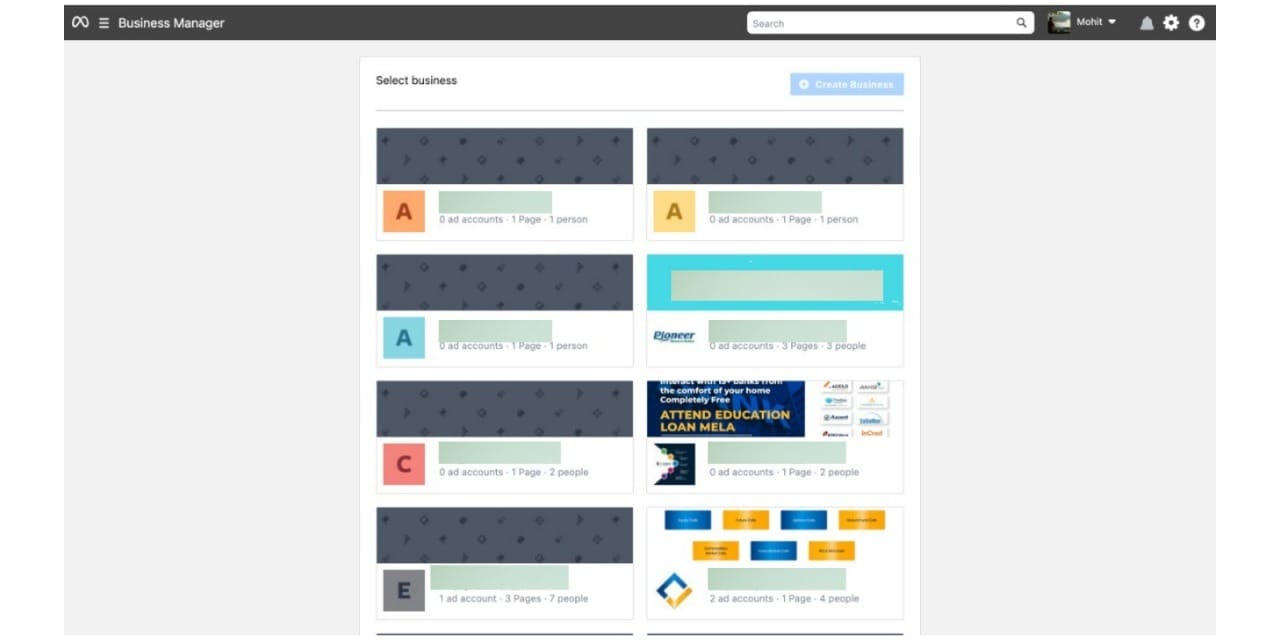
Choose a Facebook Business Manager Account
If you already have a Business Manager Account, choose the account on which you want to get your WhatsApp Business API. If you do not have a Facebook Business Manager account, you can create one.Note: If you have just one Facebook Business Manager Account, your business setting will open automatically.
Create a Facebook Business Manager Account
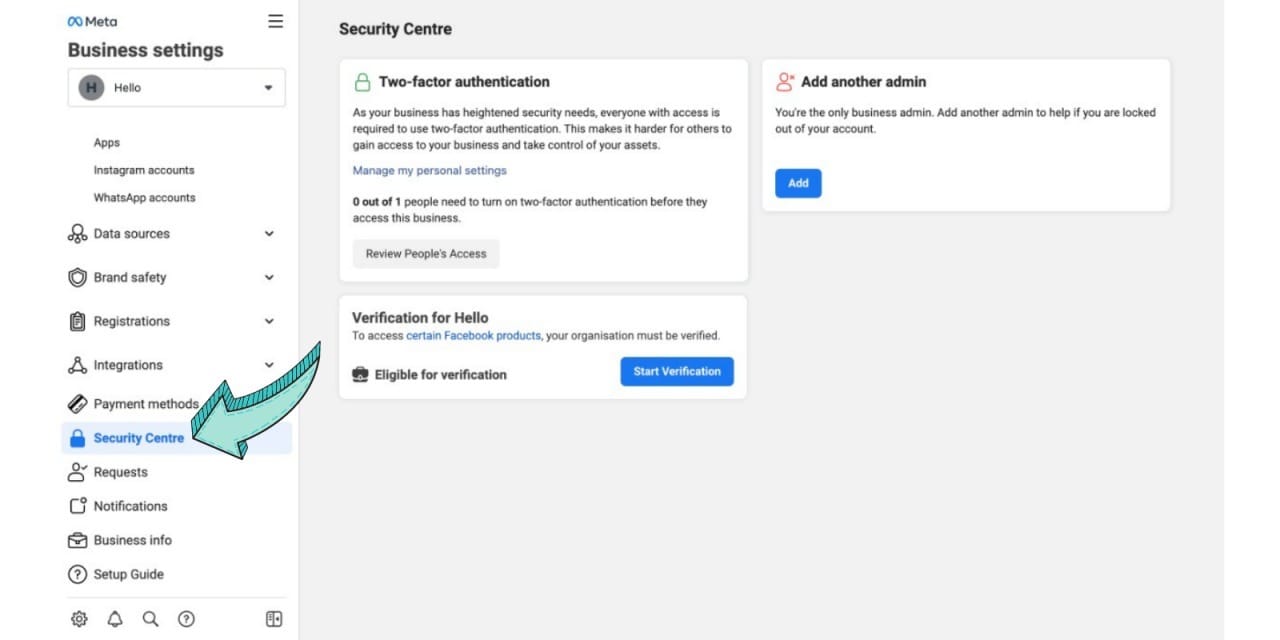
Go to Security Center
From Facebook Business Settings, choose the 'Security Center' Page.Refer to the image on the left to know its location.
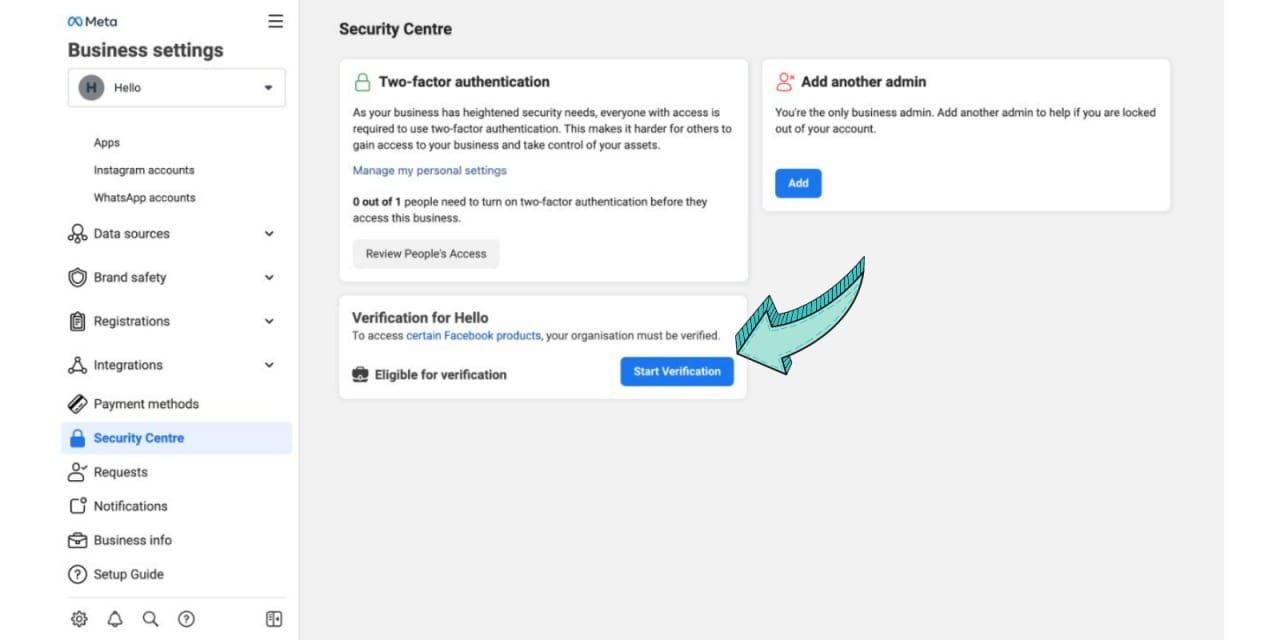
Click the 'Start Verification' Button
In security settings, click 'Start Verification'.If the 'Start Verification' button doesn't appear or is greyed out, you must follow some steps to enable it.
How to Enable the 'Start Verification' Button
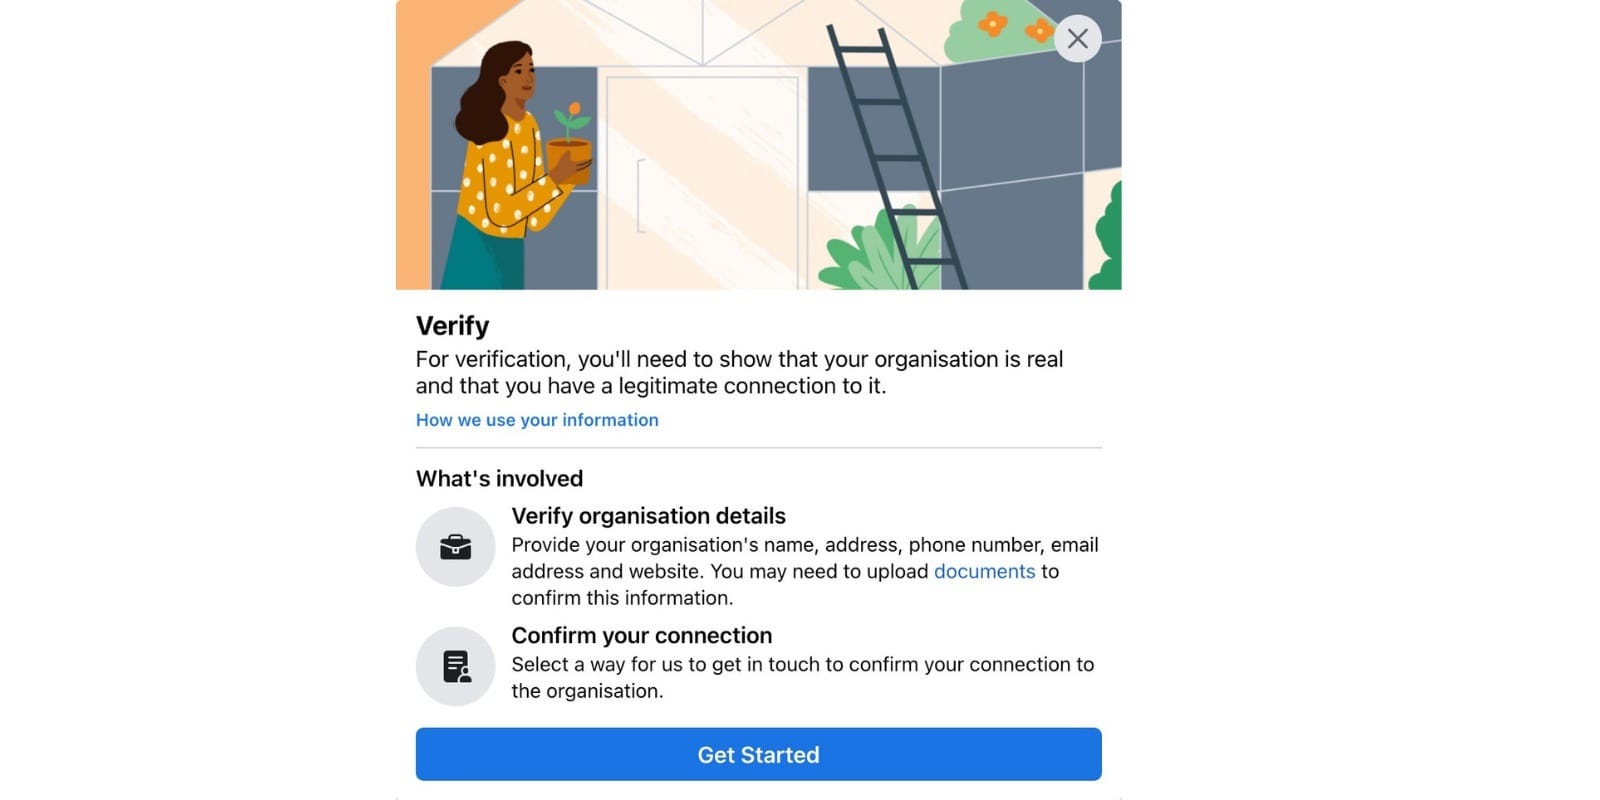
Click 'Get Started'
If you can see your 'Start Verification' Button, click it & press 'Get started' on the next screen (as shown in the image).
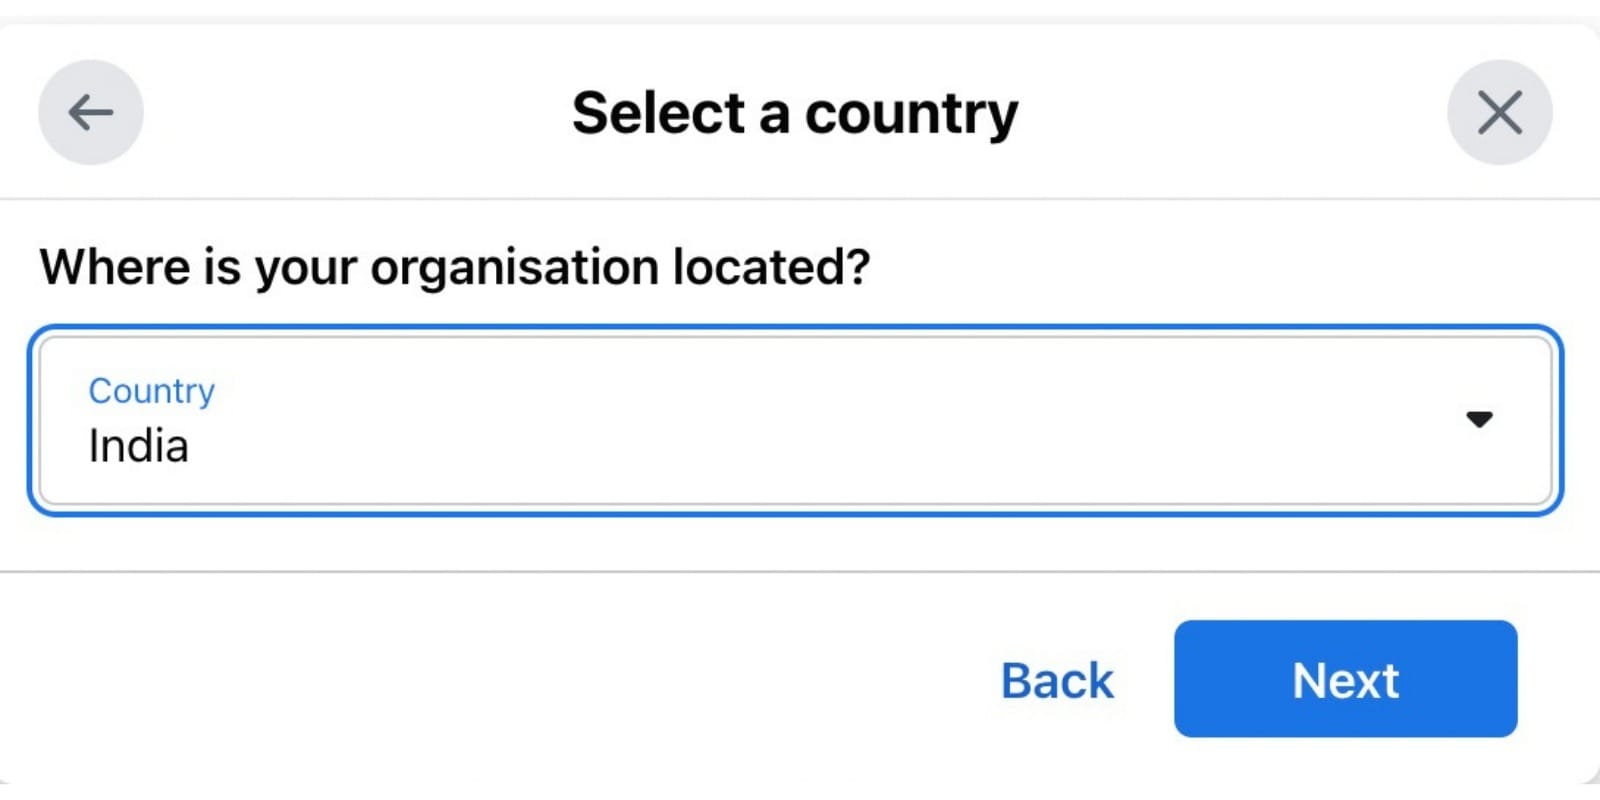
Select Country
In this step, select the country where your business is primarily based.
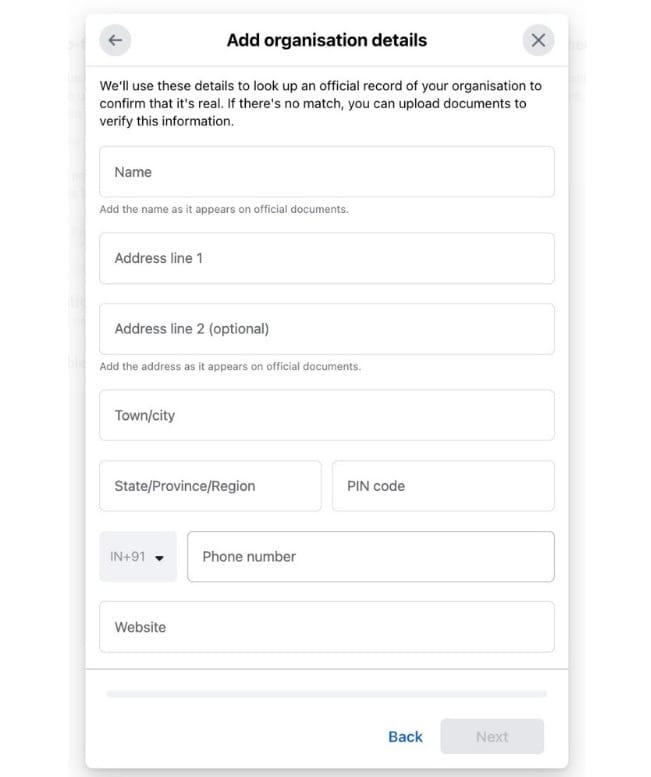
Fill in Organization Details
Carefully fill in your Organization's details!In the name section, fill in the Exact Name mentioned in your legal document.In the address, write the Same Address as mentioned in your legal document. Adding a different one might cause problems with your approval from Facebook.In the address row, be sure to add only the location of your business and not the state & Pincode. E.g. If your address is 3013, Chandni Chowk, Sita Ram Bazar, Old Delhi, 110006.Then, only add '3013, Chandni Chowk, Sita Ram Bazar' in the address row.Add Delhi in City & State and 110006 in Pincode.Add the Town, State & Pincode in the next row as shown in the above image.In phone number, it's not necessary to add your WhatsApp Business API number.You can add any other business number you wish to receive communication from on Facebook.Last, add the URL to your website. This website should contain the business's legal name at the footer so that facebook verifies that this business is linked with the legal name.
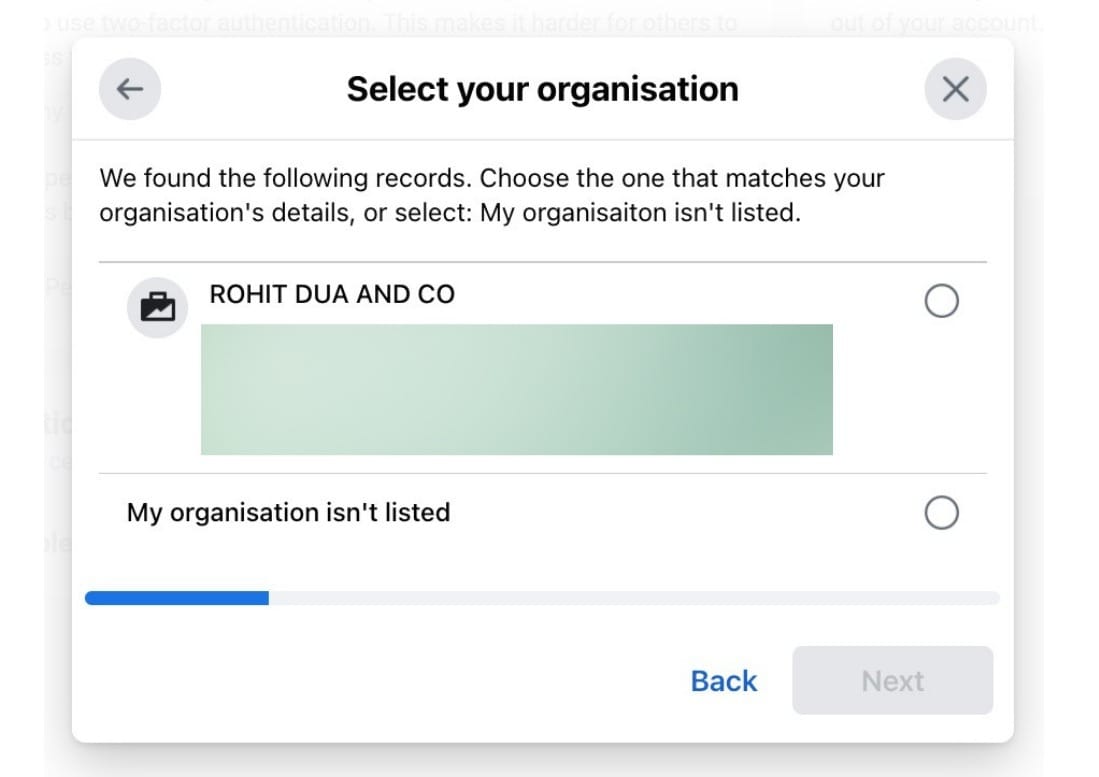
Choose your company or click 'Organization not listed'
Once you submit all the details, Facebook verifies which all companies match the entered details.Choose only the company with the exact matching details with your business.You should also have your business phone number for verification.Even if your organization's not listed, don't worry. Click 'Organization not listed' & proceed to the next step.
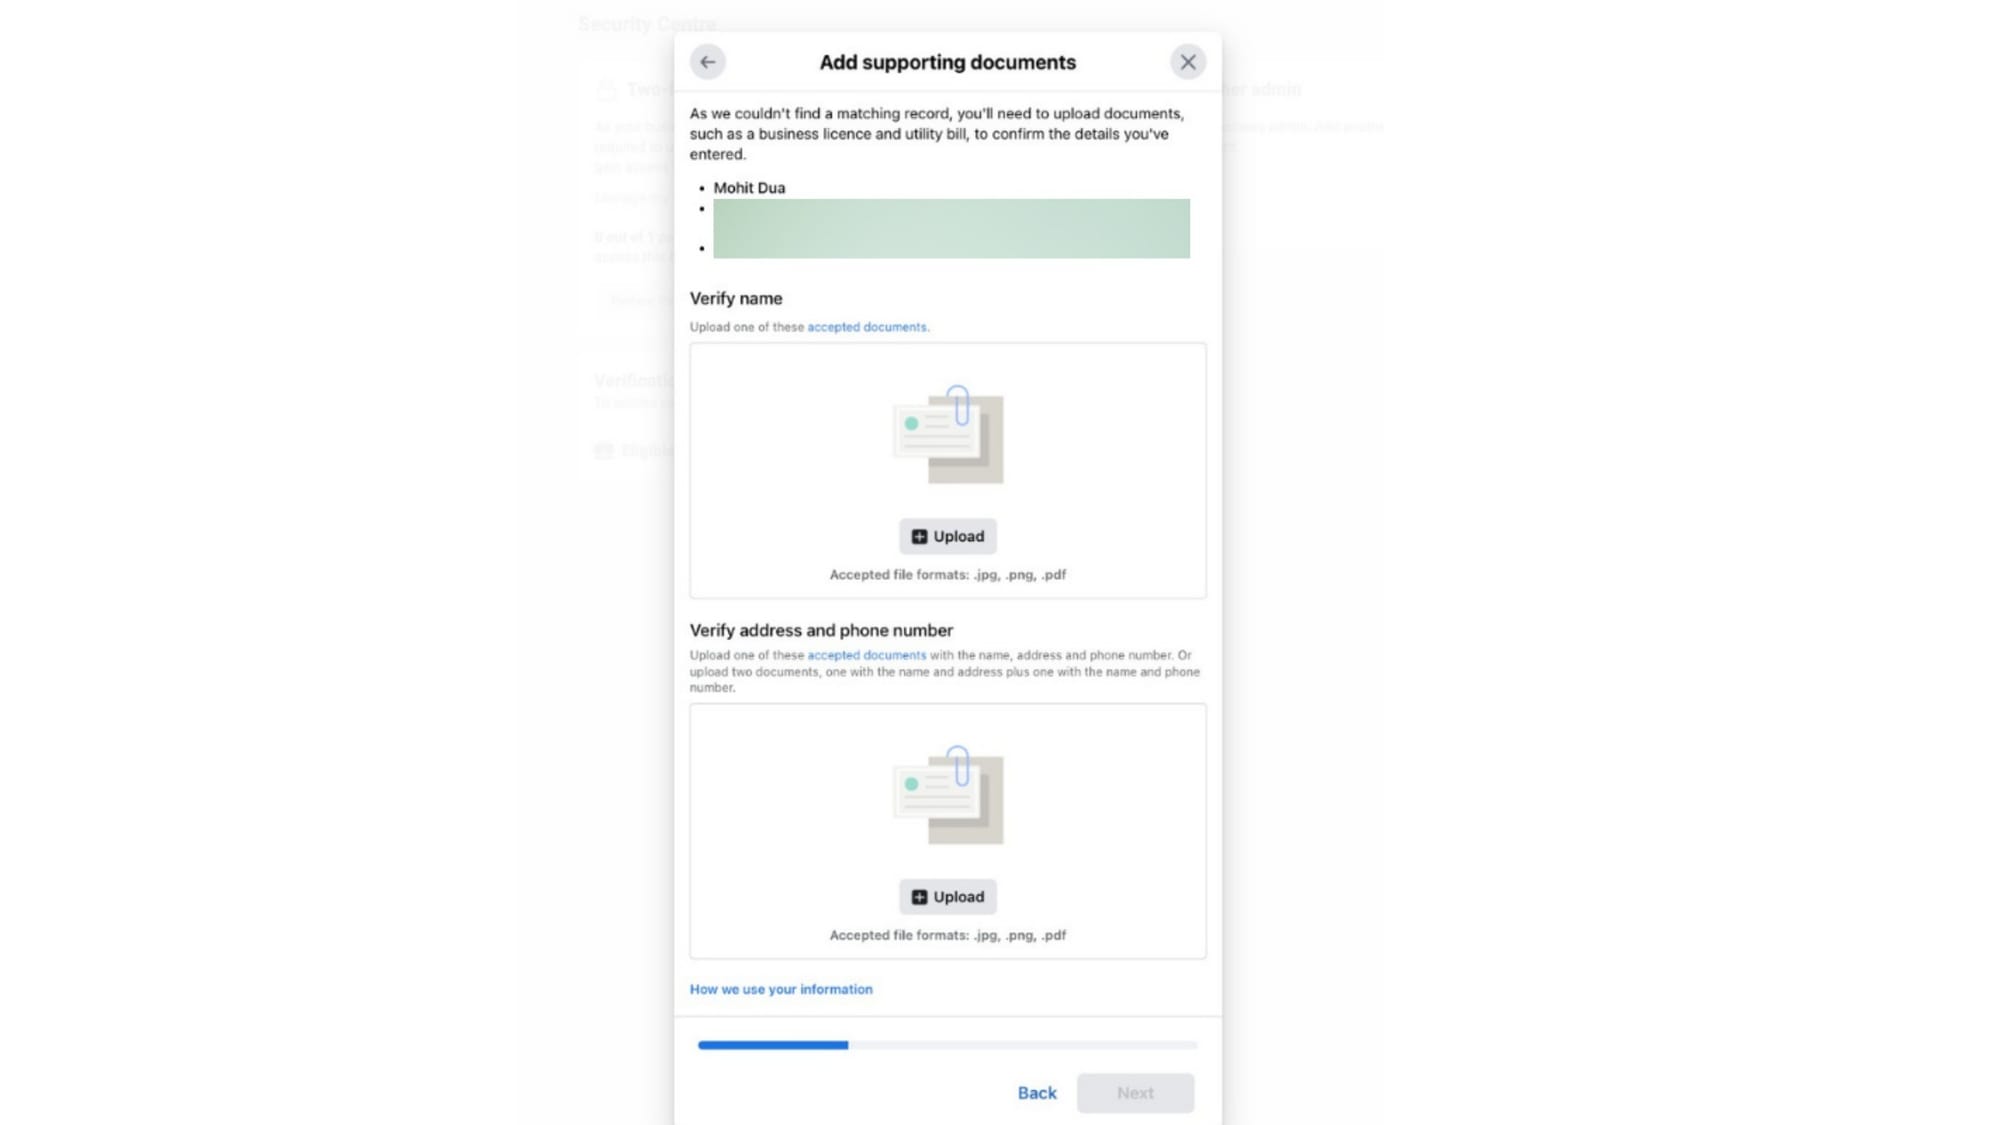
Add supporting documents for your Business
If in the previous step, your business wasn't listed, add supporting documents to verify your business. Make sure to upload the same document in both places to avoid confusion.
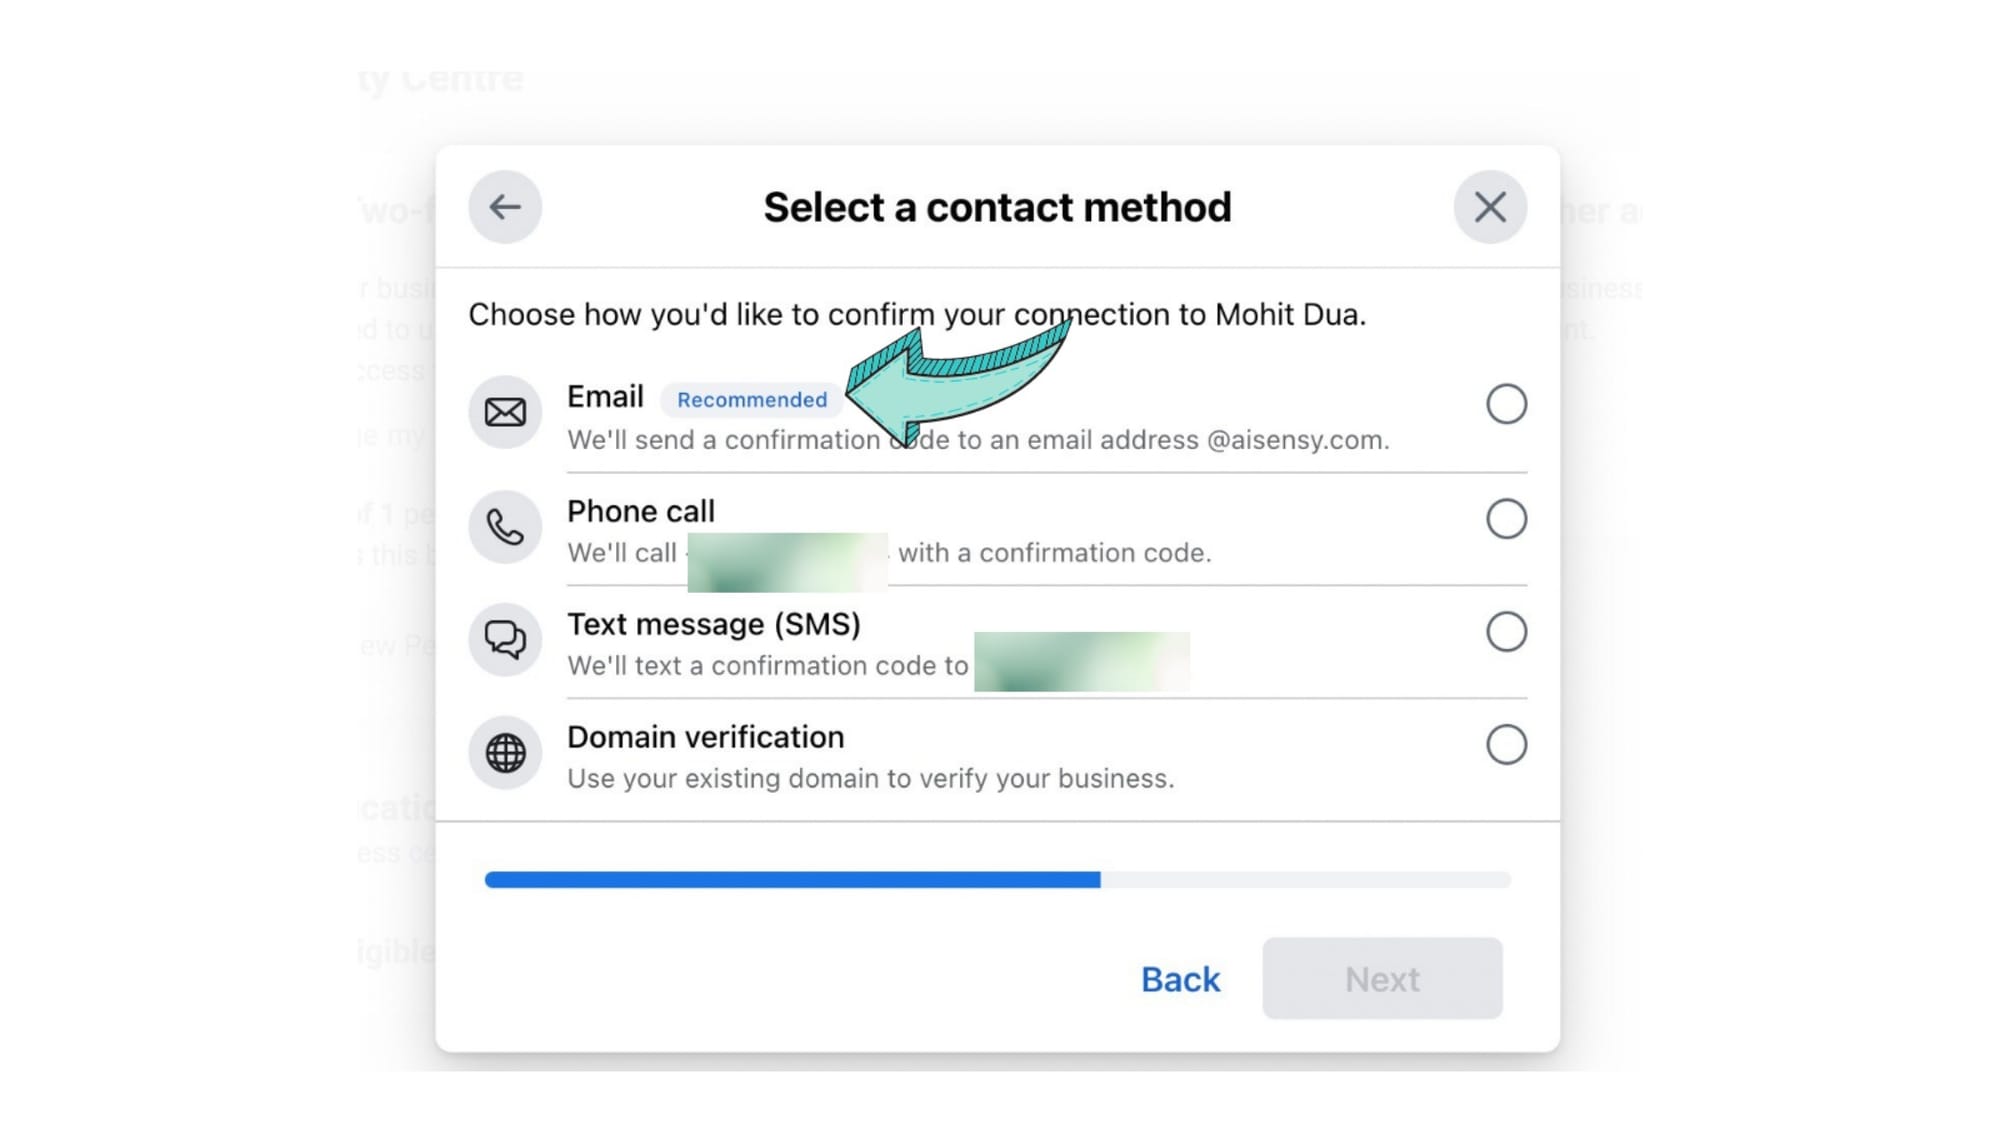
Choose a Contact Method
Note: Email is the recommended source of contact and improves your chances of getting verified.Add your official business email ID with your same domain name (e.g. shivam@messegy.com) & press next.If you don't have a registered email ID with your domain name, choose phone or text for verification.
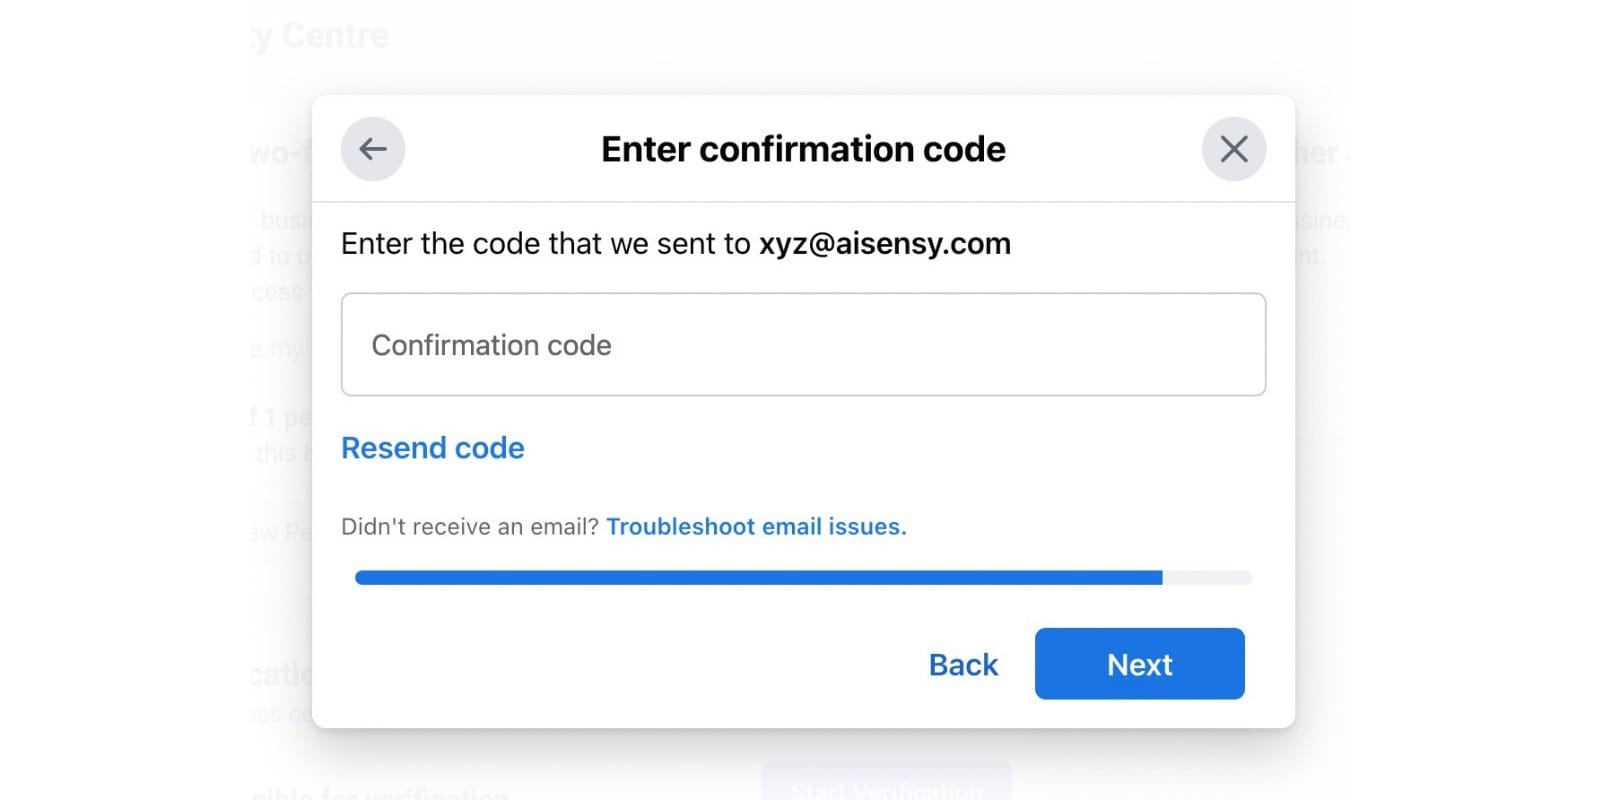
Verify the sent code
Last, verify the code sent to your Email ID or enter the OTP sent via text or phone.
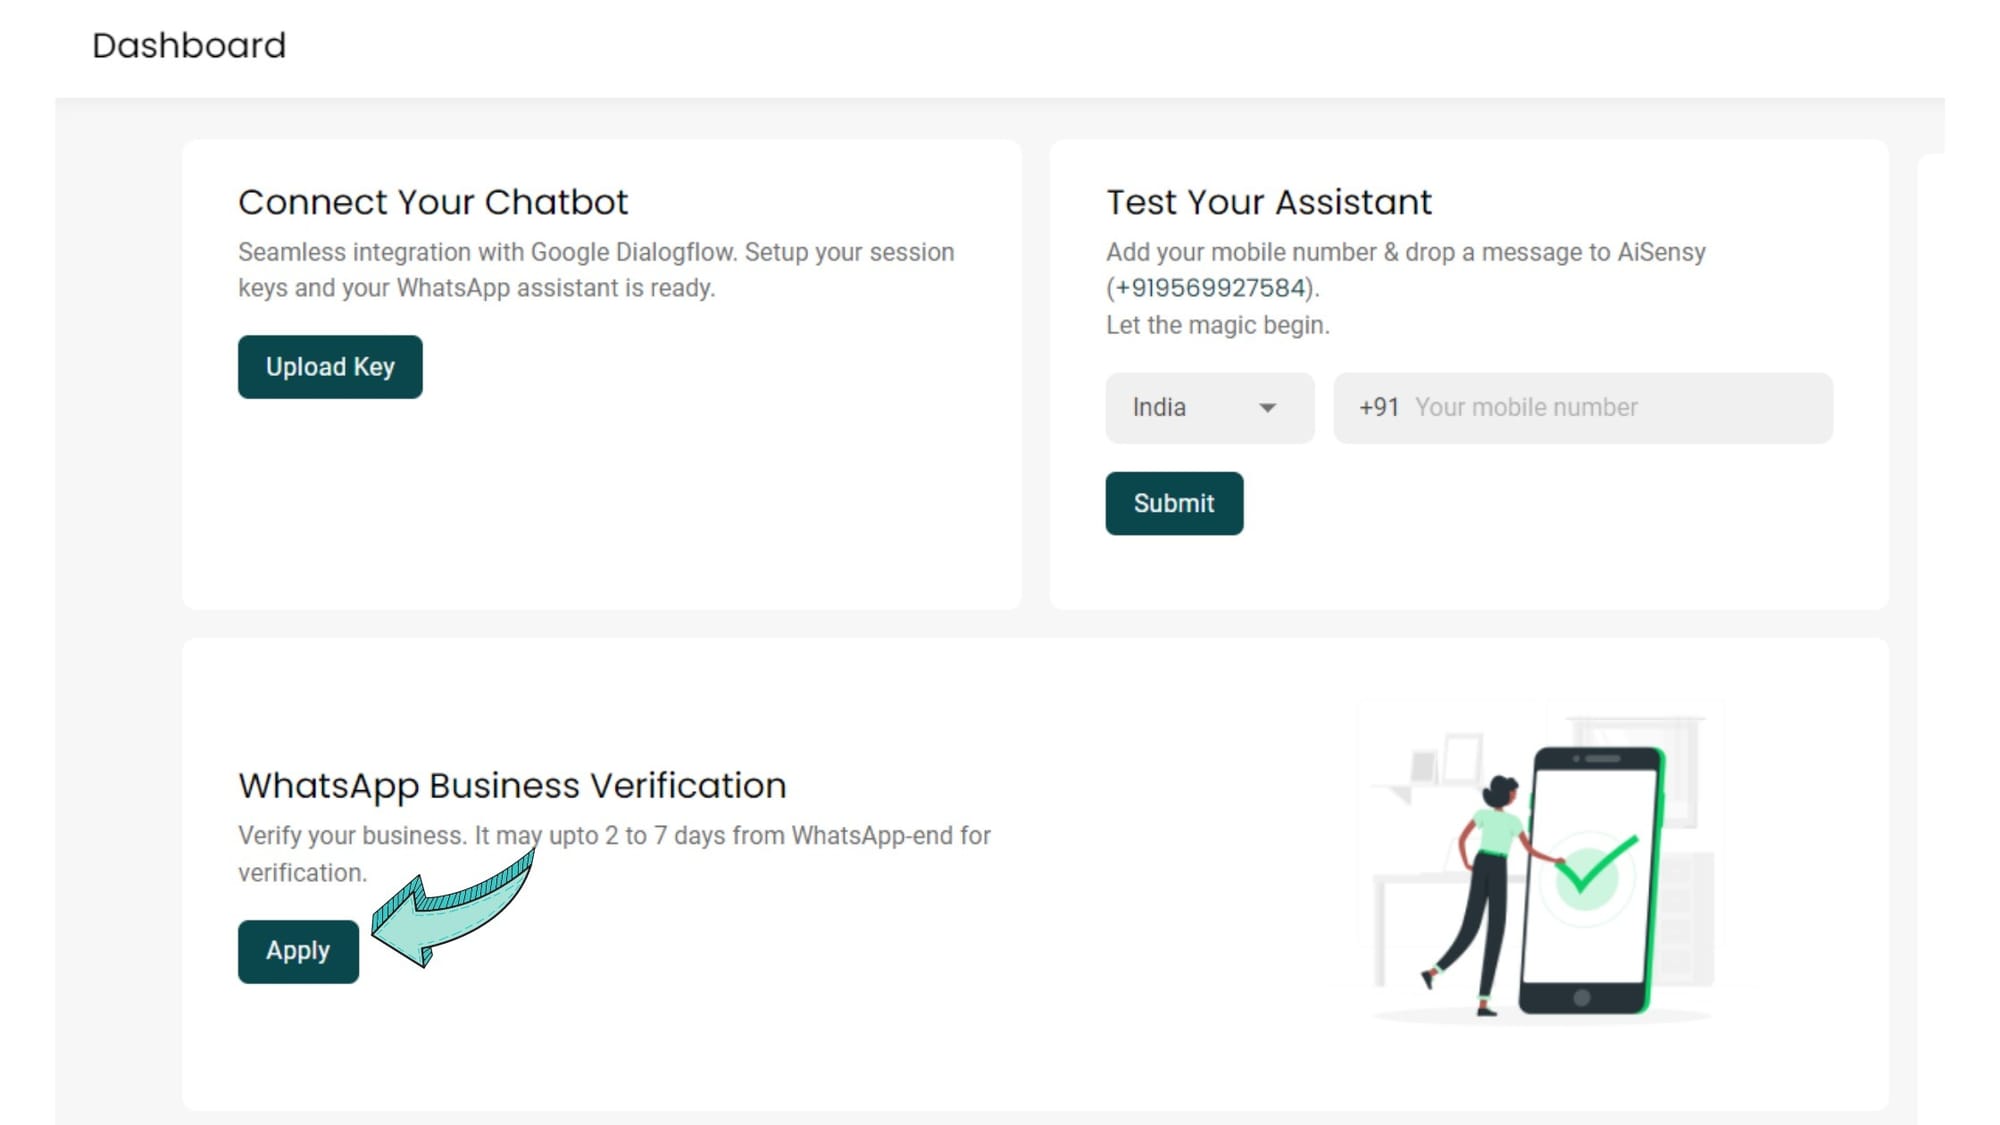
Apply & get approval for WhatsApp Business API (in 10 Minutes)
Apply for the WhatsApp Business API with Messegy & get approval as fast as 10 minutes.You can also created a FREE Messegy Account, which allows businesses to:- Access the WhatsApp Business API at no cost.- Apply for Free Verified Blue tick Application- Get ₹500 Free WhatsApp Ad credits- Free Click to WhatsApp Ads Manager- ₹50 Free WhatsApp Conversation Credits- Unlimited free service conversations And more!
Create FREE Messegy Account
Why Apply for WhatsApp Business APi with Messegy?
Apply for WhatsApp Business API with Messegy and transform your business communication.

Official WhatsApp Partner
Trusted and reliable.
Learn more
Free WhatsApp Business API
No hidden costs or setup fees.
Learn more
Unmatched Support
Get assistance at every step of the process.
Ready to get Started?
Get Started for FREE. No Credit Card needed.⚡️Powered by Official WhatsApp Business API
Book a DemoStart for FREE