Looking to migrate from WhatsApp Cloud API? Get started with Meta Business Partner Messegy for FREE now.

How to downgrade your current WhatsApp Cloud API?
To migrate your WhatsApp Cloud API to Messegy, you first need to downgrade your Cloud API account. Follow these easy steps to downgrade from WhatsApp Cloud API.
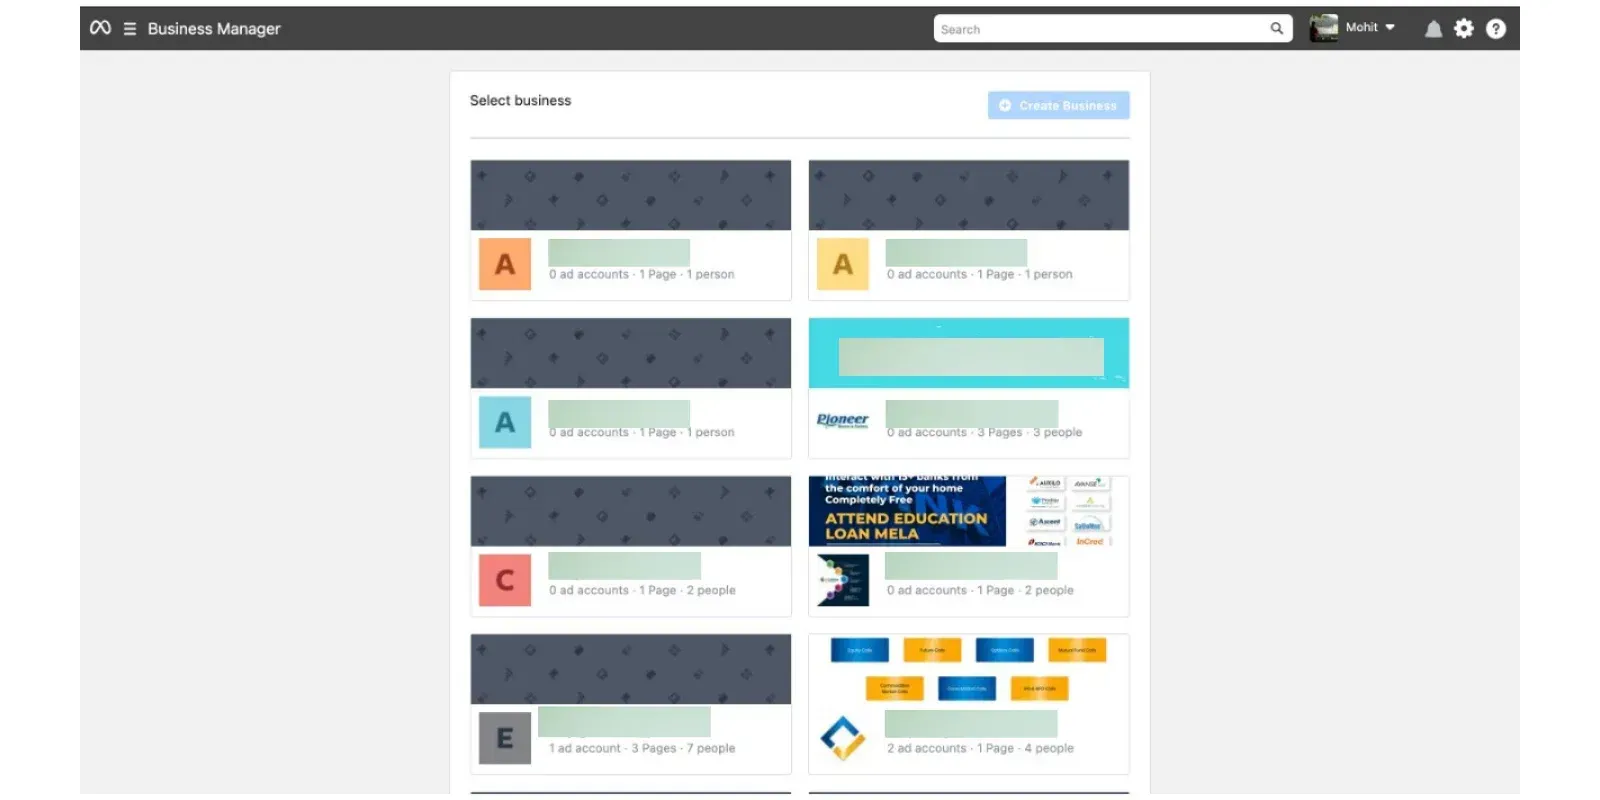
Go to Facebook Business Manager
Open the Facebook Business Manager Page.This will open to a new tab on your Facebook Business Account.
Facebook Business Manager
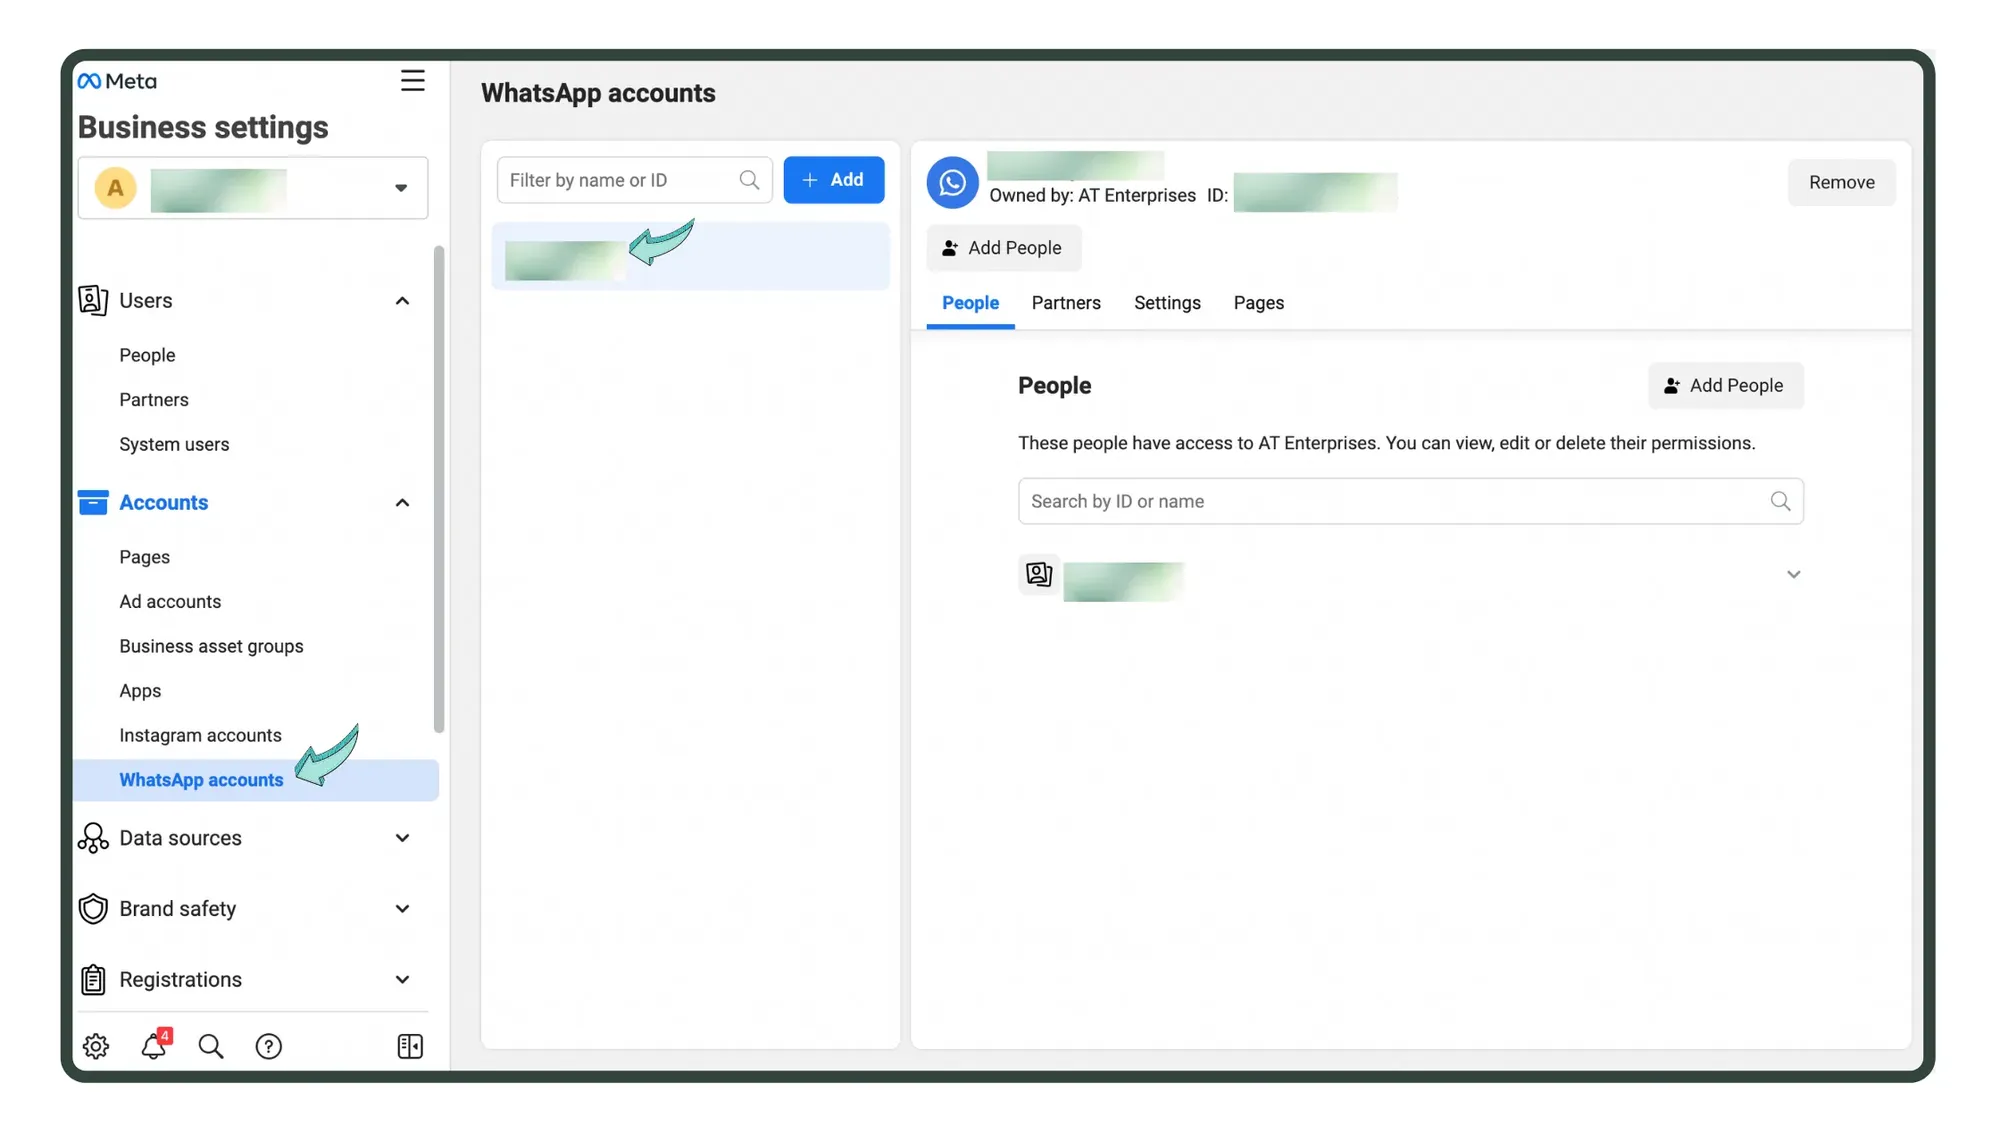
Click on 'WhatsApp Accounts' option
In the Facebook Business Manager, click on 'WhatsApp Accounts' from the left panel & choose the WhatsApp Cloud API account you wish to downgrade.In case you have multiple WhatsApp Cloud API accounts, select the one you want to downgrade.
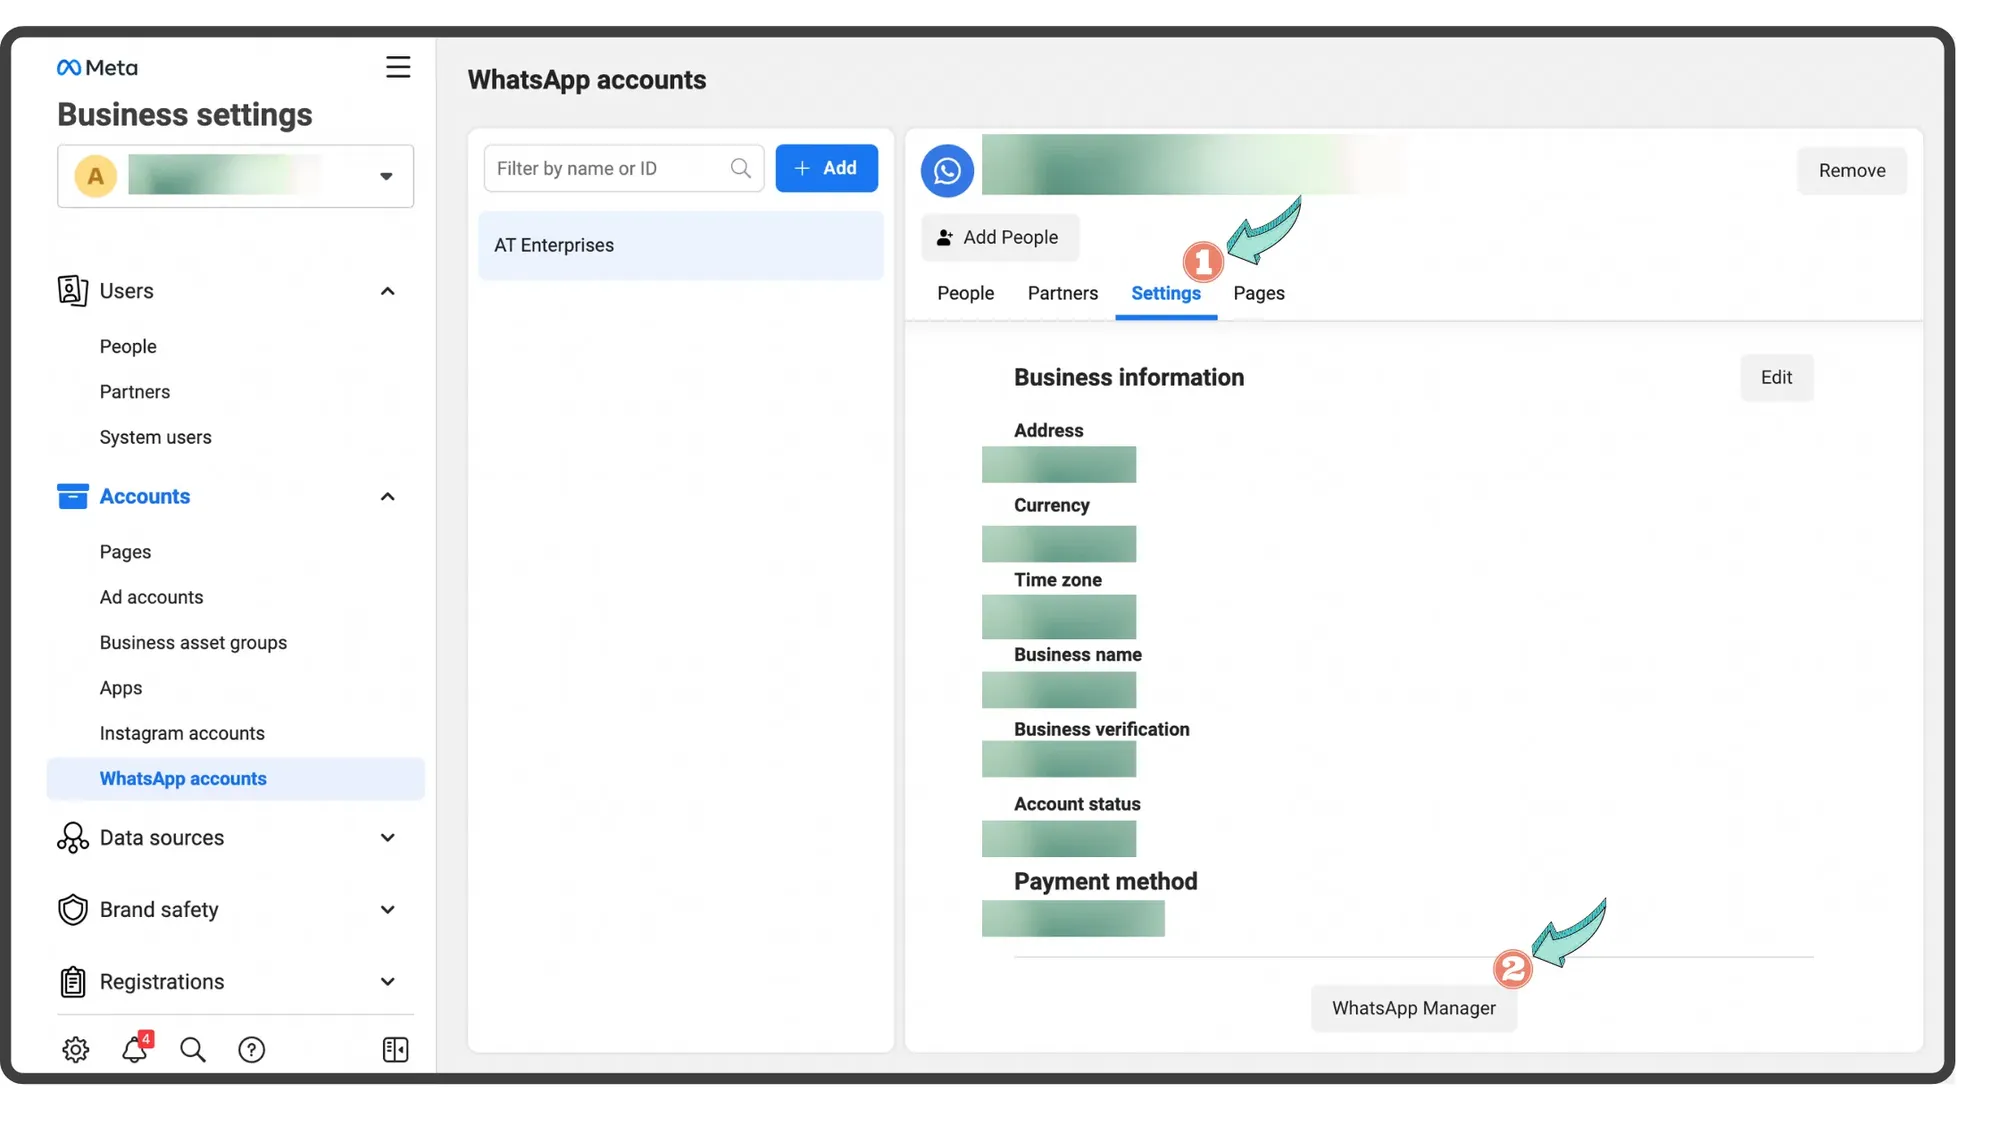
Go to Settings
Under settings, press 'WhatsApp Manager' at the bottom of your screen.
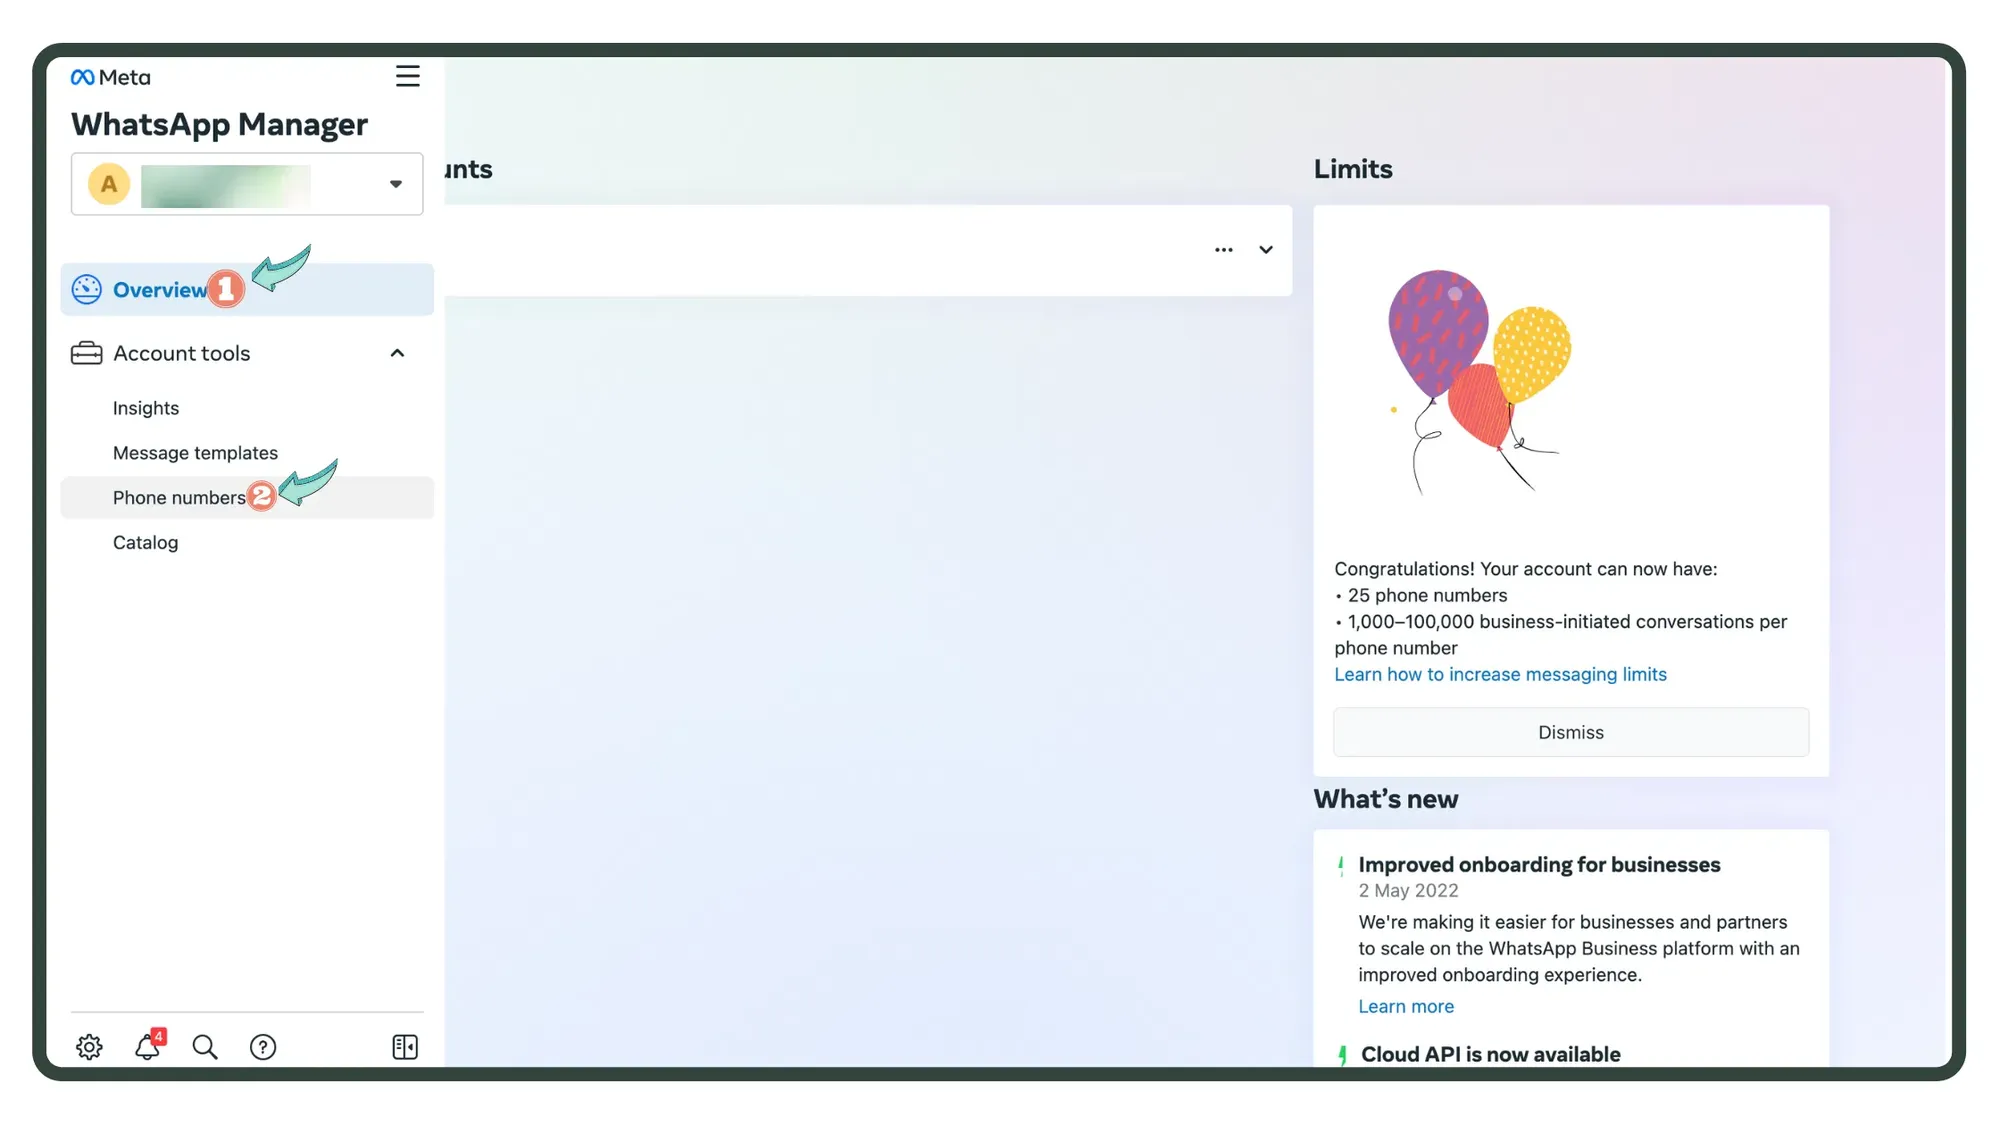
Go to Account Tools
Under the Account Tools section, click on the 'Phone numbers' option.
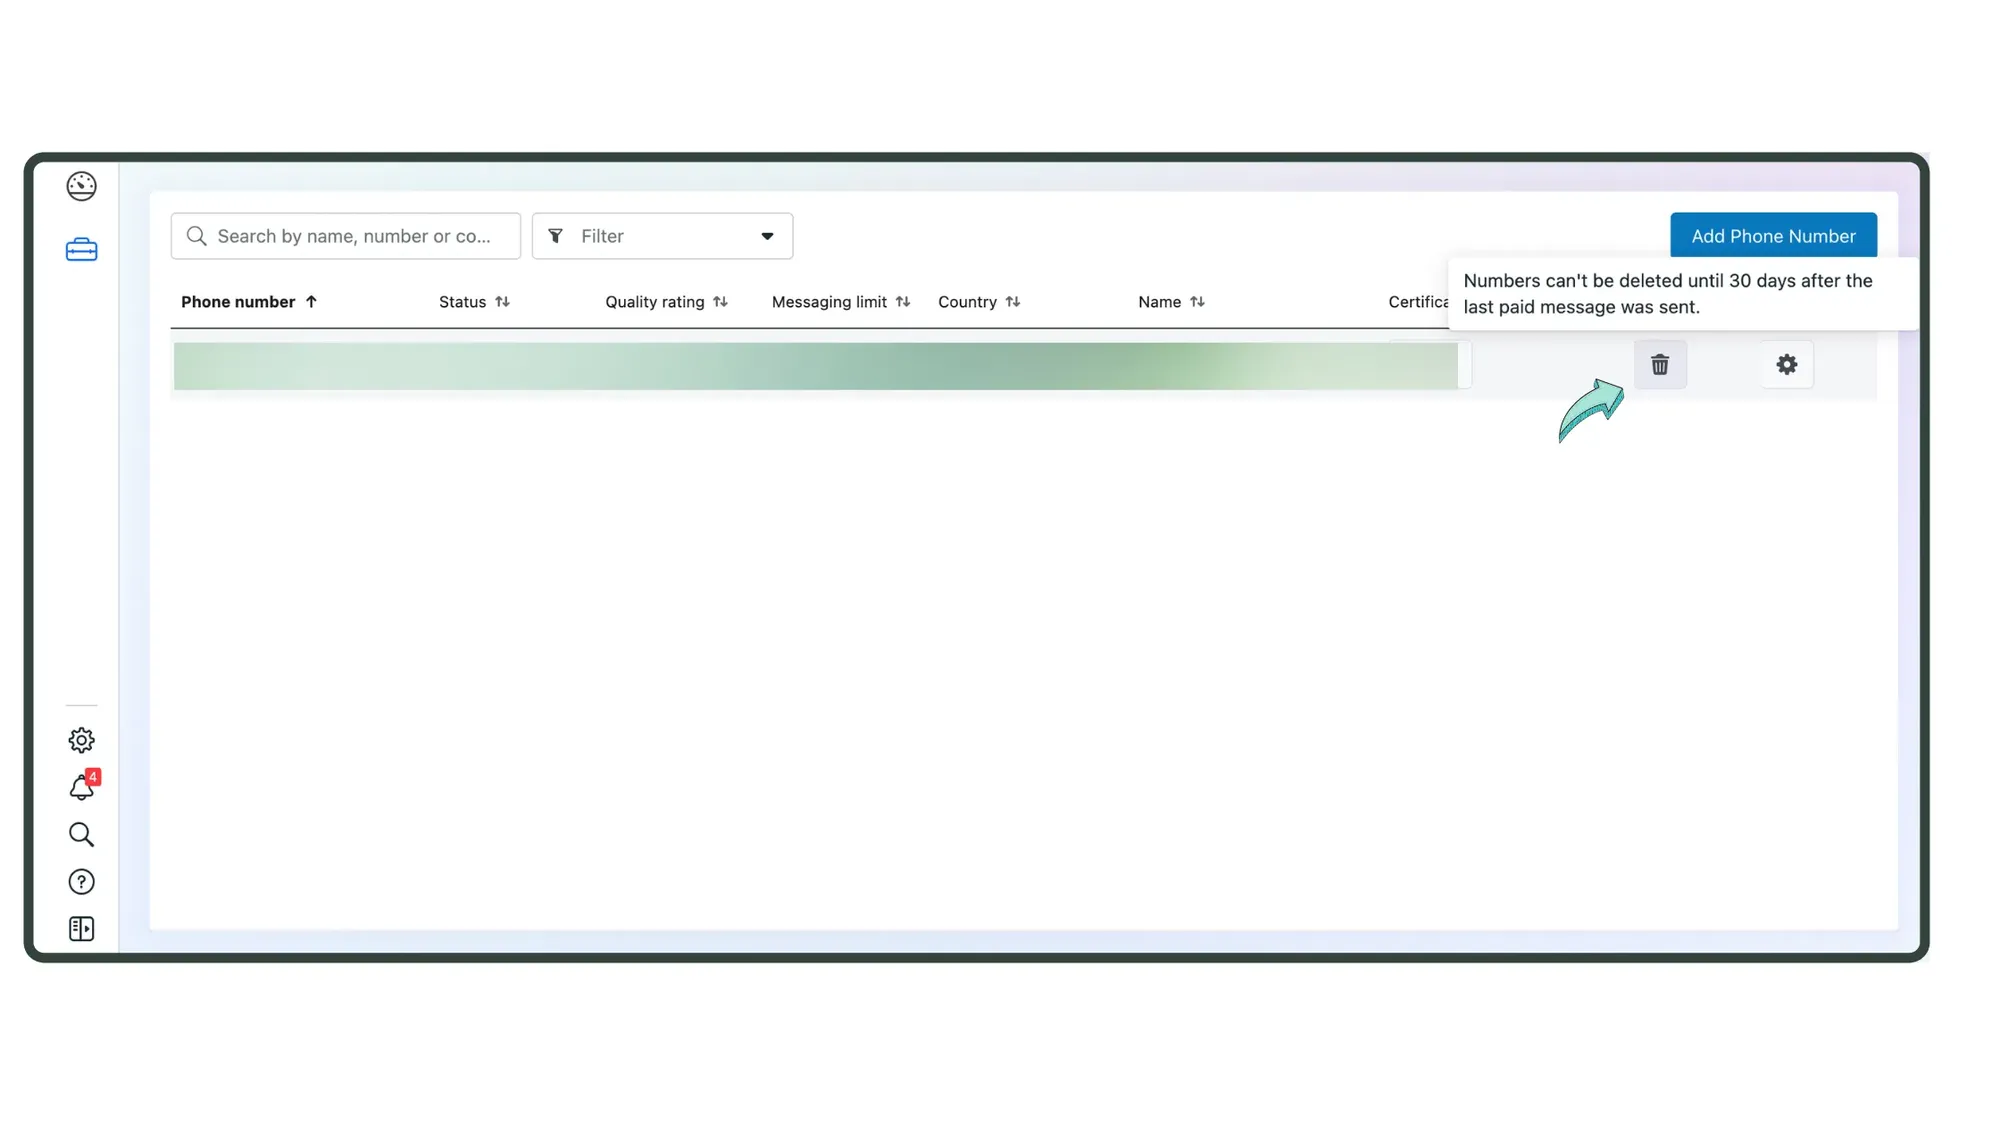
Click the trash bucket icon
On the next screen, click the 'trash bucket' icon to downgrade your WhatsApp Cloud API account.
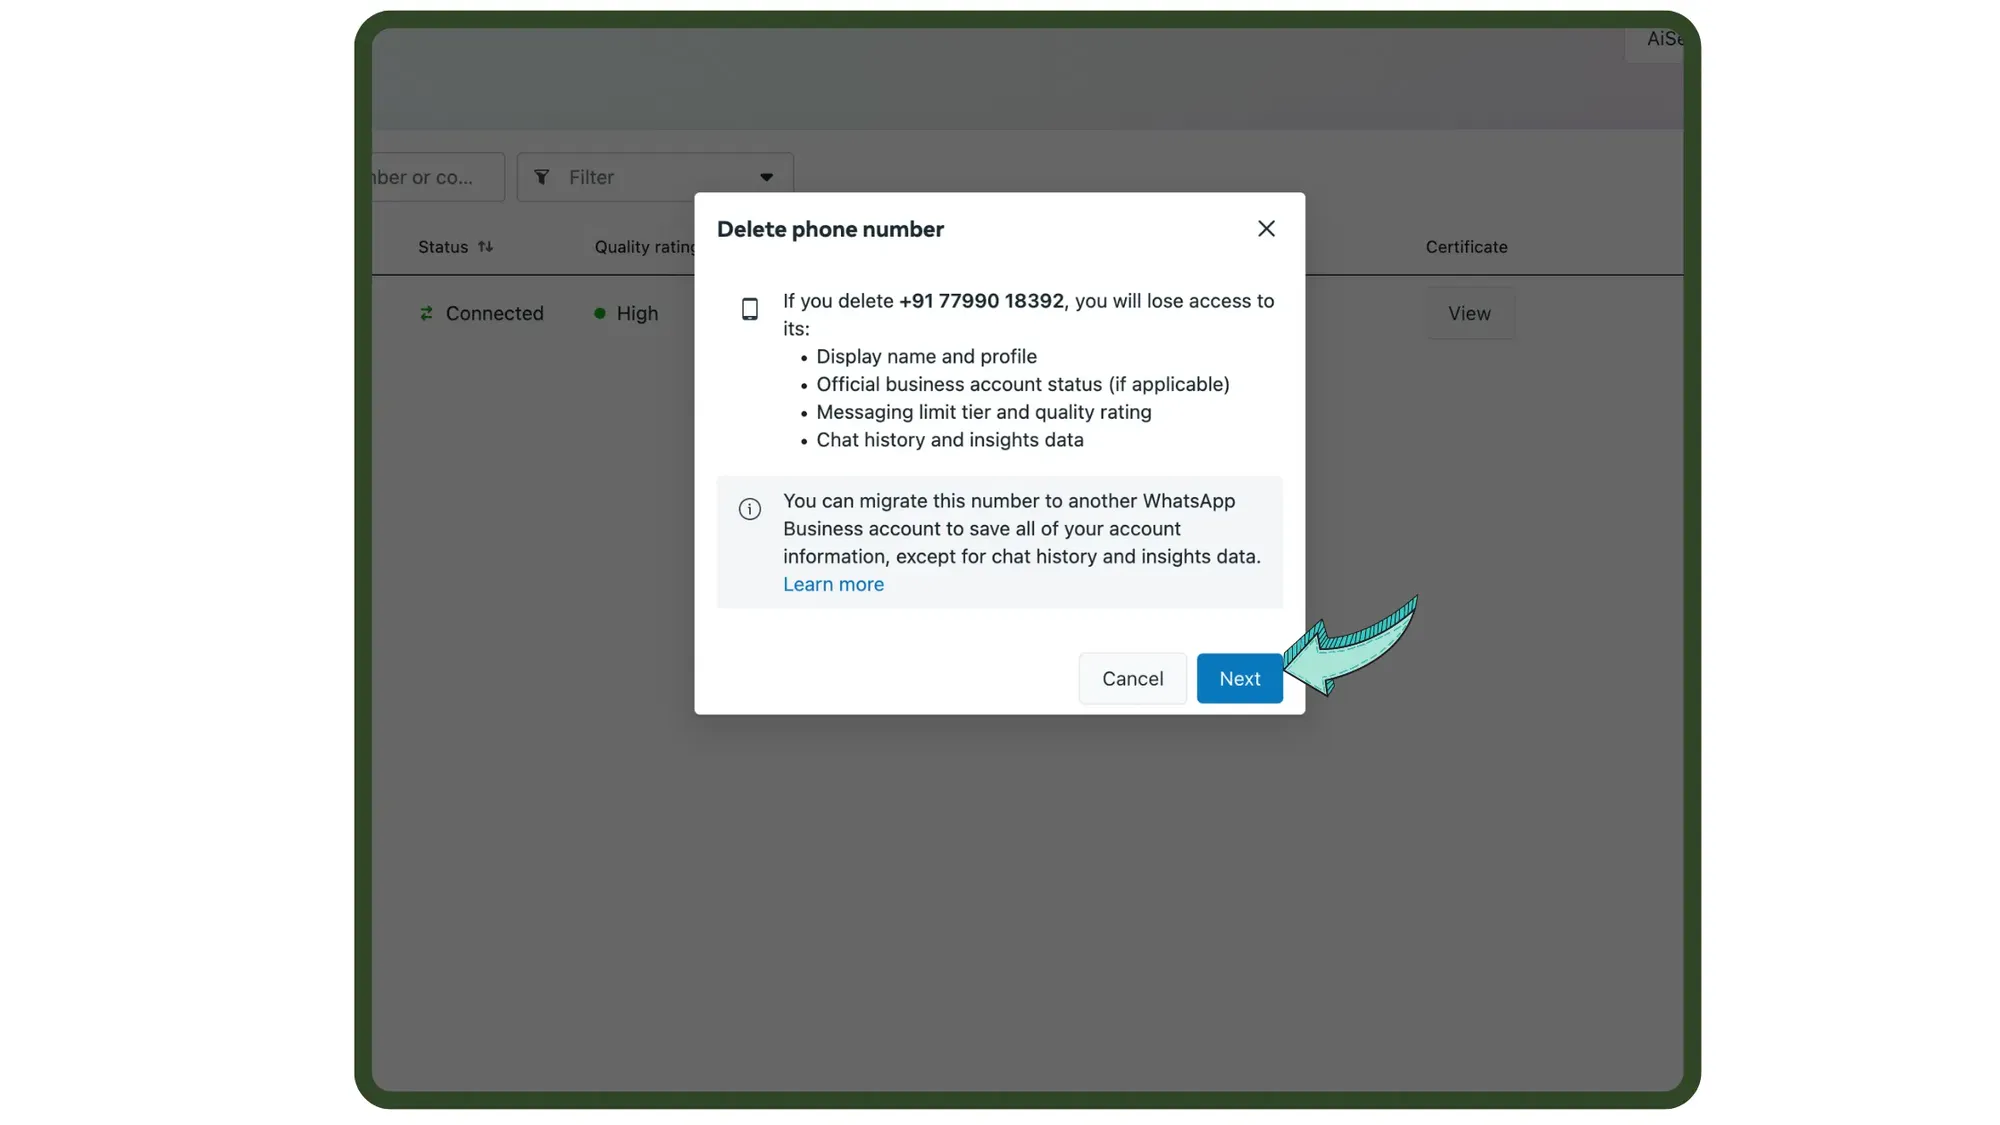
Click Next
On clicking the trash bucket, you'll be informed about the option to save your data by migrating to a different WhatsApp Business Service Provider (BSP). Click 'Next' to migrate your account.
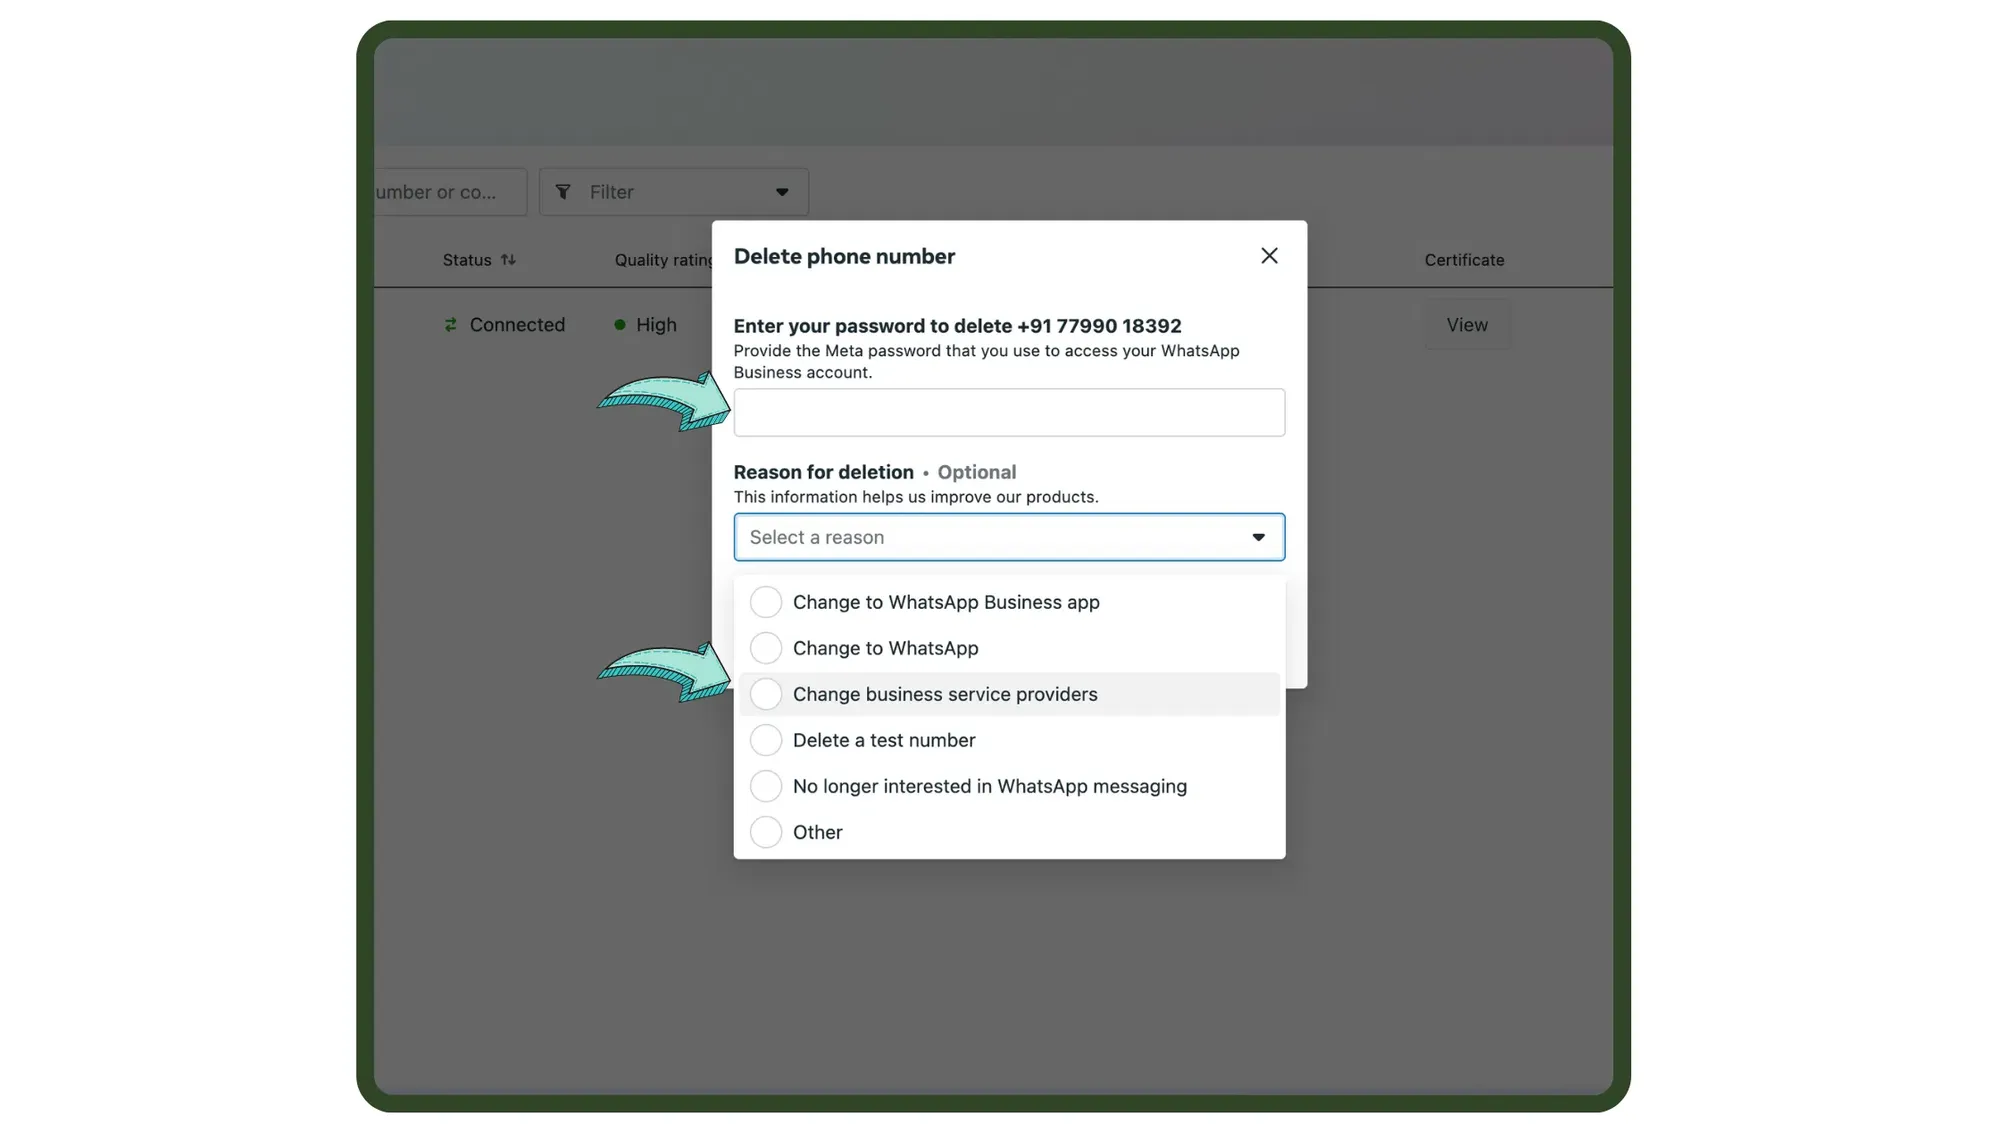
Enter password and reason to delete account
Next, enter your Facebook password & under the reason for deletion choose, 'Change Business Service Providers.'
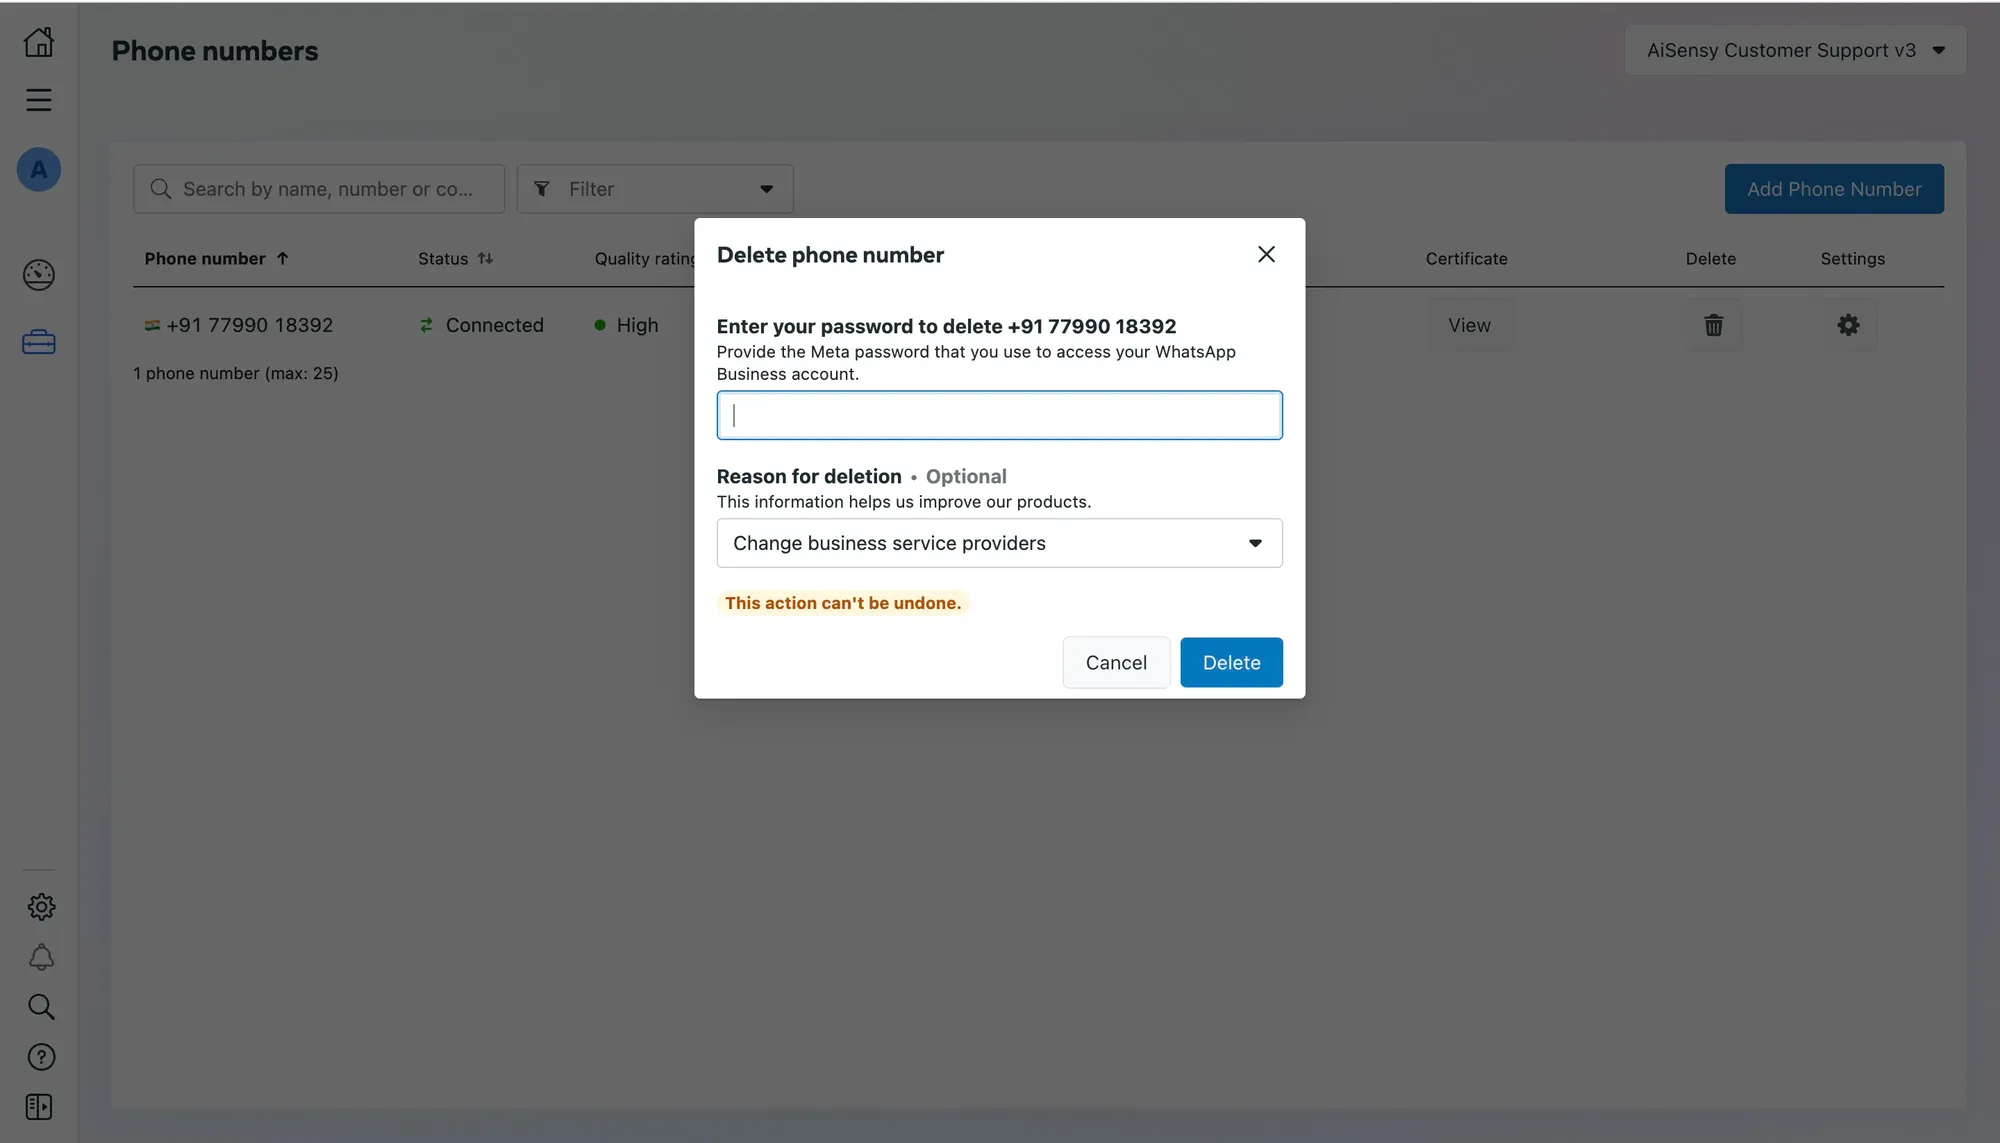
Downgrade your WhatsApp Cloud API Account
Last, click 'Delete' to successfully downgrade your WhatsApp Cloud API account & be able to apply for WhatsApp Business API with Messegy. Follow the below steps to apply for WhatsApp Business API with Messegy.
How to apply for FREE WhatsApp Business API with Messegy?
Show step by step how to get started
Signup on Messegy App
Go to Messegy Signup Page by clicking the button below. You can signup with your Google account or if you use a different business email, fill in the form.
Signup for FREE
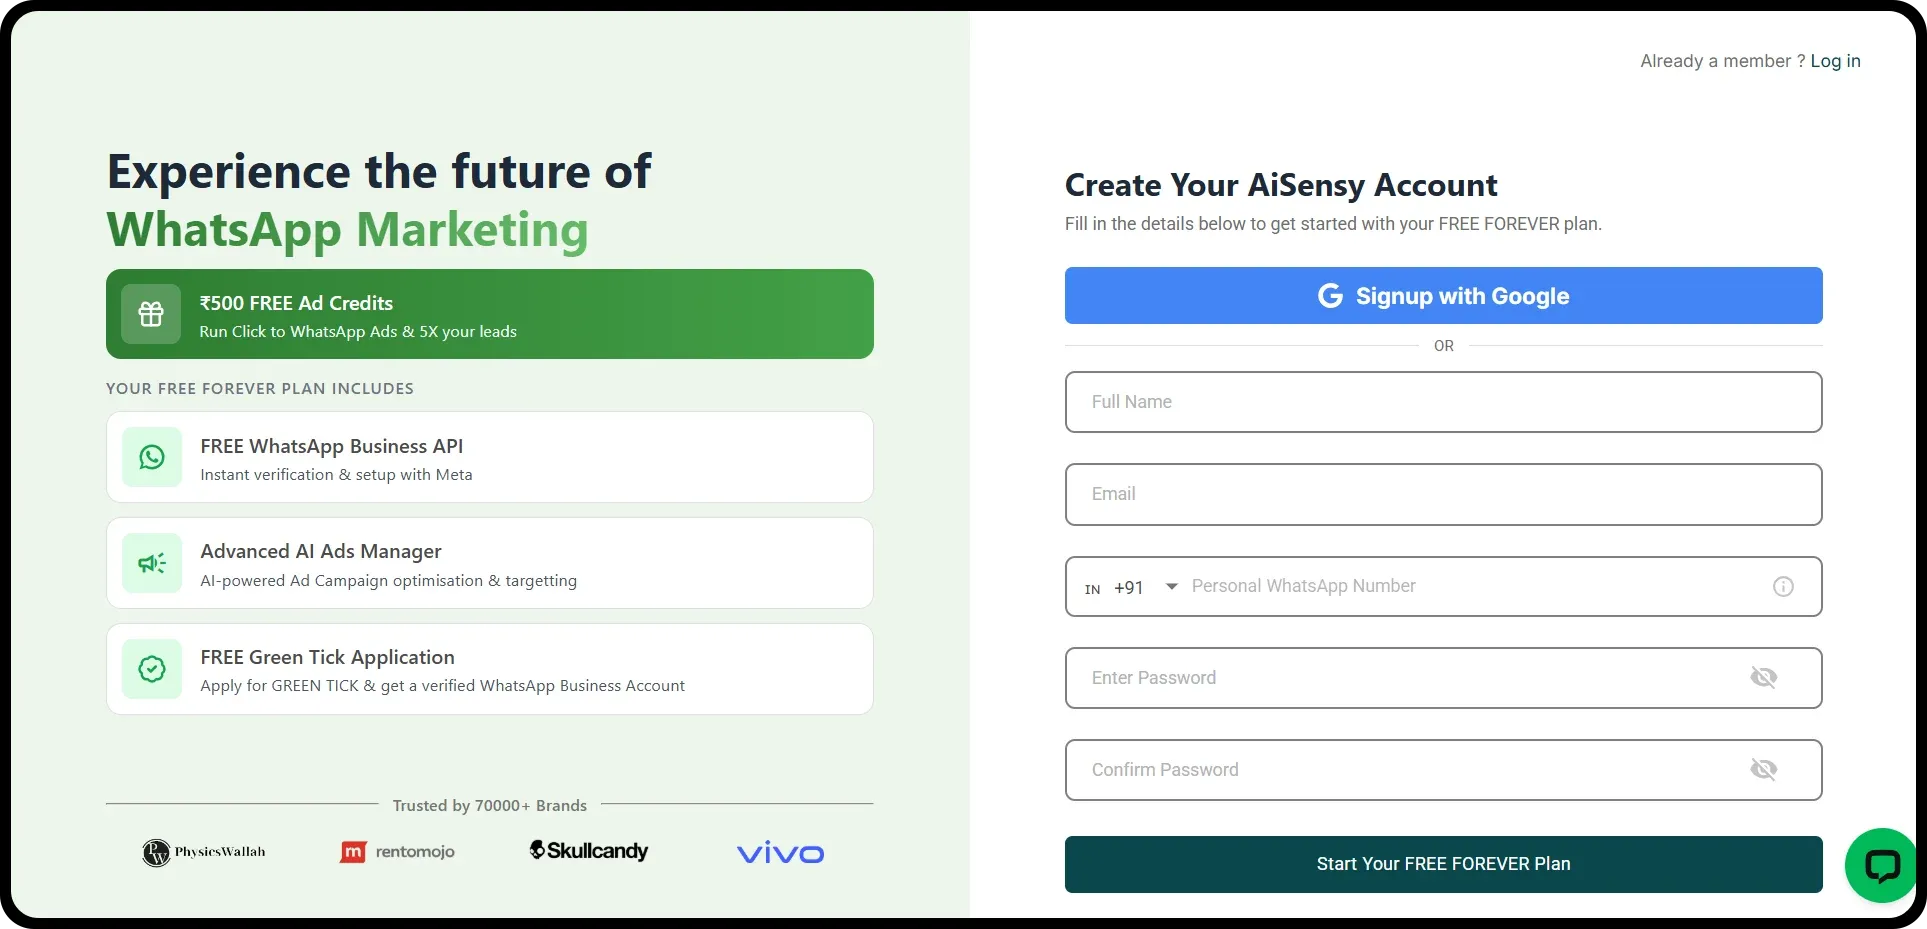
Add Personal & Company Details
Enter important Business details like Company Name, size, industry, billing currency & timezone so that we can customise your experience.Once done, click on the “Complete Signup” button to proceed ahead
You've now activated your Forever Free Plan
Now you have an Free Messegy account, which includes:• FREE WhatsApp Business API: Instant verification & setup with Meta• Advanced AI Ads Manager: AI-powered Ad Campaign optimisation & targetting• FREE Green Tick Application: Apply for GREEN TICK & get a verified WhatsApp Business Account
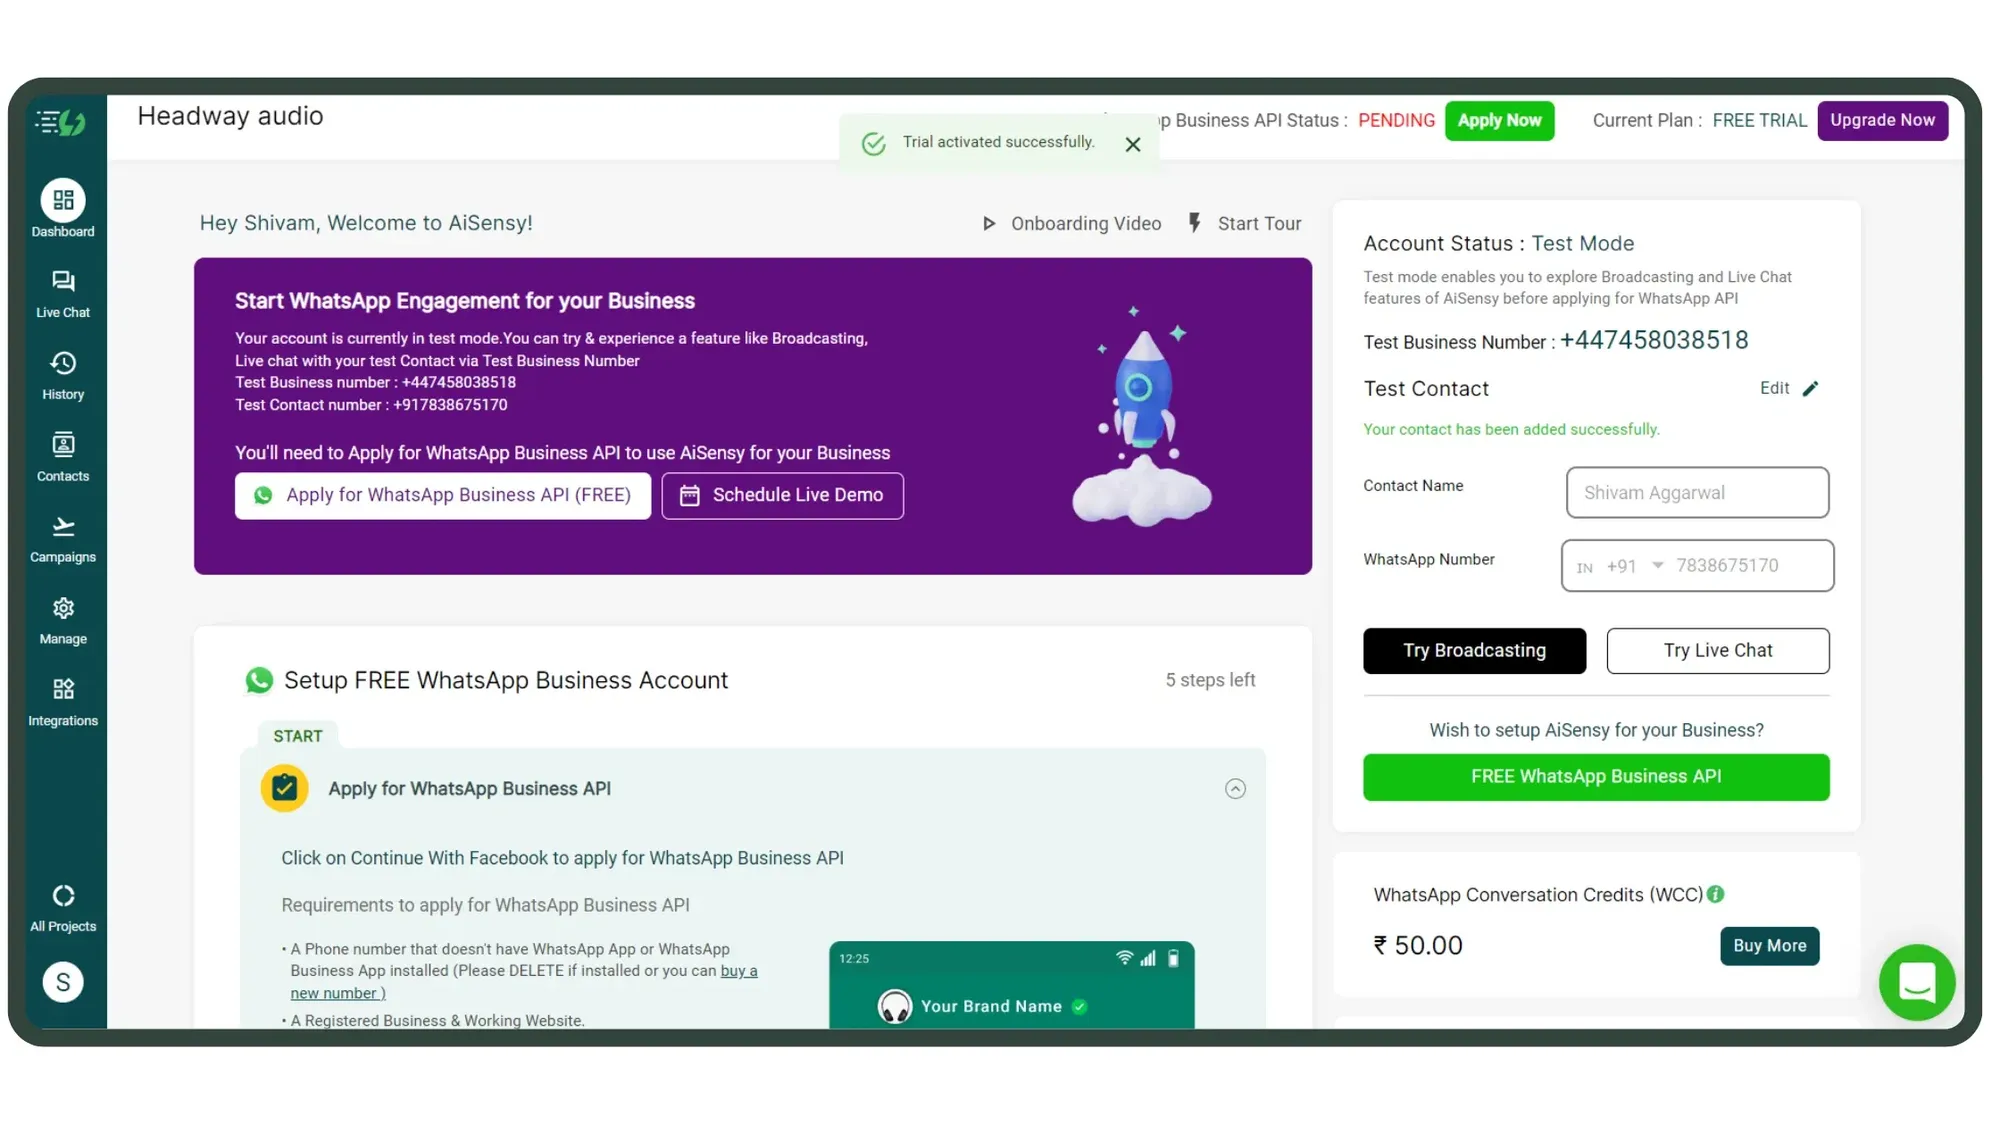
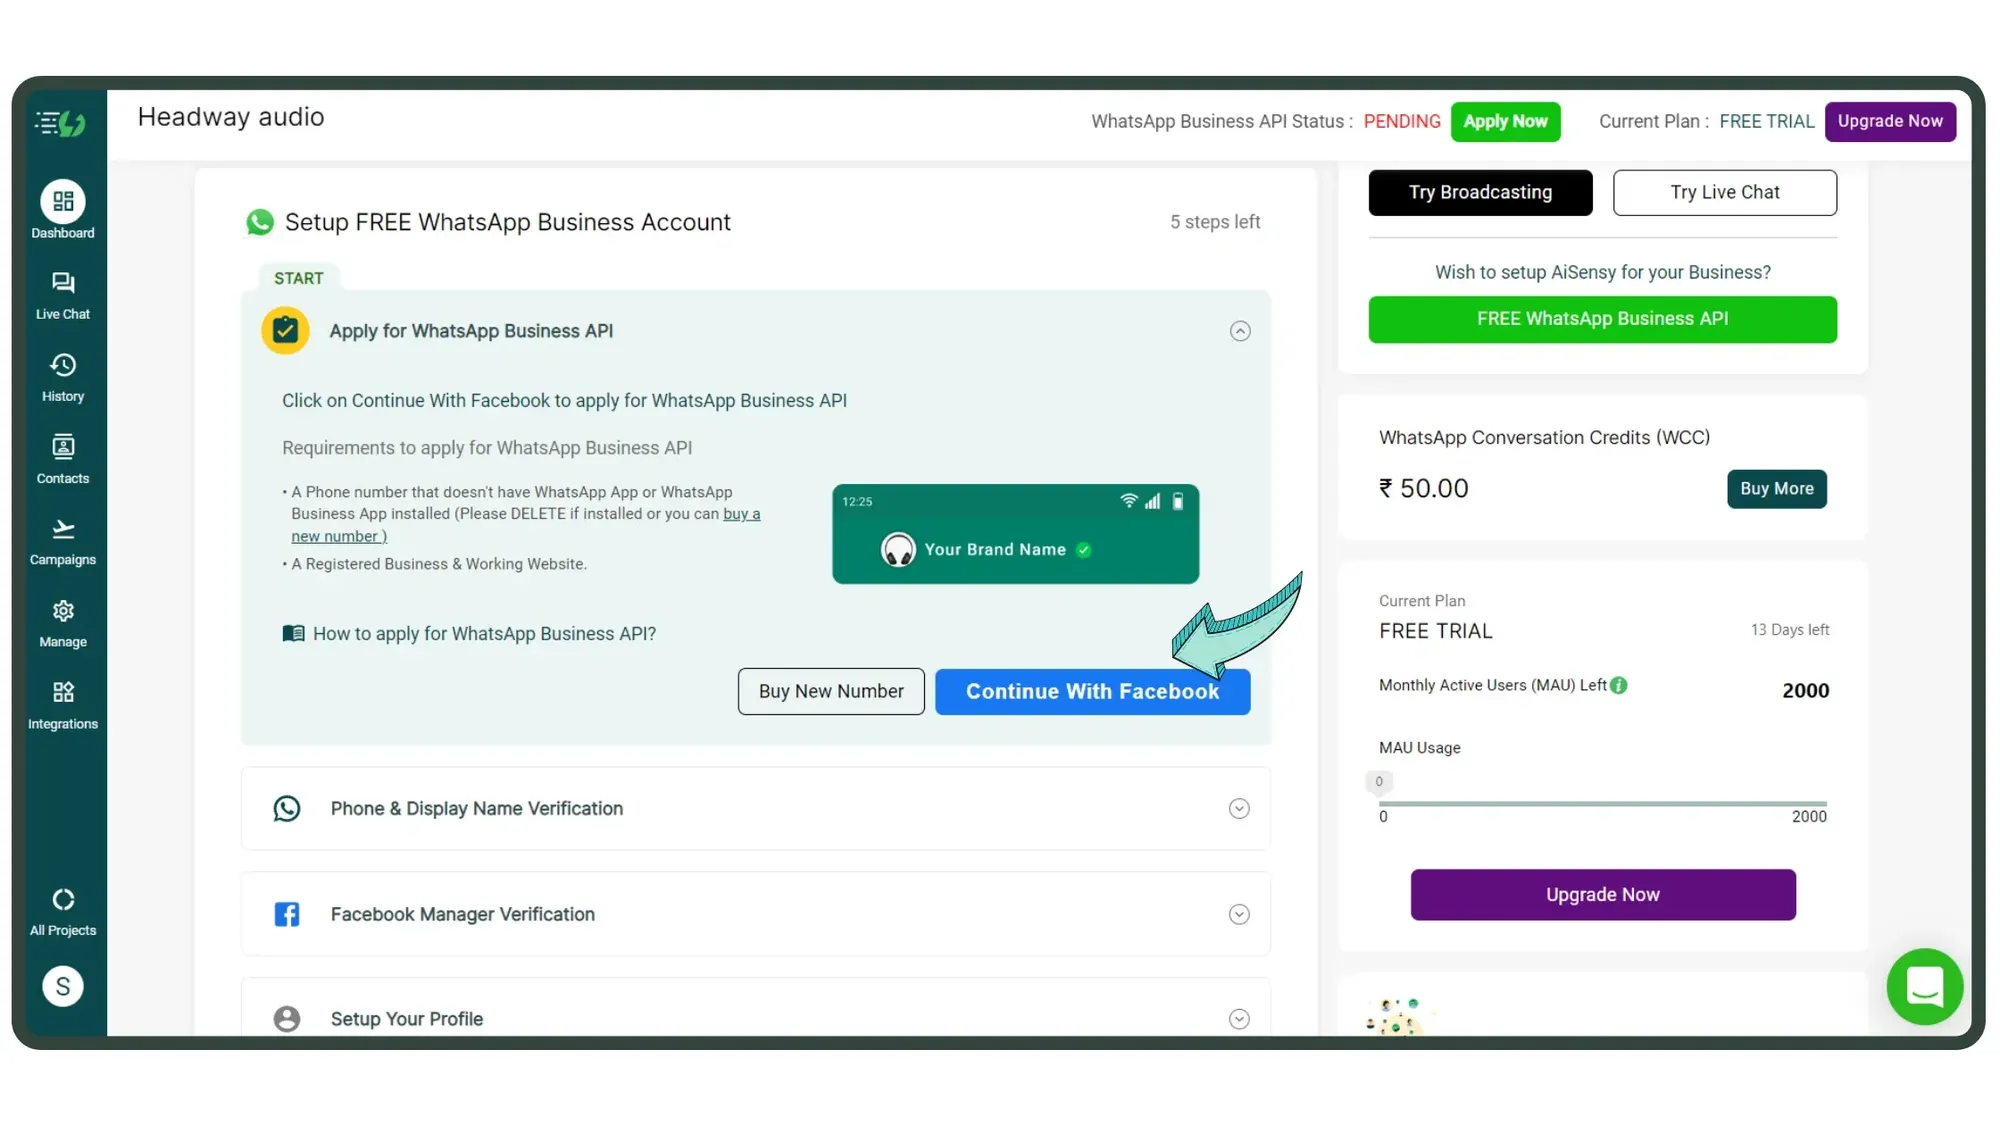
Click 'Continue with Facebook' to apply for FREE WhatsApp Business API
• Click on the “Continue with Facebook” button to start the application process of WhatsApp Business API procurement.• Make sure you have admin access of the Facebook Business Manager account to continue with the application. *Note - Make sure to get your Facebook Business Manager Account verified to get complete access to WhatsApp Business API.You can get it verified simultaneously while applying for WhatsApp Business API or even after procuring the WhatsApp Business API.
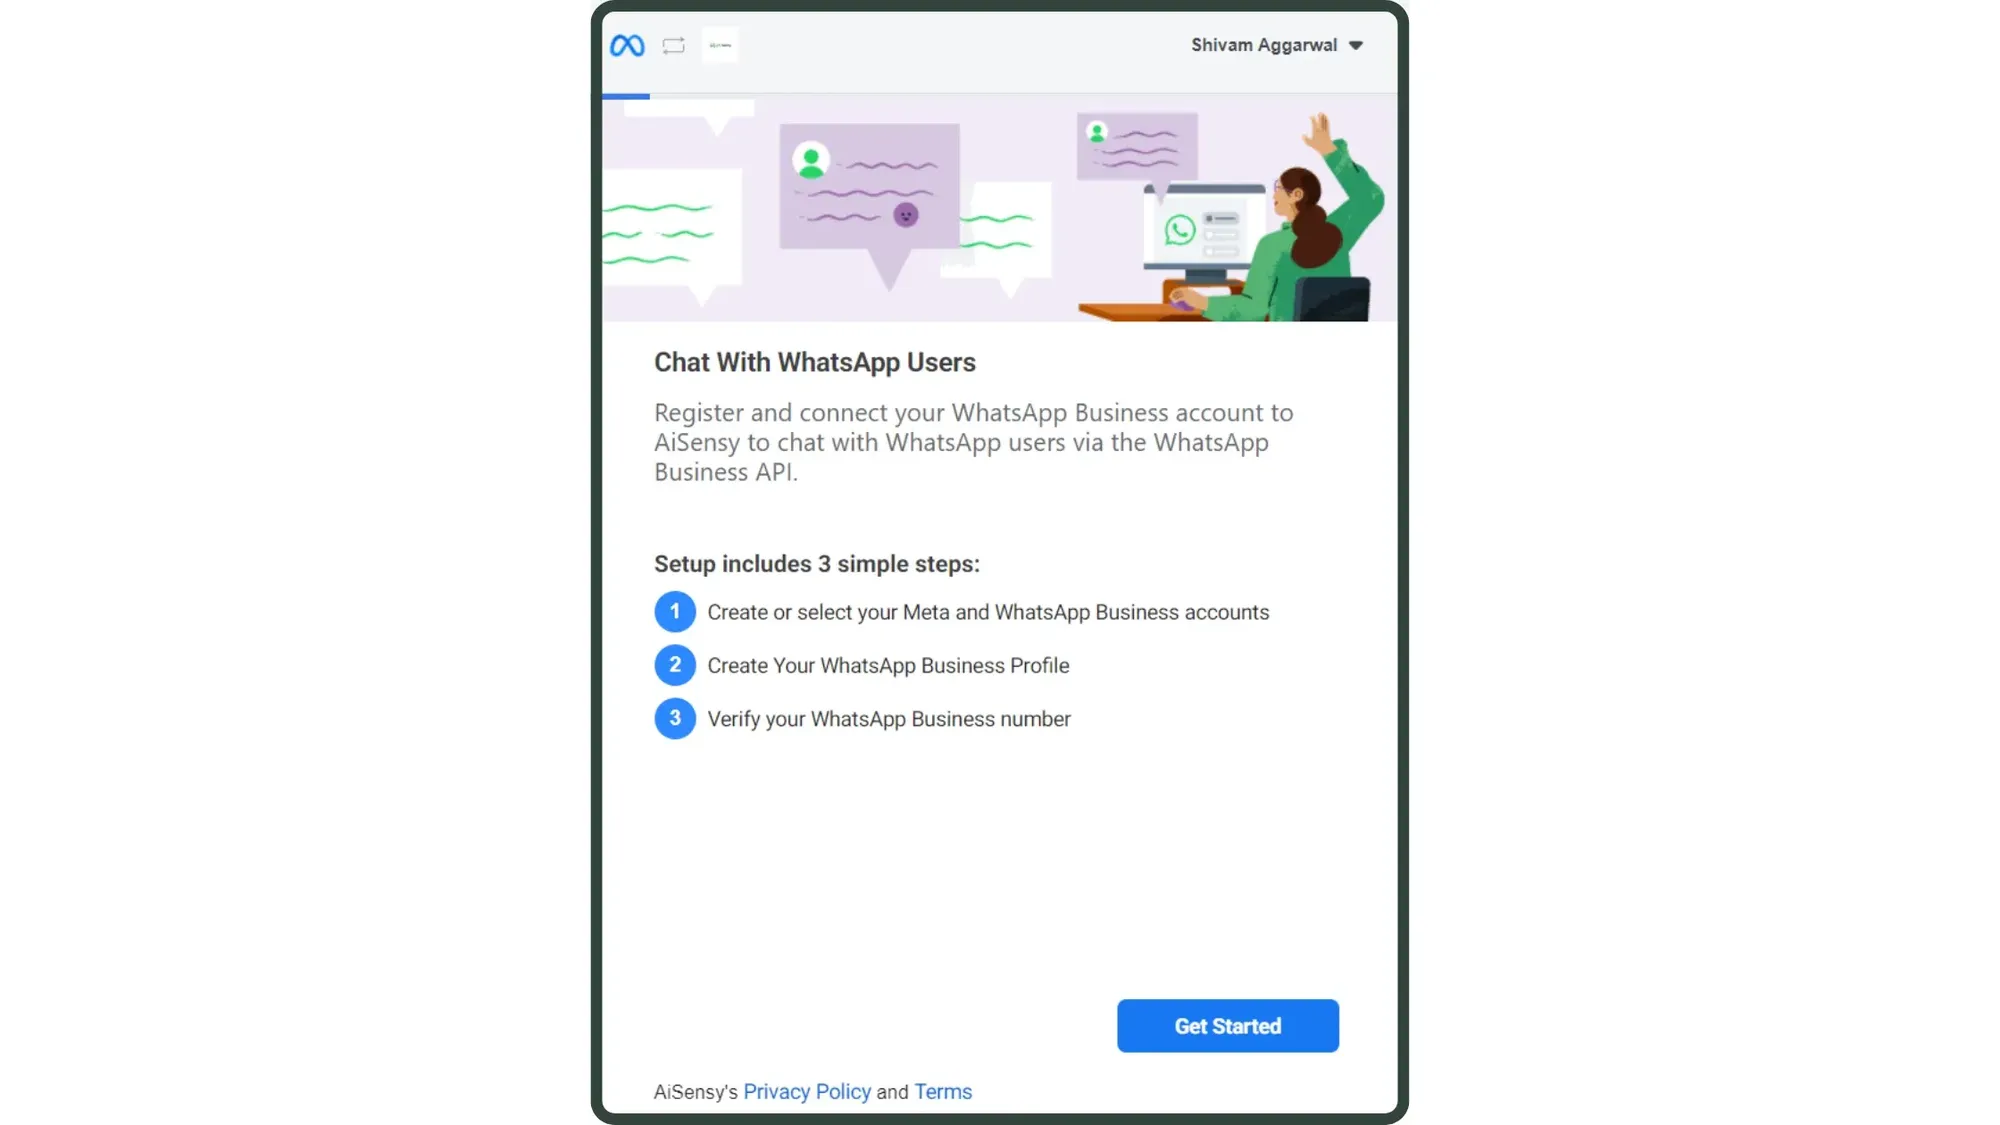
Click 'Get started'
Clicking the button will redirect you to the Meta window where you can apply for WhatsApp Business API. Click on the 'Get started' button to start filling out the WhatsApp Business API procurement application.
Connect your Facebook account with Messegy
On the next screen, read the permissions shared & click 'Continue' to connect your Facebook account with Messegy.
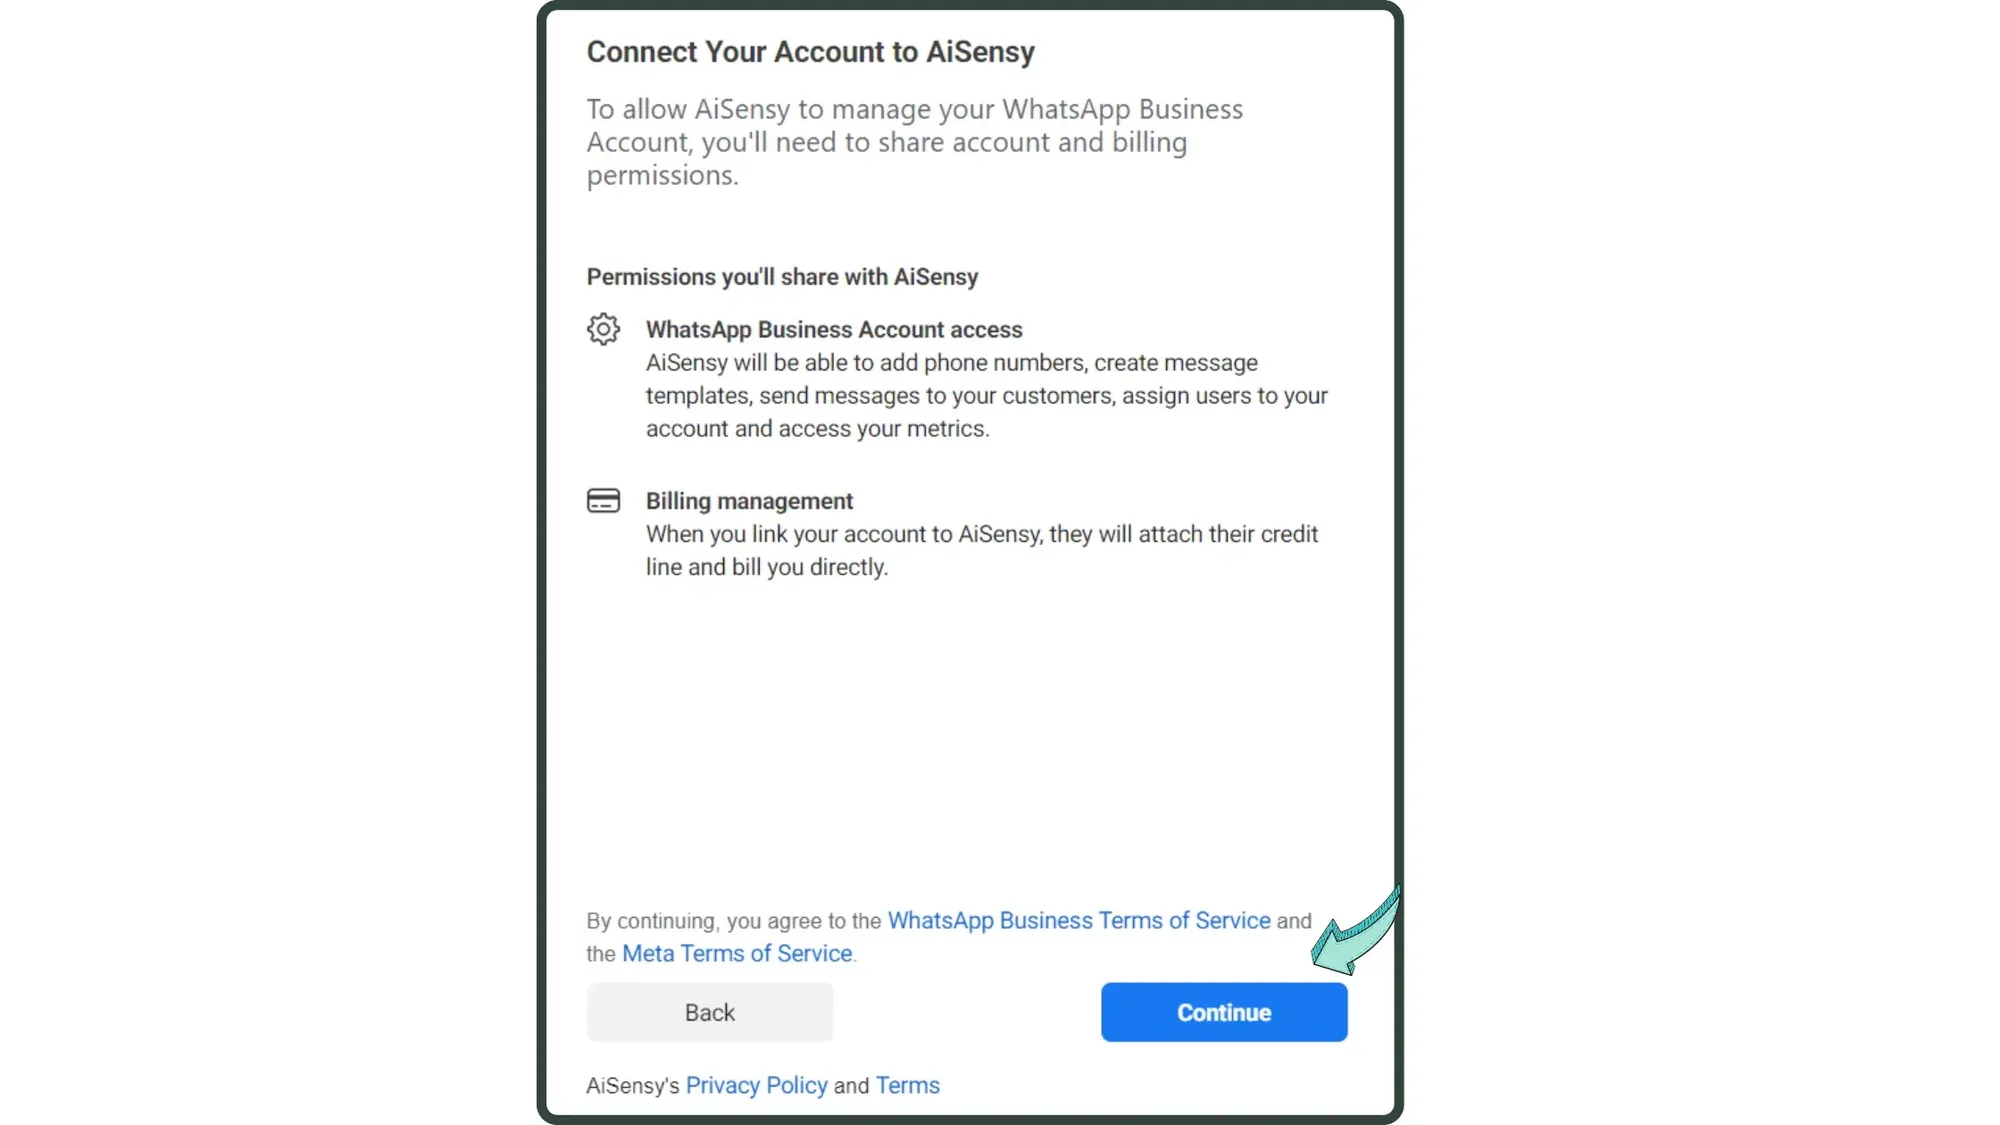
Select your Facebook Business Account
Next, select your Facebook Business Account which you wish to be associated with your WhatsApp Business API Account. Reminding you again to verify this Facebook Business Account to enjoy complete access to WhatsApp Business API.After selecting the one, click 'Continue'.
How to verify Facebook Business Manager Account
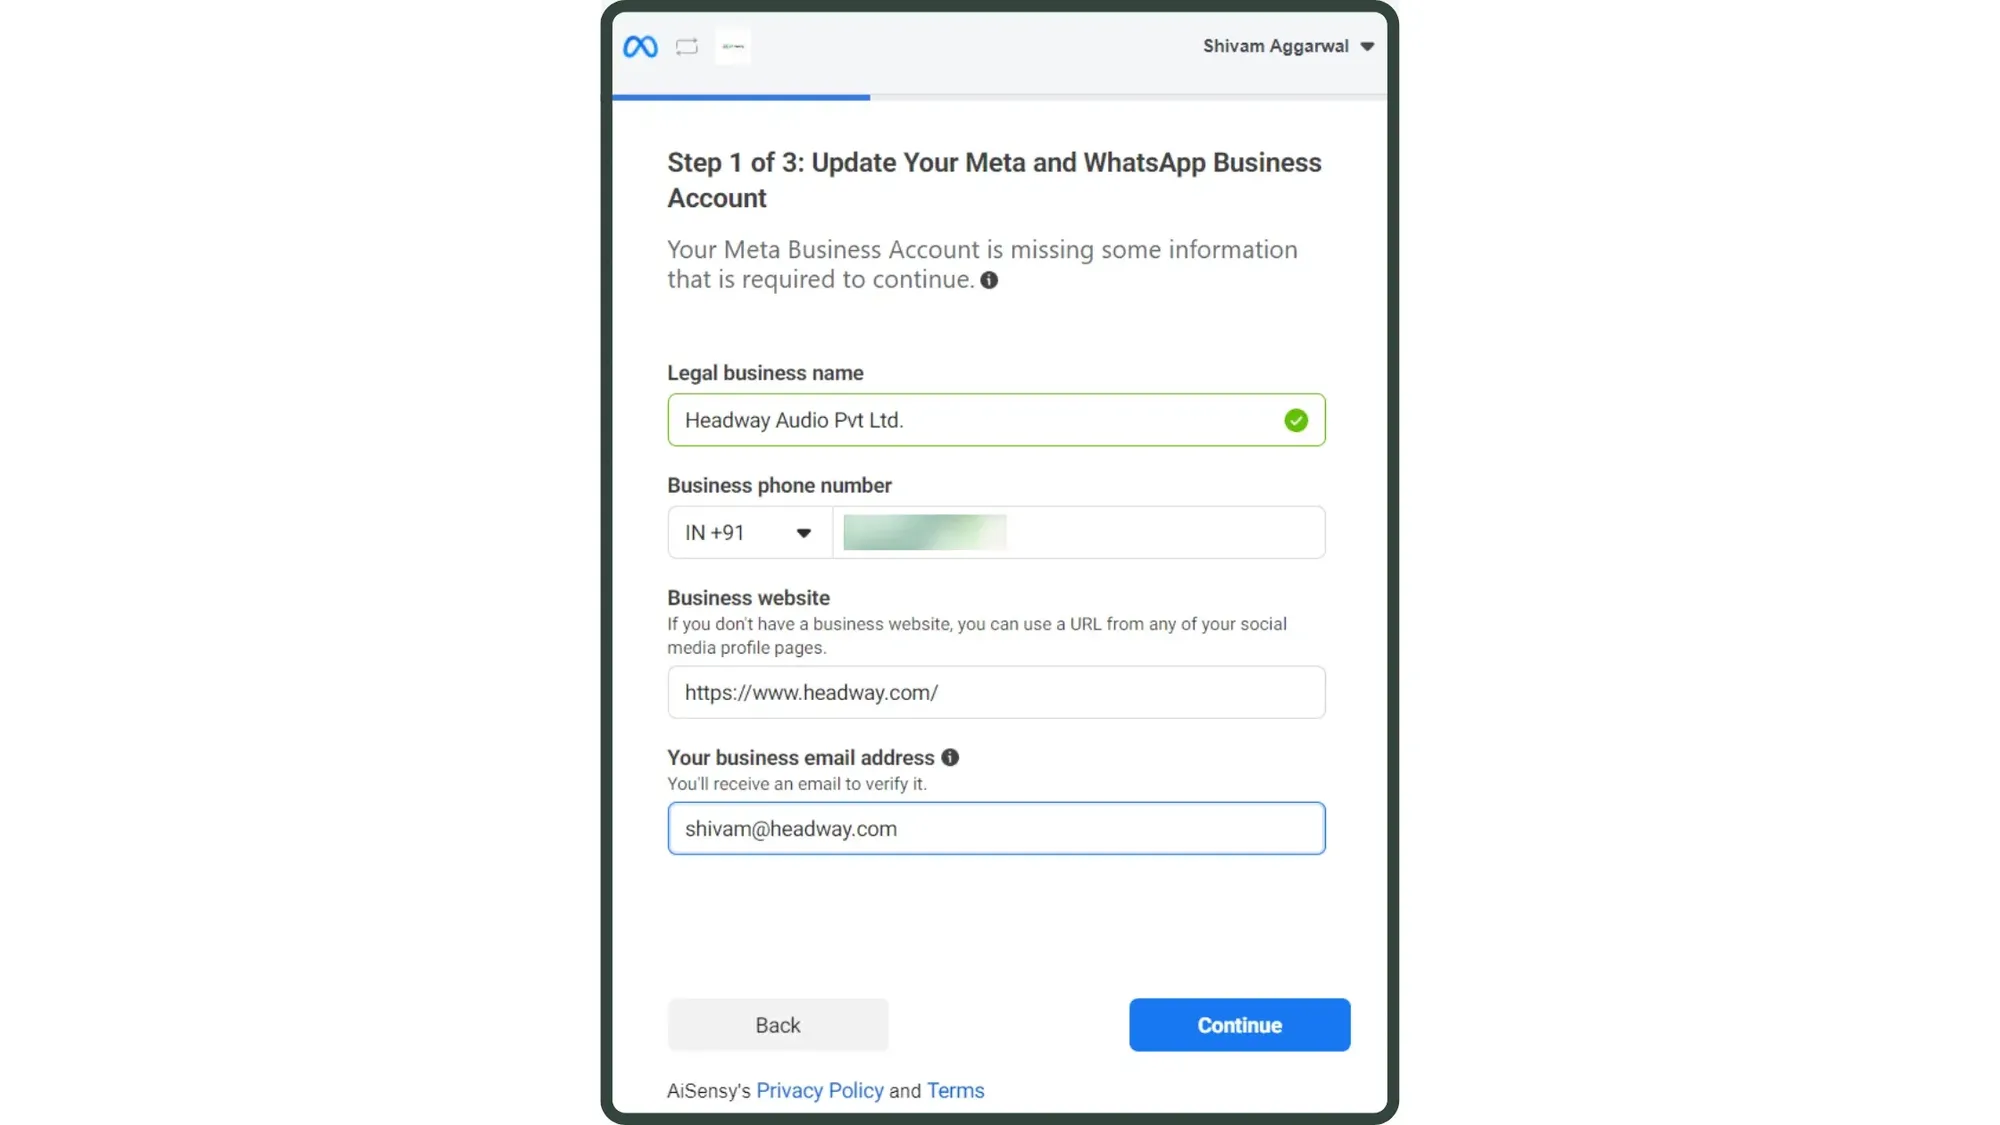
Fill in Legal Business Details
Fill out the WhatsApp Business API Account form carefully 👇• Your Legal Company Name• Business Phone number - This can be different from the phone number on which you need to get WhatsApp Business API.• Business website.• Business email.Press 'Continue' to proceed.*Note - This window might not appear for a few accounts. If it doesn't, there's no need to worry! This won't have any effect on you getting approved for WhatsApp Business API.
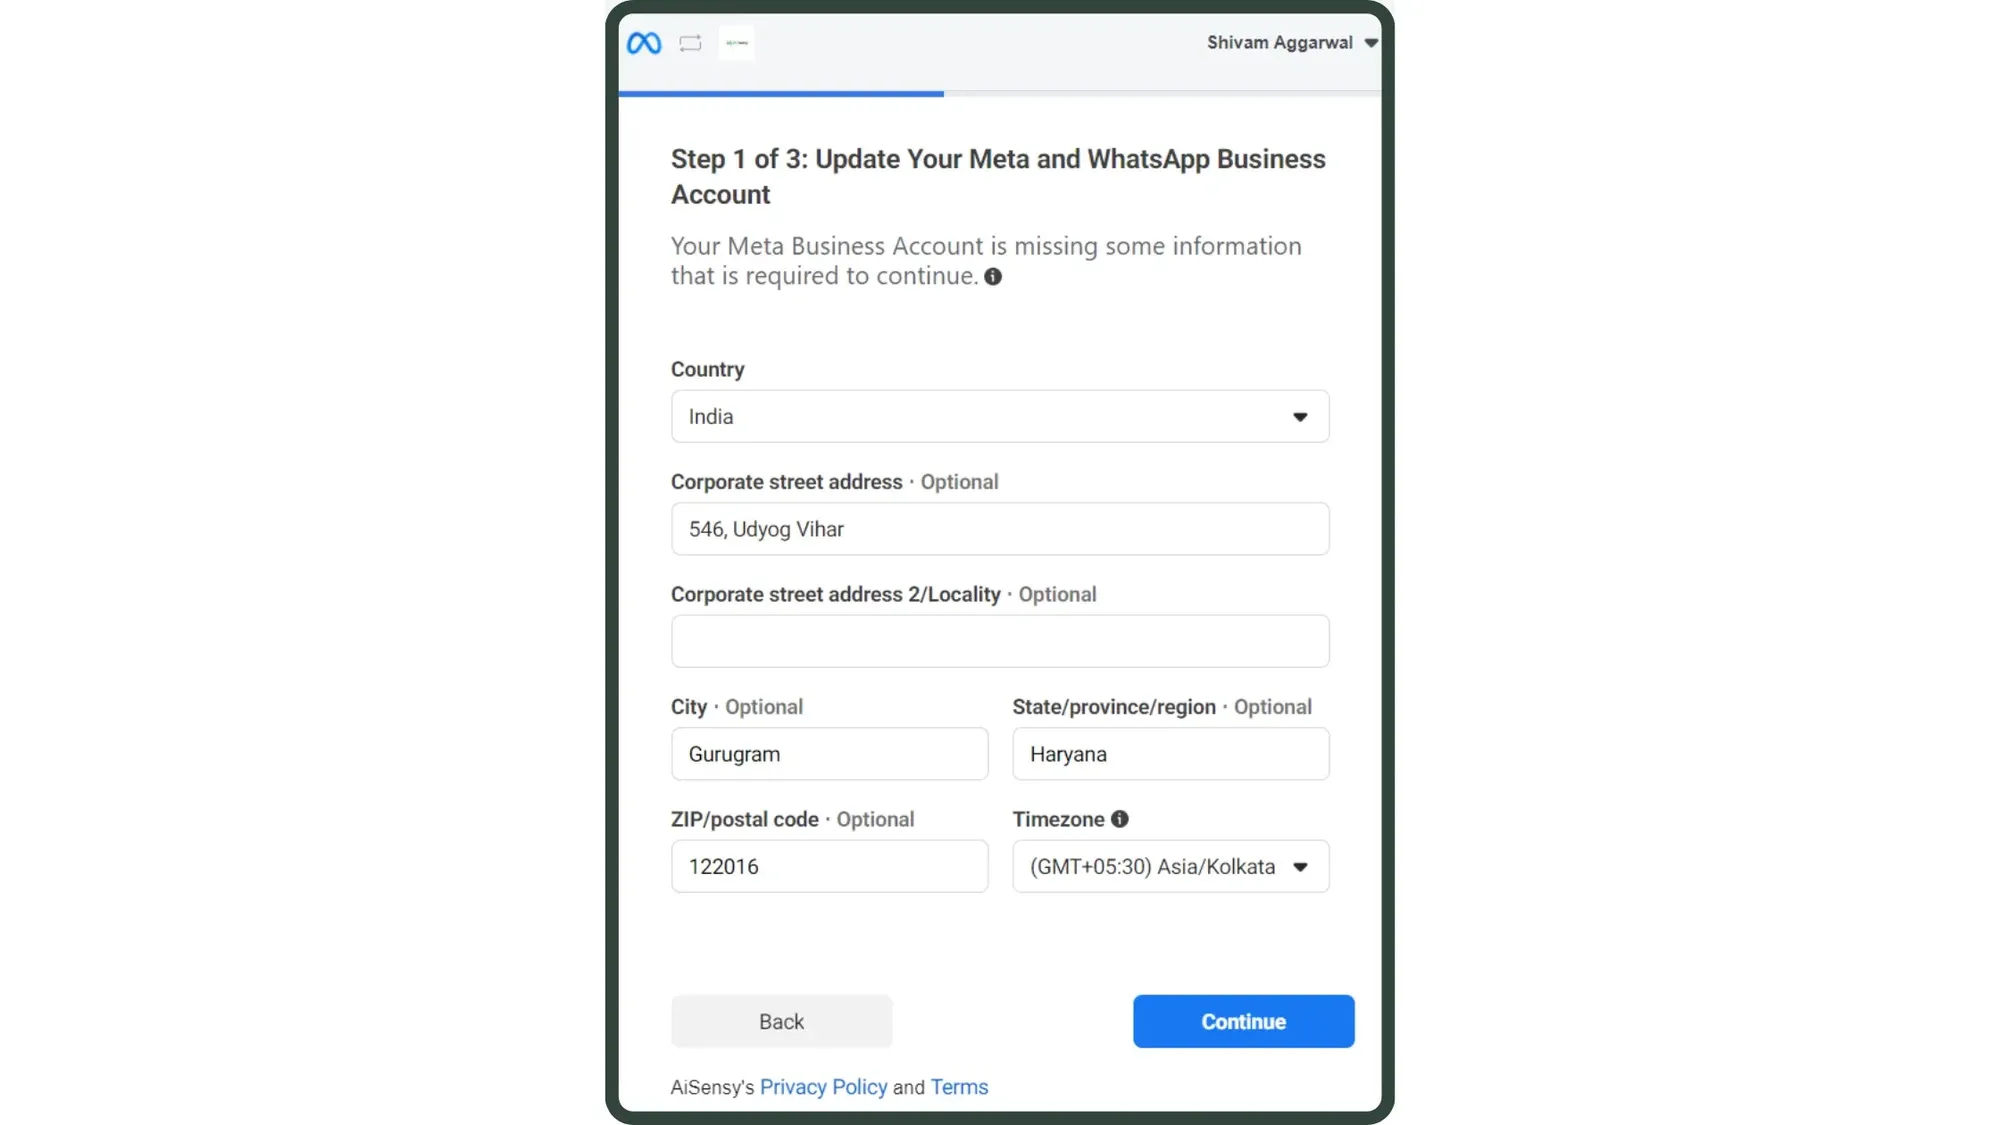
Add your Business address details
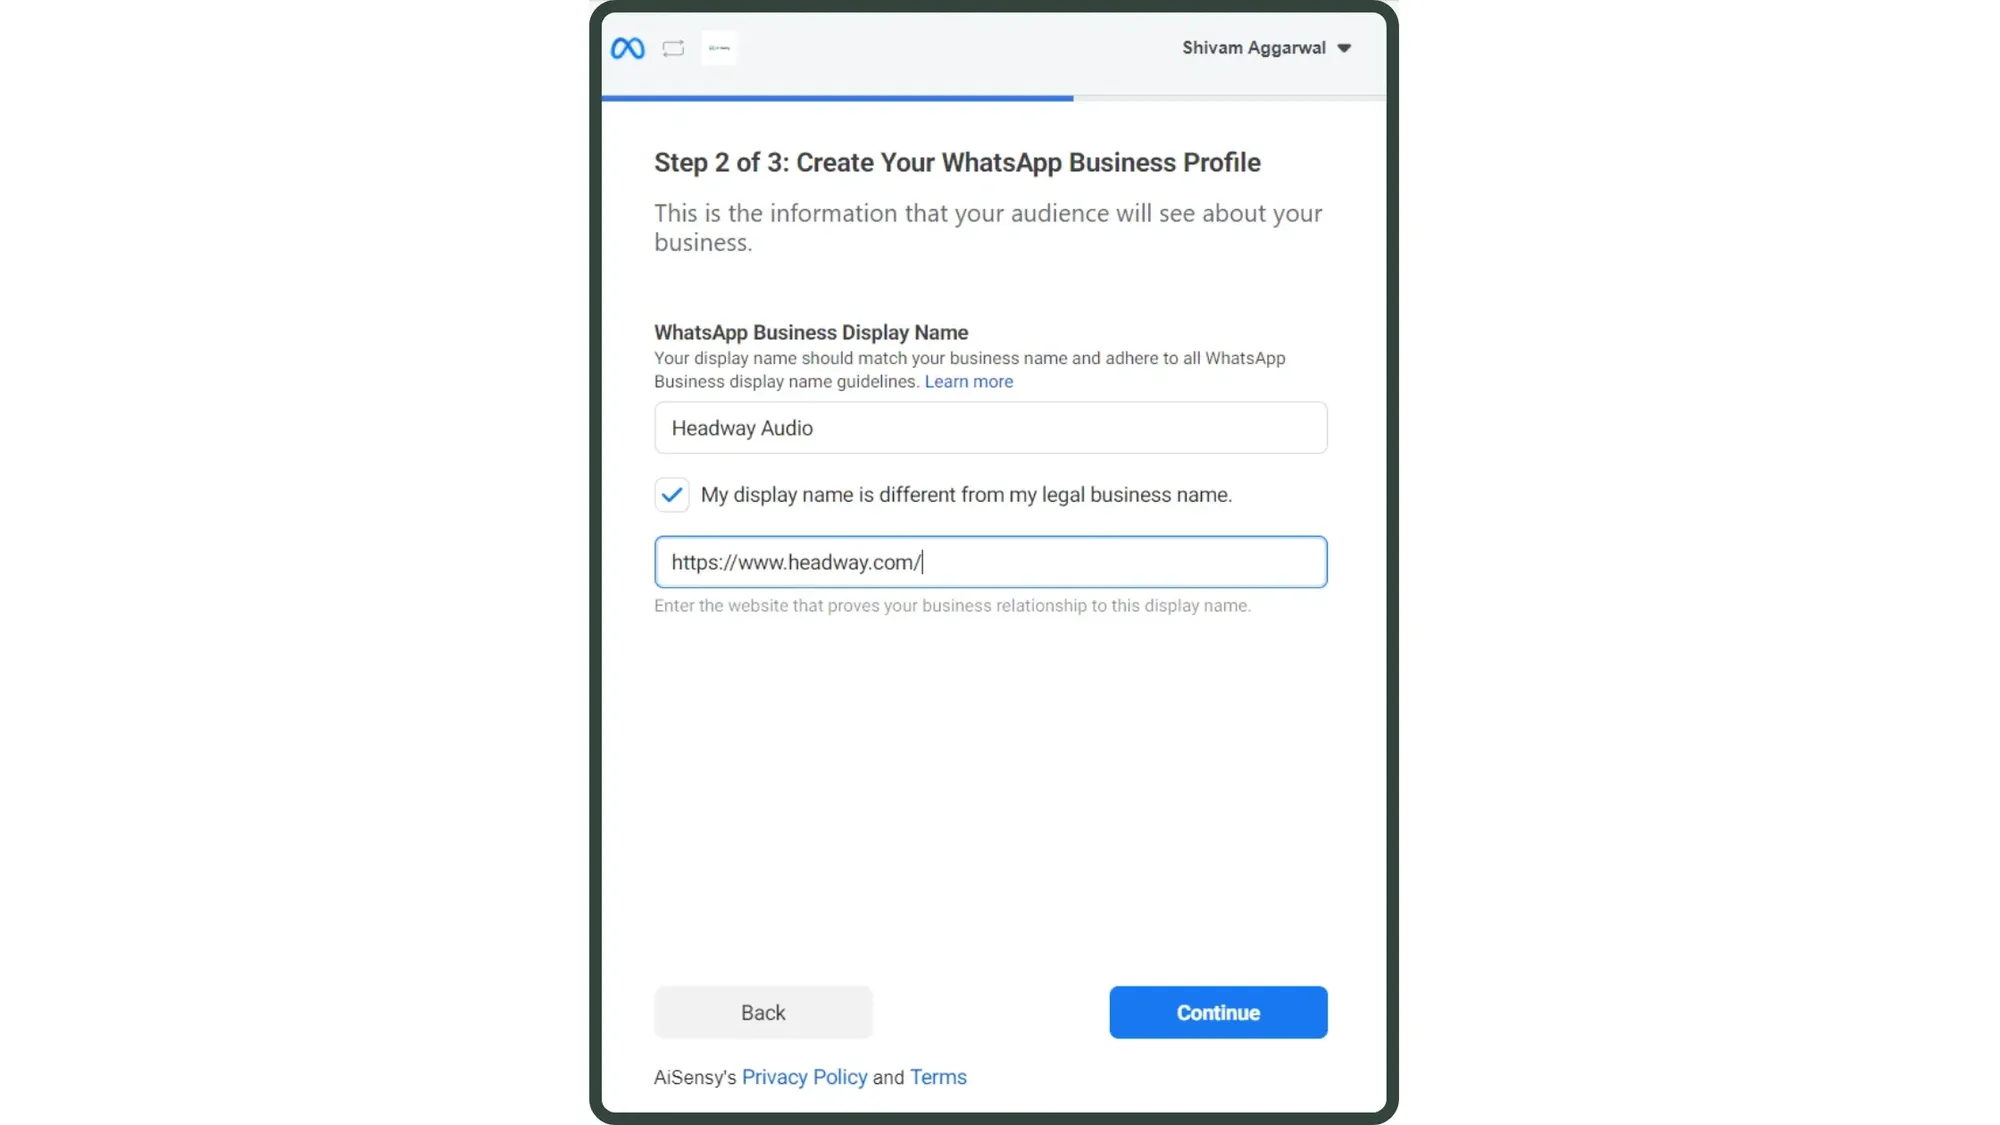
In Embedded Signup, add:• Business Display Name- This is the name that will be visible to your users. If your Display Name is different from the Legal Name of the company, you can provide a relevant business website to proceed ahead.Click here to understand how to pick your WhatsApp Business Display Name.• Your Business Category- Add the category which perfectly defines your Business.•Business Description- Add a suitable description that will be visible to customers when they click your profile button. Complete the number RegistrationComplete the Phone Number registration by submitting the Phone Number and triggering the 6-digit code via SMS or Voice. Make sure the number is not registered on any WhatsApp Accounts.
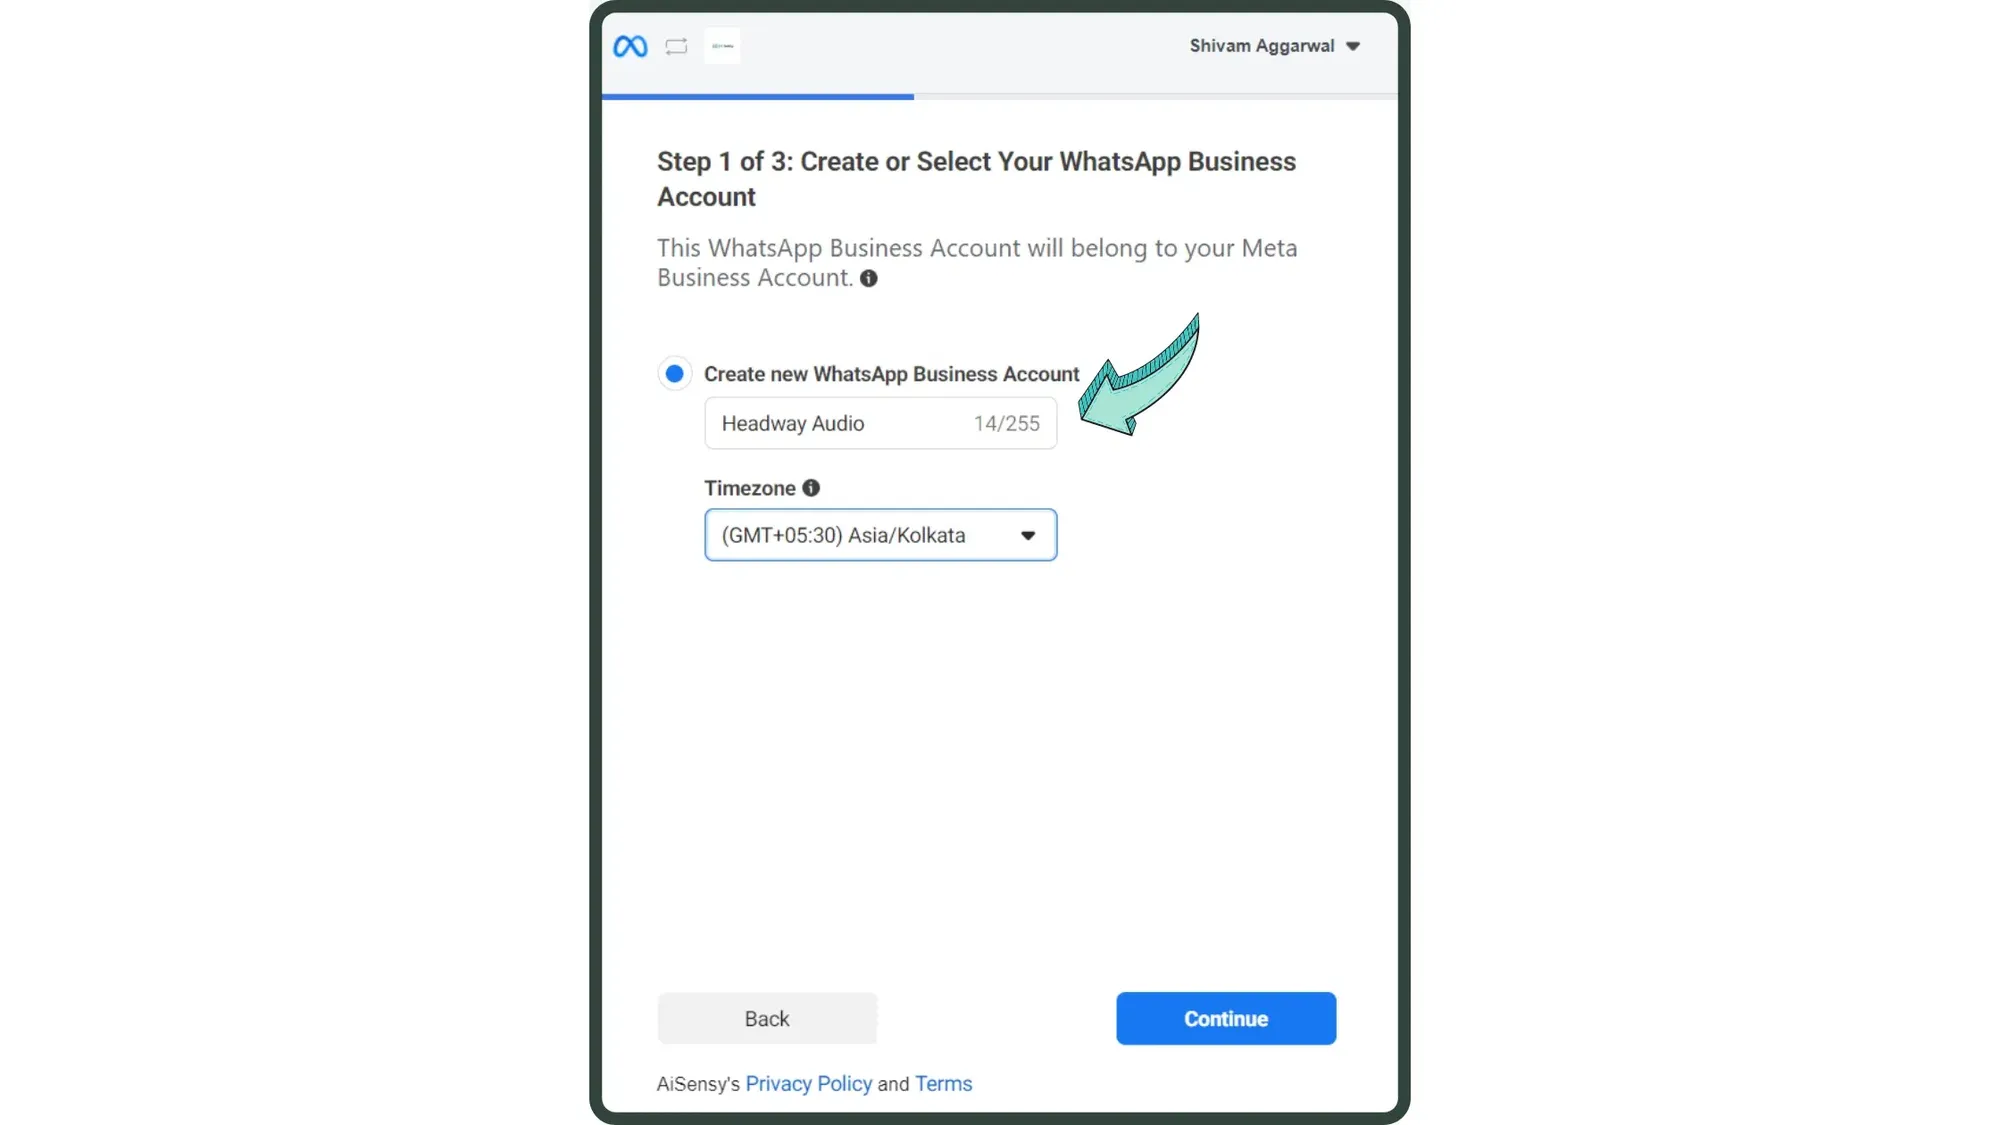
Create / Select your WhatsApp Business Account
In the next step, you'll need to create a new WhatsApp Business Account or set up an existing business account.*Note - This is not the Display Name you need for your WhatsApp Business API that will be visible to the end users. This is just the name of your WhatsApp Business Account created inside the FB Business Manager.To create a new Business account, add your Business name & Timezone and press 'Continue'.
Create a WhatsApp Business Profile
WhatsApp Display name is the name that will be visible to your users.If your Display Name is different from the Legal Name of the company, you can provide a relevant business website to proceed ahead and establish the relationship between both.There are specific rules you must follow to create this Display Name which you can view in this WhatsApp Display Name Guide.
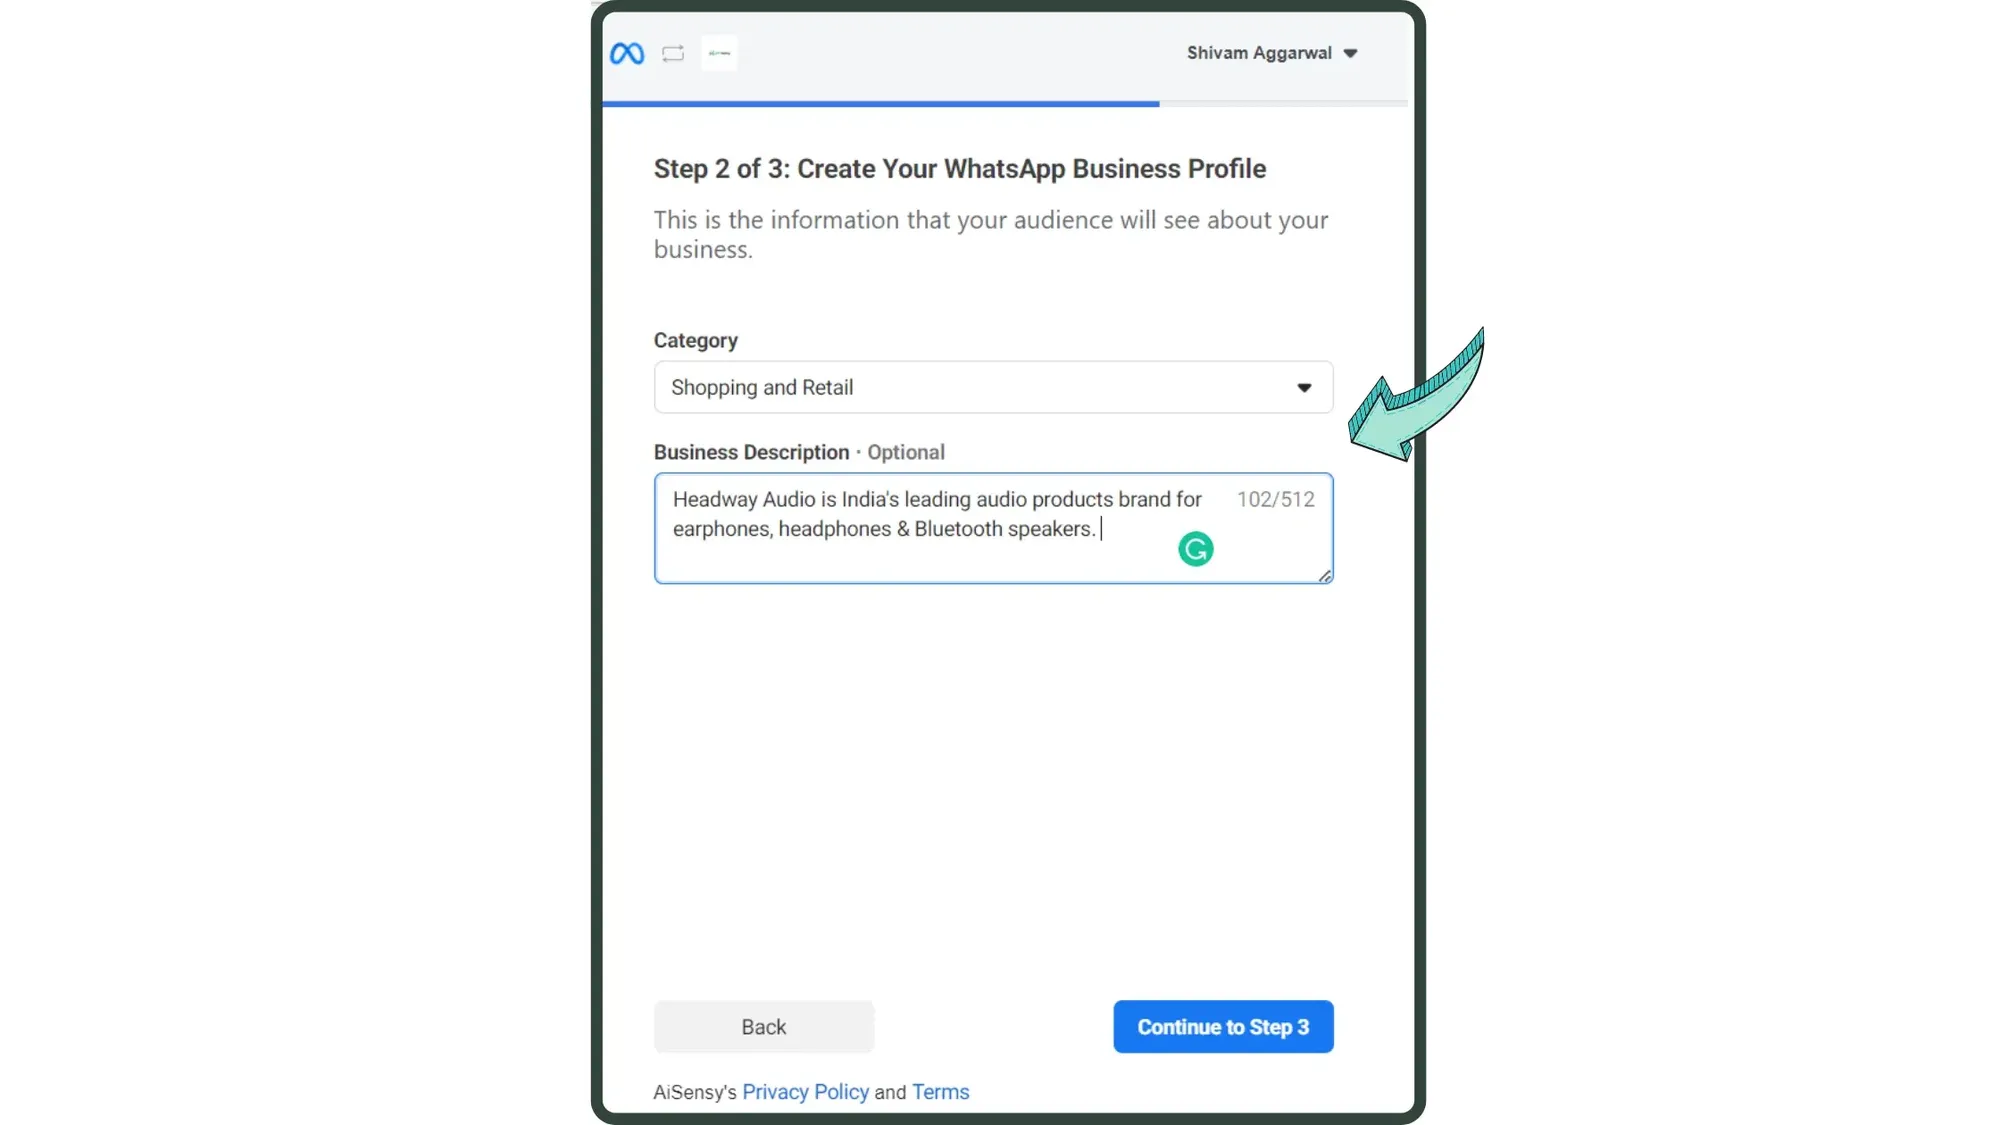
Choose the Category & add the Business Description
Pick the category most relevant for your business & add a suitable description (optional) that will be visible to customers when they click your profile button.The description can be added/changed anytime in future as well. Once you do this, continue to the final step of your WhatsApp Business API application.
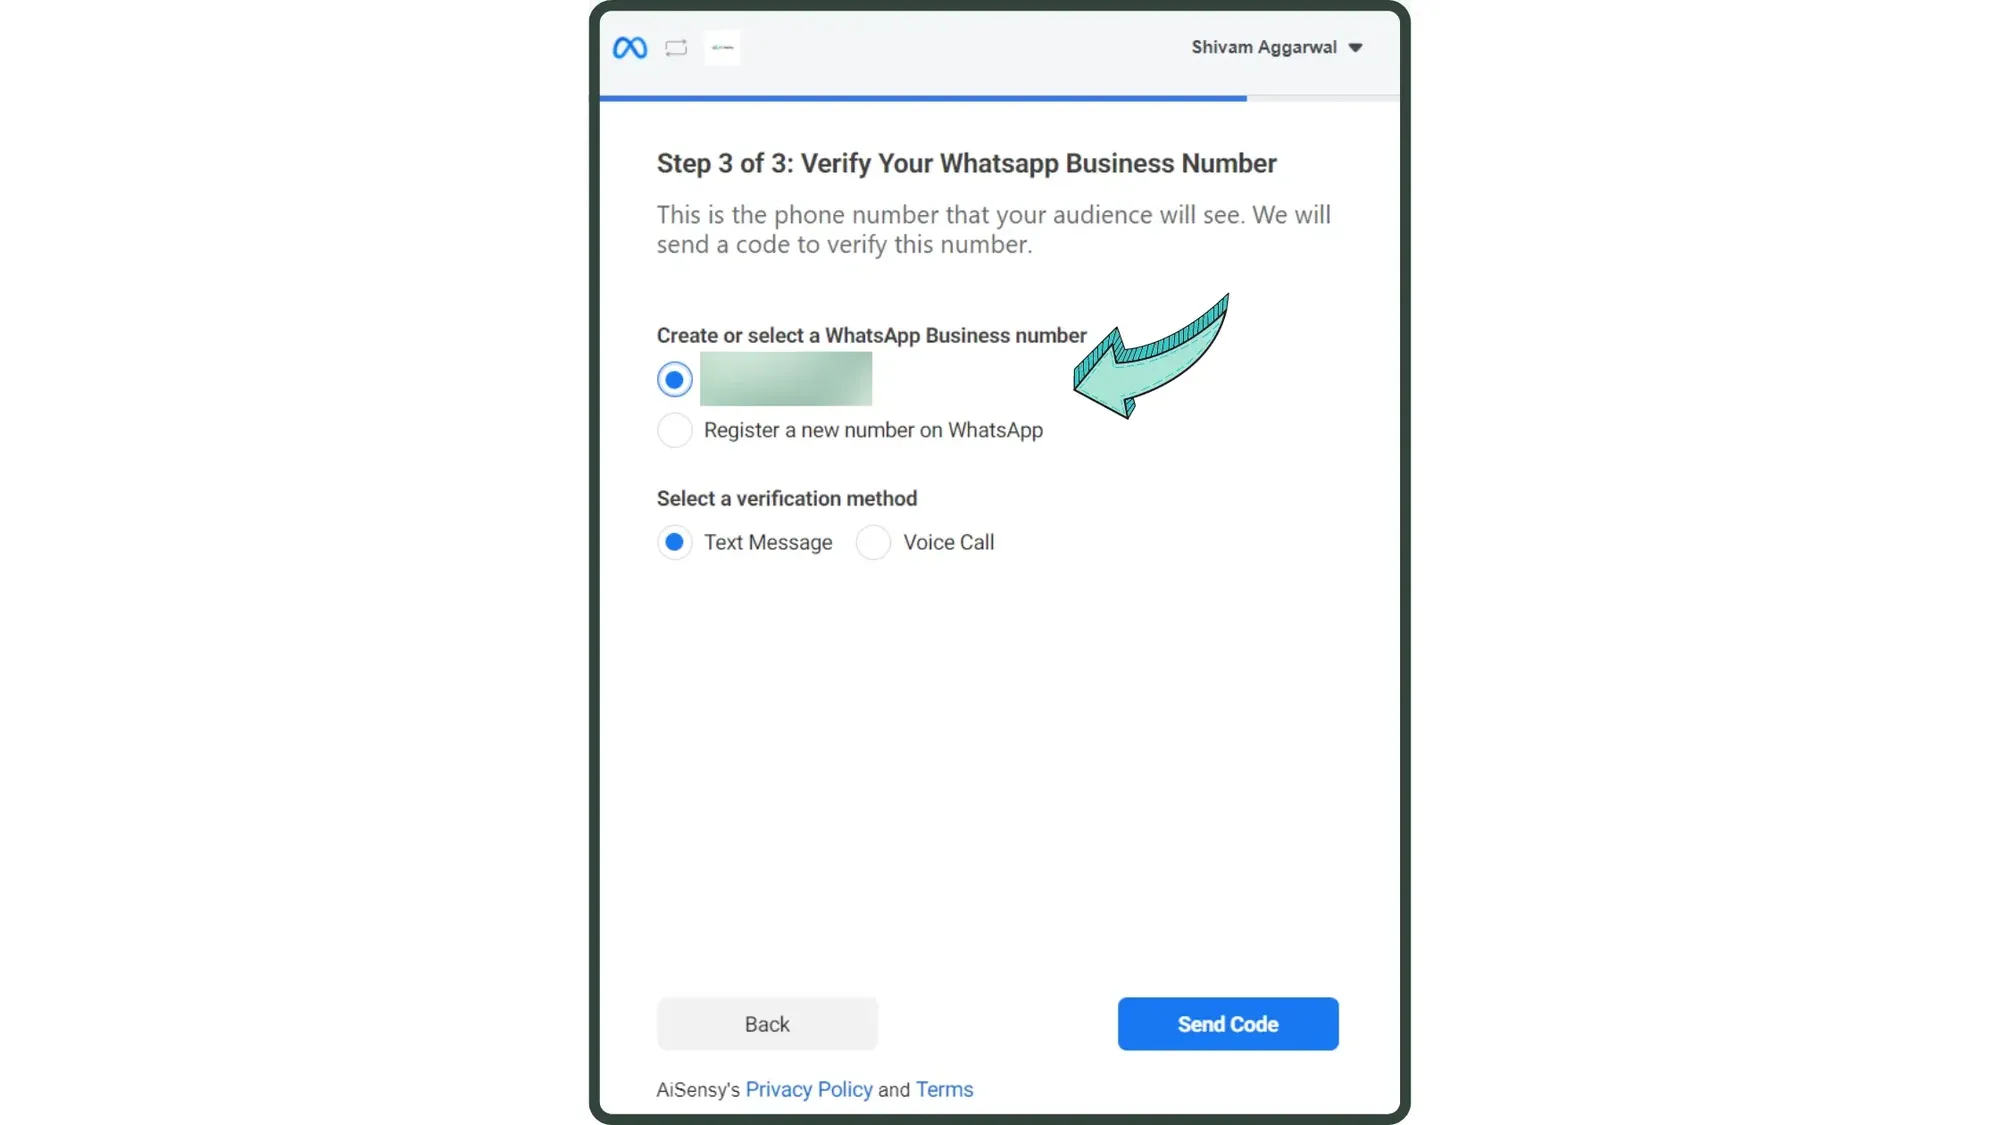
Verify your WhatsApp Business Number
Last, you need to enter the Phone Number on which you need to get the WhatsApp Business API. Make sure the number is connected and able to receive code via SMS or Voice for verification.After adding your number, press 'Send Code'. Finally, add the code you receive & press 'Submit'.
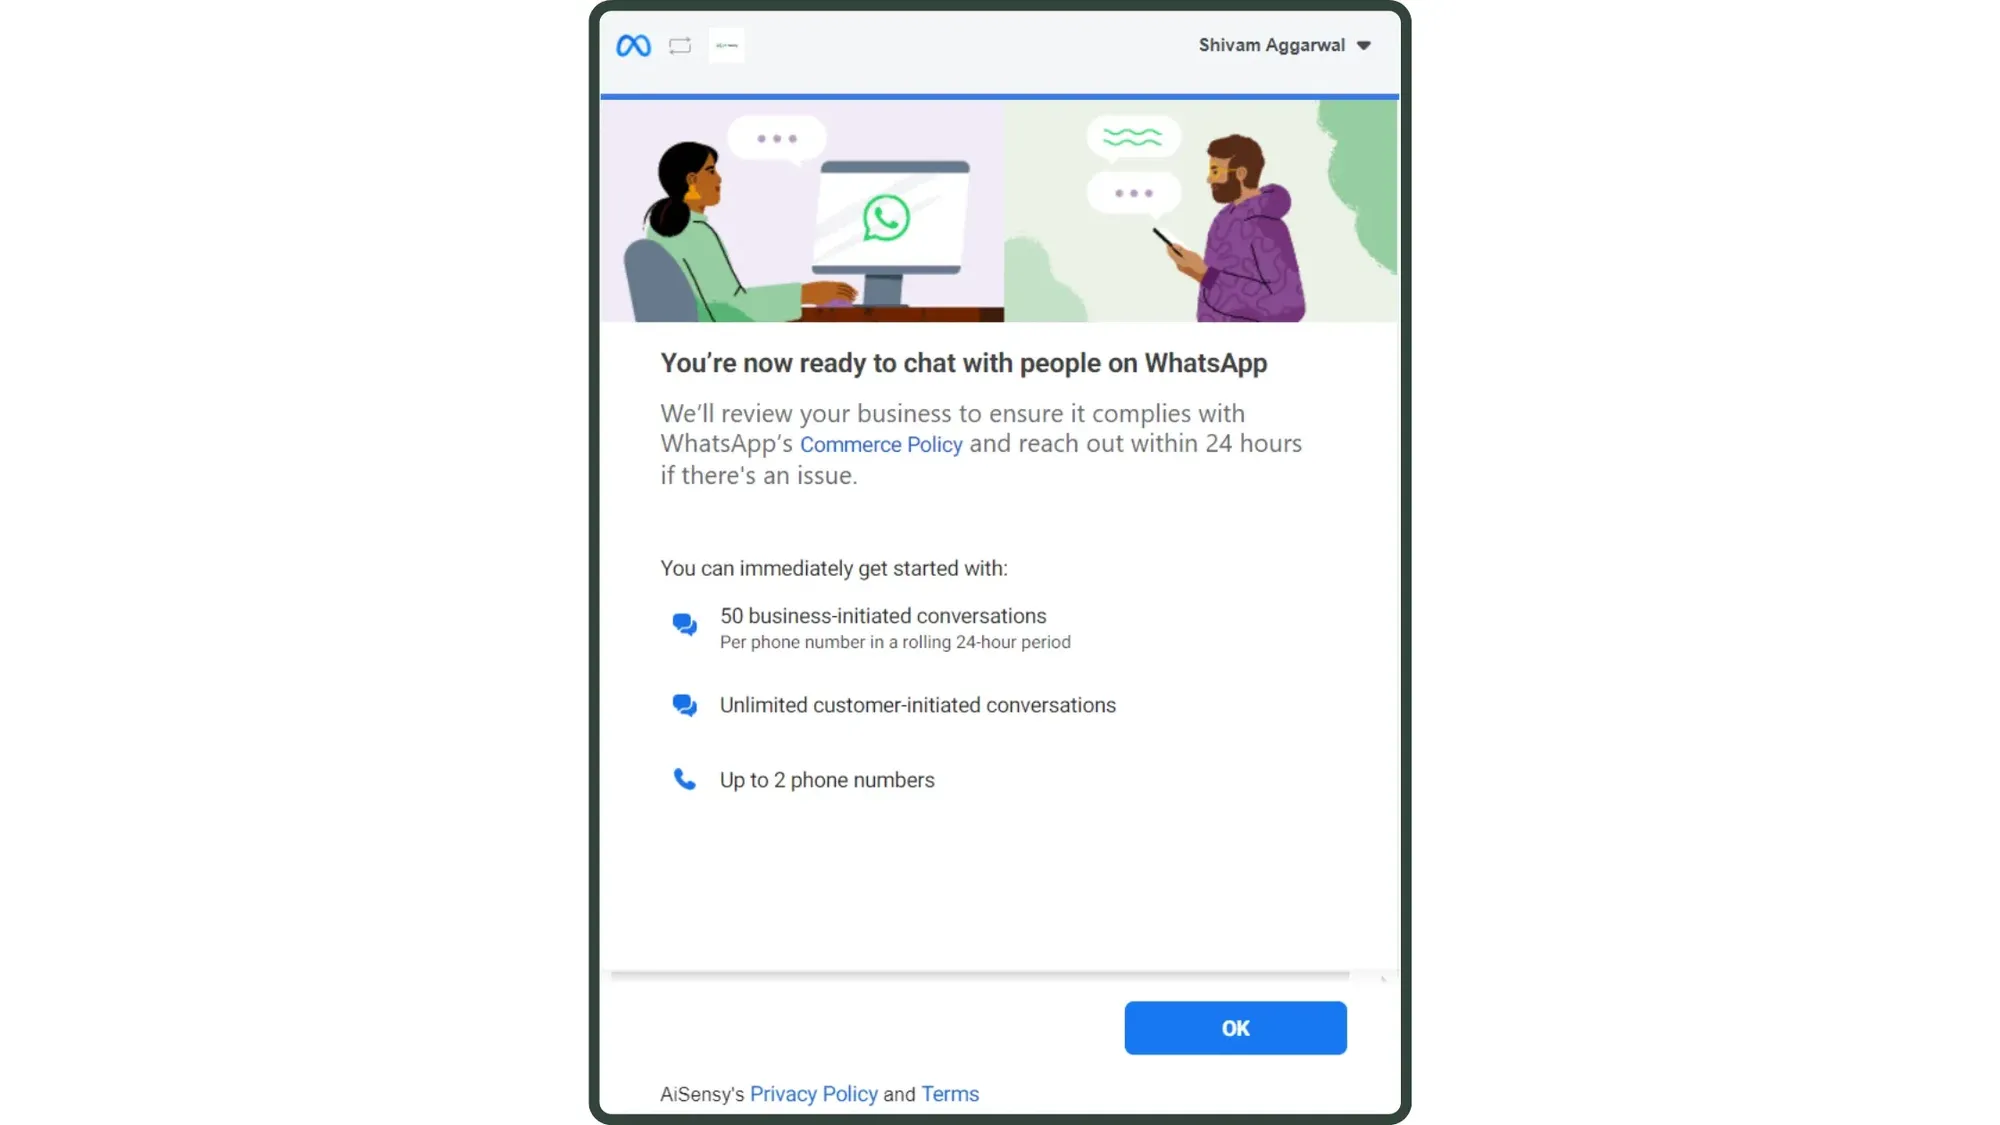
Your WhatsApp Business API Application is now under review
Congratulations! 🎉🎉If you see the above screen, you've successfully applied for WhatsApp Business API. You're one step closer to growing your business with Messegy. The majority of reviews are completed instantly (with 10 minutes) - only the Display Name can take max. 3-4 hours to get approved.
Hurray! Your WhatsApp Business API is live
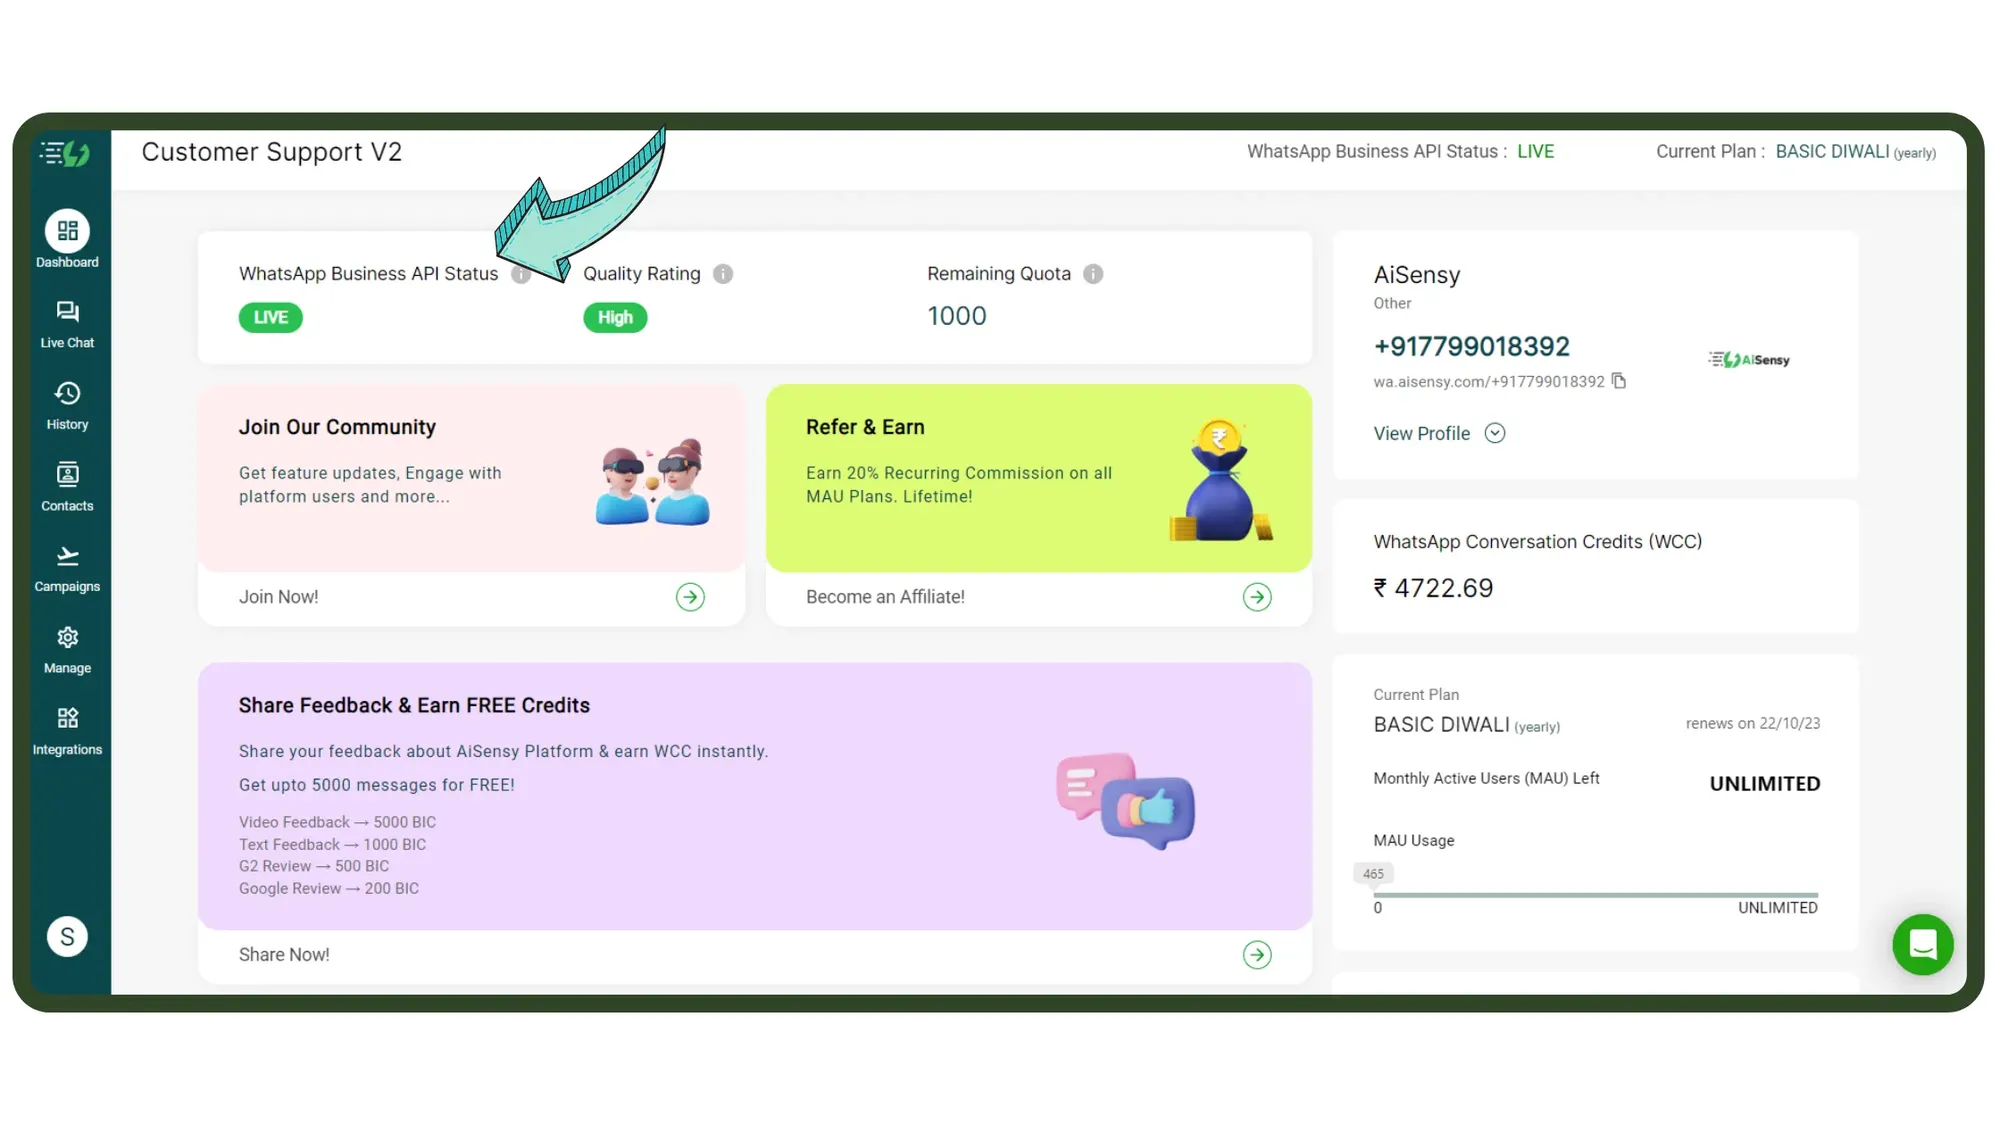
The change will show in Messegy Platform where the status of WhatsApp Business API will now show LIVE. Well, that's the complete process you need to follow to apply for WhatsApp Business API. Let us know if this tutorial helped you by choosing one of the feedback options below.
What is WhatsApp Cloud API?
WhatsApp Cloud API is the cloud version of WhatsApp Business API provided directly by Meta, allowing businesses & developers to build on top of WhatsApp to customize their experiences and respond to customers quickly & easily.
What is the difference between WhatsApp Business API & WhatsApp Cloud API?
- Quick Access - For WhatsApp Cloud API, Facebook provides direct access to the Cloud API in minutes. In WhatsApp Business API, it's the BSPs (Business Service Providers) who act as intermediaries to get businesses approved for WhatsApp Business API.2. No hosting charges - In WhatsApp Business API, BSPs undertake the hosting charges for WhatsApp Business API. For WhatsApp Cloud API, Facebook bears all charges for hosting & providing access. 3. Direct approval from Facebook - Facebook provides direct approval for WhatsApp Cloud API. For WhatsApp Business API, BSPs provide access by becoming the intermediaries. 4. No maintenance & upgrade costs - Facebook bears the maintenance costs for WhatsApp Cloud API while for WhatsApp Business API, BSPs roll out manual updates.
Which one is better: on-premise or WhatsApp Cloud API?
WhatsApp Business API is a better choice than Cloud API because you get complete support from WhatsApp partners for onboarding, and queries as well as a platform to use the WhatsApp API. Meta merely provides access to the Cloud API. They don't provide a platform to use the APIs & the support is provided only via emails.
Get FREE WhatsApp Business API in 10 Minutes
Messegy Platform is powered by Official Whatsapp Business APIs and is in alignment with all Whatsapp Rules.• Get Verified Badge on your Whatsapp• Broadcast messages to UNLIMITED users• Automate Notifications • 24x7 Chat Support
Book a DemoStart for FREE